She also sponged the basket embossing folder which makes the weave stand out.
This next card uses the spotlight technique.
1. Stamp the full image on a piece of white card stock.
2. Punch out whatever part of the stamped image you want to highlight with the smallest punch you can use.
3. Color in the punched out image.
4. Mount it on a slightly larger punched shape.
5. Attach it to the original stamped shape and now you have a highlight.
When I sponged the embossed image, I used the back side of the paper. It amazed me how the sponging brought out the weave. Before I sponged it did not look so good. Hurrah for sponging.
This did not photo as good as I thought.
1. I embossed the copper foil paper and sponged on it lightly with black ink.
2. I cut out one of the flowers from the Springtime Foils paper and attached it to the embossed piece.
3. The background it black and really looks striking.
The color contrast looks better here, but doesn't look copper. I am considering taking a photography class. I need it!
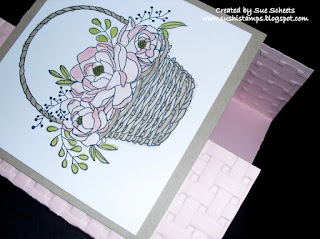
Susan made this card for our swap. I love how she got each side of the fold embossed. I did not ask how she did it. But it looks awesome. She colored her flower with the blends. I love how she used two colors on the basket.
I wanted to show how the card opens. I need to try this fun fold.
I embossed the basket weave and sponged it and then cut it out with the small part of the Coffee Cafe Framelit. For the handle I cut two ovals together.
Where did I get this bunny? I cut the animals apart from the We must celebrate stamp set. The clouds came from the Myths and Magic designer paper. And the eggs, are ovals cut from the Sweet Soiree designer paper. Fun card to make1
This card will be featured in my Fun Friday, Playing with embossing folders class to be held on March 16th. Check out my facebook page, or my website for more details.
Tomorrow I will be featuring cards made with the Epic Celebrations stamp set. One of them will be a card for my grandson Naij.
Product List


No comments:
Post a Comment