Showing posts with label My Paper Pumpkin. Show all posts

Monday, July 17, 2017

Scrapbook Week-From a Paper Pumpkin kit

  Once a month I have a scrapbook class I call Scrapbook Your Life.  Each scrapbooker makes 2 two-page spreads. If they bring their pages back the next month with pictures on them, I give them a little something extra.

The layout was inspired by the May Paper Pumpkin Kit.  I traced the donut shape on the card and made stencils for the stampers to trace around.

Here's how I made the chocolate donut.

1. Trace around the stencil onto Early Espresso card stock.
2. Press a VersaMark pad all over the card stock.
3. Emboss with clear embossing powder to give the donut a shiny look.
 I called this my chocolate glazed donut.

I used the now retired sprinkles punch to make the swirls on the confetti donut.

The white frosting on the lower donut was made similar to the chocolate donut except I used white embossing powder on the VersaMark.  

This layout just happened to be created right before National Donut Day.  What a coincidence.

Scrapbooking is a great way to use up small pieces of designer paper.  The next two layouts I will show tomorrow did just that.

Friday, October 7, 2016

Halloween Fun-Test Tube treat holder

  It was so much fun to open the September Paper Pumpkin kit and see the test tubes...16 of them.  And then to try and think of many different ways the tubes can be used.  One was to put some Halloween candy in the tube.  Then I found a video by Dawn Griffin that showed how to make this cute and easy treat holder.  We will be making this and the last treat holder in my Halloween Fun class.

This has been a fun Halloween Week.  I am off to see my son Brian get married.  It will be a fun-filled family time weekend.  Can't wait.  An extra perk will be seeing most of my grandchildren at the same time.  Hope your weekend will be a good one also.  

Come back next week to see what I will be posting then.

Friday, May 20, 2016

Hello Sunshine-February Paper Pumpkin

  
Where did Thursday go?  All of sudden at about 8 PM I realized it was Thursday and I had not written my blog post.  This seems to happen more often lately.  It couldn't have anything to do with being 70 could it? At least I still have not put the cereal in the refrigerator, so there is some hope.


This is one of the cards that you could make with the Hello Sunshine kit.  I loved this kit and made a lot of cards with the leftover supplies.  But, for today I decided to make cards using the stamps.  In addition to some leftover supplies with each kit you have 
     Stampin Spots- the colors are not repeated in a 12 month period
     Stamp set that is unique to Paper Pumpkin

I really like the font in this stamp set, and always need birthday cards.

The flowers in the set are really cute.  I include thank you cards in every order so need lots of thank yous.


I love using washi tape on a card

Black and white cards with a touch of color are one of my favorites.  I send congrats cards to my top 3 downline for their monthly sales.
Now, how do I store my stamps from Paper Pumpkin.  I finally have found a system that I think will really work for me.  I have a Project Life scrapbook and the insert pages.


Now I can flip through the pages to find a stamp set I might want to use.


I have really enjoyed Paper Pumpkin week and I hope you have too.  If you don't subscribe and are interested just click on the link at the top of the page and sign up.  My demonstrator name is Sue Scheets.  This should link you to my page.

Have a great weekend and come back Monday for Sprinkles of Life week.  This was last year's Ronald McDonald stamp set and for the first time every has been carried over into the new catalog.  


Wednesday, May 18, 2016

Blissful Bouquet-October 2015 Paper Pumpkin


I actually made these cards in the car on a road trip using just a lap board.  That's how easy it is to make up a Paper Pumpkin kit.

 Found this idea on Pinterest of course.  Do you go to Pinterest?  I sure do an find all kinds of ideas.  My problem, actually making up the ideas I have pinned.  This week's theme is helping me make up my Paper Pumpkin pins.  I used the Gold Wink of Stella pen to highlight the leaves and flower.  The center of the flower is punched out of some of the extra gold paper.

This card was made by punching out some of the flowers on the circle that was included in the kit.  I love the font of the words in this set.  Hope to remember to use them more often.

I used one of the envelopes for the Coral background and the Hello Honey backing of the flowers.  The flowers were stamped on one of the background sheets included in the kit.

The square accent piece was punched out with a circle for a different look.

The stamp from the Blissful Bouquet set was stamped in black Memento ink and then colored in with Mossy Meadow ink using an Aqua Painter.  I will be very sad to see Mossy Meadow go as it was a favorite of mine.

I think I could have gone on and on with more samples and I may later on tonight.  Paper Pumpkin can be  used for more than what the directions tell you.  I will show you on Friday how I have stored my stamps so they are more easily accessible.

Come back tomorrow to see the cards that I have made using the February set called Hello Sunshine.

Tuesday, May 17, 2016

March Paper Pumpkin-Pocketful of Cheer

  March Paper Pumpkin kit was really cute, featuring 4 cards each with a place for a gift card and 4 gift card holders.  But, I need just a few gift card holders each year, so I decided to try and use the supplies I was given to make some cards.


 I thought this card was really cute. I found it on Pinterest and it was connected to a blog called creativejuice created by Loni Spendlove. It used a couple of the stamps included in the kit, and the balloon punch to make matching balloons.  The banner on the side of the word box  is actually two small banners made to look like a long one.


 I love the simplicity of this card that Liz Baily at myelegantcards made. The adorable background paper is actually cut from one of the envelopes. I would love to see some designer paper like this pattern.


For this card I used several different parts of the leftovers and some of my favorite punches. And this is a Sushi Original! 


 Last but not least I used several left over parts from the envelopes and belly band to make graduated banners.  I stamped the saying and then cut it apart for a different look.

  This is really a lot of fun and help me use up lots of old supplies.  Nothing to throw away.  That appeals to the part of me that recycles and tries to avoid waste.

  My new paper pumpkin came in the mail today and I hope to have some projects made with the leftovers on Friday.

   Come back tomorrow to see what I have done with the October 2015 kit called Blissful Bouquet.

Monday, May 16, 2016

April Paper Pumpkin-Lovely Little Wreath

Welcome to Paper Pumpkin Week.  I will be featuring a Paper Pumpkin kit each day and showing you alternative ways to use the set.


    Love this wreath, and the best part of making it was how easy it was.
This was the April Paper Pumpkin project.  When I was finished I was so surprised at how many leftovers I had.  So, I went to Pinterest and then tried my hand at being creative.  See what you think....


  I was inspired by a similar card I found on Pinterest with a blog address called www.barbstamps.com.  You can see that Barb used leftover wreath wrap to make the trees at the bottom.  I changed Barb's card by using a different saying in the set and adding some color to the saying.


 I loved the way  Stacy McCain at craftasticdayswithstacy used the negative image leftover from punching out the stem as a stencil.  All I changed from her sample was the flower and adding some candy spots.


 Now I was ready to do some of my own creating.  I used the leftover piece from punching out the leaves on the wreath as my background, stamped the flower that is a part of the stamp set and used the words Happy and Day from two of the stamp sets.


 I wondered if I could make a wreath out of the left over leaves and this is what I came up with.  The row of leaves has its own adhesive along the bottom which helped me create a circular effect.  

  I have lots more leftovers and could keep going.  I would love to see some of your ideas. If you liked this post and enjoy checking out my blog, please consider liking it and even sharing it with your friends.

If you like what you see with this Paper Pumpkin kit, then click on the link above to receive your own Paper Pumpkin kit each month. Contact me if you have any questions.

  Come back tomorrow to see some alternate ways to use Pocketful of Cheer, the March Paper Pumpkin kit.

Monday, February 8, 2016

Miscellaneous Monday-Paper Pumpkin ideas

 
 Isn't this treat holder cute?  Well, I wanted to see if I could make cards from the January Paper Pumpkin kit supplies.  Here is what I came up with.....
 
Occasion designer paper, heart punch and a Sale a Bration stamp set make up this cute card.
 
The heart punch made cutouts for the Mint Macaron big heart to shine through.

 
Darcy brought the supplies and I made this cute card.

One of the hearts is behind the balloon cut out.

 
I used all the little scraps and created this cute card for any special occasion

 
It is great fun to make up the Paper Pumpkin kits the way they are designed, but also fun to find alternate ways to use the supplies.
 
 
Check back tomorrow for Technique Tuesday.


Wednesday, December 30, 2015

Paper pumpkin Change Up


    Last year's November Paper Pumpkin kit looked like this.  I loved it.  The stamp included in the kit featured a very nice Christmas saying.  When I thinking of some ideas to do when I held my class at the Senior Center, I thought that this card did not have to be all about Christmas.  It could be about winter.
  Check out the little bitty change I made to the card.


      I prepared all the supplies last night to take to the class this morning and guess what greeted me as I left the house...Great big giant snowflakes that actually stayed on the ground.  Our first for the season.


Thursday, July 23, 2015

Celebrate Your Life with Paper Pumpkin


     For my second layout, I searched on Pinterest for Paper pumpkin ideas and found a layout similar to this one. 

The page on the right is from the May 2015 kit.  I cut apart two of the cards in the kits to make the picture backgrounds. 

 I used some paper from the Cherry on Top paper pack for the backgrounds. 

The balloon on the left was from the kit and was used to trace around the rest of the balloons on the page.

The saying says Celebrate so this page could be used for any kind of a celebration not necessarily a birthday.

I like using parts of my Paper Pumpkin kits on scrapbook pages to help show the versatility of each kit.

What would you celebrate in pictures on this layout?

Thursday, October 23, 2014

Paper Pumpkin Week-Bootiful Bags


   Halloween treat bags ready to go to three great guys I see 4 days a week.  But I was able to make so much more with this cute paper pumpkin kit.
A Sushi Original, yes I designed this one myself.
Created by Rachel Tessman at Stamp Your Art Out.
Boni  Montane cut apart one of the bags to make this cute card.


A bunch of cute cards inspired by cards I found on Pinterest.

 
Finally a new batch of mini cards using up all the wonderful stickers I found in the kit.

 
Isn't this fun!  Tomorrow I will be featuring some cards and 3-D items I made using the Pinwheel Party kit.  


Tuesday, October 21, 2014

Paper Pumpkin Week-Seriously Amazing

These were the cards described in the kit.
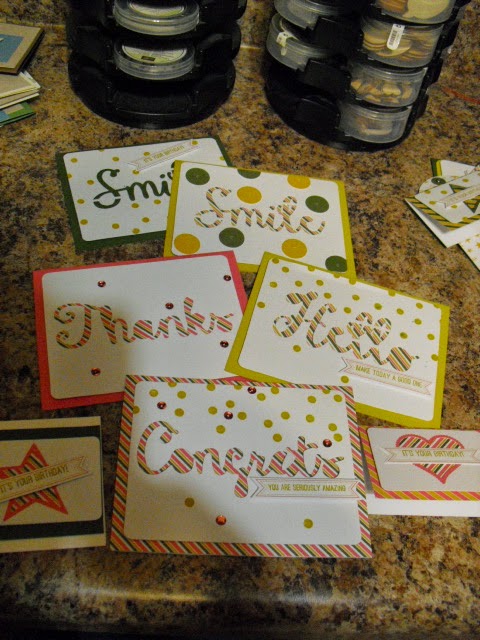
     This was an amazing kit for the August Paper Pumpkin.  There were 8 cut outs both large and small and I was able to make oodles of cards from everything in the kit.
klompenstampers is where I got my inspiration to punch some circles out of the background papers.
I found this card's inspiration from stampinpretty.


jamillastampingrounds.BlogSpot.com is where I found this great idea.  Note how she used the reinforcers in a totally different way.
 
Lots of supplies for lots of cards.
 
Some Sushi Originals.


Does this tempt you to consider becoming a subscriber to My Paper Pumpkin.  Check out the website and if you want to join then list me, Sue Scheets as your demonstrator. I would love to help you with these fun stamping kits


Monday, May 5, 2014

March Paper Pumpkin

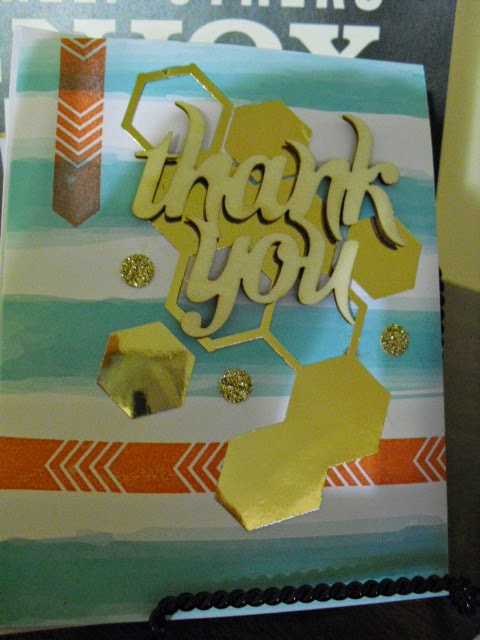
I love the look the wooden accent pieces give to the card.
One of the two original designs that came with the kit.


   So glad to be back after having a non-functioning computer for over a week.  It is amazing to realize how dependent I am on a computer.  Did not realize it until I could not use mine.
   So, I am so proud that I have kept up with all my paper pumpkin kits from the past few months.  These are the cards I made from the March kit.  It was bigger and better, something Stampin'Up! is trying to do with the kits.  This month there were 8 cards to make.  Of course I went online to see what designs I could find to alter the kit designs.  Here is what I came up with.

    I only inked the arrow stamp once to get the various colors.  Love how it looks like I used several different colors.

   Washi tape can always dress up a card.


    Shelli Garner the CEO of SU showed us how to use some of the envelope liner to accent the front of the card.  Notice how the saying has been cut in two.


  What would you do with this kit?  Now, I am curious what the kit for May will be like.  It is never too late to join Paper Pumpkin.  Just click on the link and if you want to join I would love to have you join under me Sue Scheets.  Glad to be back.  Look for regular entries until the next computer problem. :)