Wednesday, March 31, 2021
What is it Wednesday-Here’s to you March cards
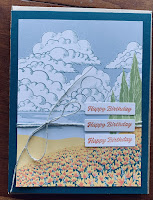
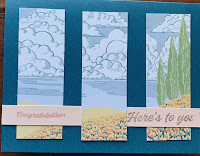
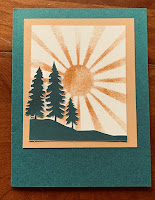
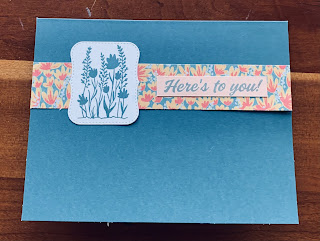
These cards have been created using the March paper pumpkin kit called Here's to You. I had a great time making them.
One of the cards you could make with kit supplies according to the directions.
The second card made with kit supplies.
I made this card after being inspired by the quilt my daughter and I made together.
This card was inspired by Jackie Bolhius and used 1 inch squares.
A simple card
A few more details have been added.
And even more details.
I took one of the pictures and cut it into thirds.
Used stencil and stamp and blends for this card.
Star stencil with ink
Star stencil with white craft ink.
Star stencil with embossing paste.
Cloud stencil with ink.
Sun stencil with inks.
Finally mountain stencil with embossing paste snow.
I hope you have enjoyed looking at the cards I made with my March paper pumpkin kit. I can't wait to see the April kit and have more fun creating alternates. I'll be back the last Wednesday of April with my sampples.
Tomorrow is step it up day and the one of the last few cards I will be making with the Ice Cream Corner Suite.
Till then,
Happy Stamping,
Sushi
Tuesday, March 30, 2021
Cut it out Tuesday-Pop-Up card in a box
Are you ready for cutting instructions for a Pop-Up box card?
1. Cut card base 7.5 x 9.25
2.Cut 1 piece of designer paper and 1 neutral at 5.25 x 2
3. cut 6 pieces of designer paper at 2.25 x 1 7/8
4. Cut 3 pieces of designer paper at 2.75 x 1 7/8
Plan some accessories and a saying
Here is my first example of the card. It will fold and fit into a standard envelope.
On Friday I will post more examples and make the card with you. So come back for directions.
Product List
Get your supplies ready for Friday at 10:30 on Facebook Live, or 6:30 on Zoom or anytime here on my blog.
Tomorrow I plan to share my cards I have made using the March Here's to you paper pumpkin kit.
Till Then,
Happy Stamping,
Sushi
Monday, March 29, 2021
Make it Simple Monday-Ice Cream Corner Suite
Good Morning! Are you ready for another simple card template?
Here it is. I challenge you to make a card using this template and post it below on this page.

Here is how I interpreted this template.
1. First, I chose Purple Posy as my background paper since it is one of the colors that is in the designer paper.
2. Next, I made my strip using 1 inch of the diagonal designer paper.
3. Then, I punched out a small circle from the cone design.
4. Finally, with the oval punch I found an ice cream cone I liked and punched it out.
5. The last thing I did was to find a saying to use. I figure this card can work for just about any reason I might want to send a card.
These are the supplies I used.
Don't forget to post your sample of this card template. And your prediction, will my hair be straight or curly after my trim.
Tomorrow come back to see the card of the week cutting instructions.
Till Then,
Sushi
Friday, March 26, 2021
Put it together Friday-One inch strip card #5, card idea 53
I just love creating cards with one inch strips. This week the strips are cut into one inch squares
For this card I used 10 different designs from the In Good Taste designer paper. And I just had to use another Chicken from the Hey Birthday Chick stamp set as my accent. The Happy Birthday and banner are dies that are a part of the die set that coordinates with the stamp set.
This card was created using parts from the March paper pumpkin kit. The background is one of the envelopes cut apart.
This card was created using parts from the December Beary Comforting Kit.
My final sample was created using the Butterfly Brilliance Collection. Notice there is no saying. Sometimes the card says it all.
Supplies used for these cards.
Product List
What a fun week! Have a great weekend and be sure and come back Monday for another simple card template.
Till then,
Happy Stamping,
Sushi
Thursday, March 25, 2021
Step it Up Thursday-Here's to You March paper pumpkin
A refresher of this week's template.
And my version using the Here's to you the paper pumpkin kit.
Check out how I stepped it up.
2. I punched a circle out of the envelope and added a banner for the saying.
3. Added a card stock layer.
1. Changed the direction of the card.
2. Embossed the card stock layer.
3. Added an extra circle and some twine.
I had a great time trying to figure this out with parts of the paper pumpkin kit.
Tomorrow I will be showing you how to put together the card of the week. Come back with your supplies and make your card with me.
Till then,
Happy Stamping,
Sushi
Wednesday, March 24, 2021
What is it Wednesday-How to use the paper pumpkin stencils
Have you seen the wonderful stencils that are included in the March paper pumpkin kit called Here's to you. I have made the same card using each one of the stencils.
Used white craft ink pad.
Used Misty Moonlight ink.
Using embossing paste

First I used several neutral colors for the mountains and then used the embossing paste for the snow on the mountains.
Used Crushed Curry first on the rays of the sun, and then pumpkin pie on the part of the ray next to the sun.
In the video below you can watch my instructions on how best to use each stencils.
Have fun making your own cards using stencils.
Come back tomorrow to see how I see how I step up the card from Monday using this week's template.
Till then,
Happy Stamping,
Sushi
Subscribe to:
Comments (Atom)


