Showing posts with label Detailed dragonfly thinlits. Show all posts

Friday, January 27, 2017

Dragonfly Dreams-Fab Friday


   What fun I have had this week.  I checked out a number of Challenge blogs and decided to go along with the Fab Friday challenge.


I liked the color combinations and thought they would work well with my Dragonfly Dreams week. Here are the steps I took to make this card.


1. I made my 3 layers coordinate with the 3 colors of the challenge.

2. I embossed the Sugarplum layer with the new Falling Petals embossing folder.

3. I scribbled Soft Sky and Sweet Sugarplum markers onto the back of an acrylic block, spritzed the block with water, then stamped it on some water color paper.

4. Next, I took an Aqua Painter and used some Sugarplum ink, tapped the painter on my finger and made some dots of color on the water color paper.


4. Finally, I cut out the dragonfly out of Very Vanilla and Soft Sky cardstock, applied it to the card, then glitzed it up with Clear Wink of Stella.


5. The saying is from the Bunch of Blossoms stamp set.

This might be my favorite card from this Dragonfly Dreams week.  Come back next week for Scrapbook Layout week.    

Thursday, January 26, 2017

Dragonfly Dreams-Template Thursday

  Today I will be using on each card sample

    Inside the Lines designer paper
    Dragonfly Dreams bundle

This first card also uses
    Tags and Labels framelits 
    The saying from the stamp set called Bunch of Blossoms

Even though this designer paper can be colored in, it also looks great uncolored as the background for a bold thinlit, like the dragonfly.


For this card I added
 Stitched Shapes framelits 
 Layered Circles framelits 
 The saying is from the Dragonfly Dreams stamp set.

I love how the stitched shapes framelits and the layered circles framelits work so well together.


For this card I added

New watercolor pencils from the Occasions catalog
Aqua Painter
Vellum
Black embossing powder 
Saying from Watercolor Words

For the final card I colored in parts of the designer paper using our new colored pencils.  You do not have to color a solid image when you use them.  Just color and then use an Aqua Painter to blend the coloring marks.

After I finished my coloring I cut the paper into thirds and attached it to the card base.

Since my dragonfly was so big and bold, I needed a simple bold saying to complete the card.  Watercolor Words fit the bill.

Don't forget you too can have this great designer paper by spending $50 on any items you wish.  Then the designer paper is yours for free.  Can't make it to one of my classes.  Feel free to order online any time.  Just go to www.sushi.stampinup.net to my website.  There is a direct link to my store at the top of this page.

Come back tomorrow to see anothe Fab Friday card.

Wednesday, January 25, 2017

Dragonfly Dreams-Wednesday Wow

  I found another sample on Pinterest that was a wow to me so I am featuring it today.

1. I embossed the Smoky Slate layer with the Softly Falling embossing folder.

2. I took the strip of Whisper White card stock and sponged on it with Island Indigo, Night of Navy, and Perfect Plum.  I used the same colors to stamp some of the stamps  from the set called Awesomely Artisitic.  I really enjoy using the collage stamp sets for backgrounds.

3. I made Elegant Eggplant as the color for the dots, the dragonfly and the Solid Baker's Twine.  

4. The final touch was to cut the string of dragonflies out of Silver Foil paper.

Here you get a better look at the layers on the card.


This card looks like it might be very hard to make, but step by step was quite easy.  

Come back tomorrow to see how I used the Inside the Lines designer paper that can be earned for free during Sale a Bration.

Tuesday, January 24, 2017

Dragonfly Dreams-Technique Tuesday


Can you see the dragonfly in this card?  I used the masking technique to get the subtle image of the dragon fly.

1. First use the thinlit to cut out the dragonfly on a post-it-note, making sure one part is on the sticky part of the note.


2. Attach the post-it-note to your card base and stamp around it using a variety of stamps.  I used the stamps from the set called Timeless Textures.

3. I even used a sponge around the edges of the dragonfly with Smoky Slate ink to make sure the image would be totally visible.

4. When satisfies, pull off the post-it-note and you have a masked dragonfly on your card.

I found a similar card of Pinterest made by Leonie Schroder.  She has a wonderful explanation of how she made her card on her blog.  Check it out here.

Come back tomorrow to see a WOW card made with the Dragonfly Dreams bundle.

Monday, January 23, 2017

Dragonfly Dreams-Miscellaneous Monday

   Have you seen the Occasions catalog yet?  This set called Dragonfly Dreams was one that jumped out of the catalog at me and has become my favorite. Today's card shows off the stamped dragonfly image. And  best thing is there is a matching framelit that will cut the dragonfly out.
Don't you love sets that match the stamp and the framelit.

I love the realism of the background paper used in this card. It is called Falling in Love and can be used for so many things: Weddings, Anniversaries, Valentines, Birthdays, or just thinking of you.

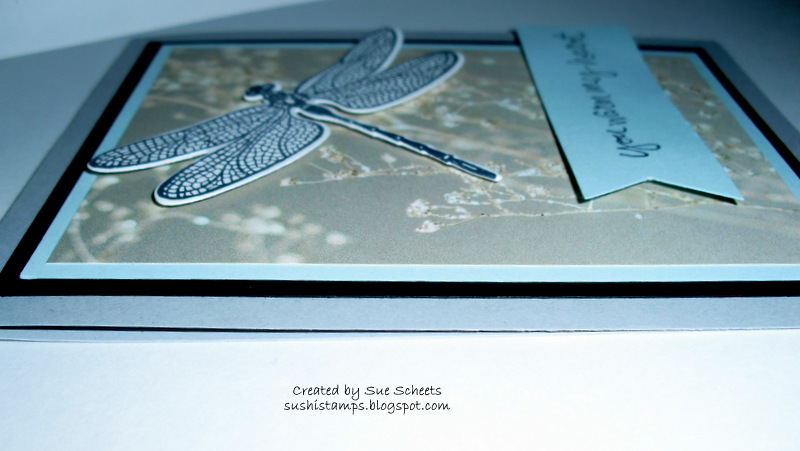
This picture you shows you which layers I used dimensionals on. So this is a simple card that could be used with all the elements of this Bundle and the Falling in Love Designer paper.

Come back tomorrow to see a card I made using the masking technique.