When I made this card I was thinking of a family member who is raising bees and what fun it would be to put them on a card that I could send to her.
So, have you been thinking of some of the words you could use on an eclipse card?
Use the word YOU but stamp other word to go with it like Happy Birthday to...
Create a card and instead of letters use numbers to depict the person's age, especially if it is a special age. My friend Robin made one for a grandmother turning 100.
Place deer on a card and use the word HUNT for a man that loves to hunt.
Use the person's name or nick name if they have a long name.
Happy
Hello
Smile
Good
I am sure that you could make an even longer list. Have fun trying your own eclipse card.
Come back next week to see samples made with the Merry Patterns stamp set, a set you can have free by having a home party or private order that totals at least $300.
I found an example of this card on Pinterest and fell in love with it. The city of Bethlehem is faintly stamped in the background.
One of the great things about stamping your background before cutting out your letters is that it is so easy to place your letters correctly into the slot. The stamping makes it easy to line them up. In case there are multiple letters like the word Fall, it is still quite easy to line up the letters.
You can pop up your letters with anything you have on had, but the easiest thing to use are the foam adhesive strips. The are just the right width to fit any of the letters.
My favorite letters to use are the Large Letter Framelits from the annual catalog. They are $99. If you have a bunch of friends over for a party and the party can total $450 or more you can purchase them half price.
Better yet, if you join my team you can purchase them as part of your start up bundle. You are able to order $125 worth of supplies for just $99. Contact me if you are interested in joining the Super Snails.
Tomorrow is my last card showing the Eclipse technique.
Do you see the change I made to the eclipse card?
1. Instead of stamping my background, I just used a piece of designer paper, the one called Spooky Night.
2. I cut the word Boo out of the background piece and another paper from the Spooky night designer paper series.
3. The cat is not stamped, but cut out with the cat punch from one side of the same designer paper pack.
I had a leftover boo from the background paper so.....
I punched out some cards from the designer paper creating my own background, then attached the boo on top.
Tomorrow I will show you the Night in Bethlehem card I made using this great technique.
My downline group called the Super Snails had our monthly meeting on Saturday. I demonstrated the eclipse technique to them and we each created a card or two using that technique.
Jody used the Spooky cat stamp set and cut out the word DARE. I love the end result how about you.
Four letter words work the best for Eclipse cards, but if you squeeze the letters together you can get 5 letter words. I have also seen samples where a rectangular picture frame was used for much longer words.
I am thinking of making a Christmas, Halloween, or even one that says Scheets, our last name.
Once you have tried the technique it is hard to stop.
I will show you a couple of cards I made that featured the cat punch.
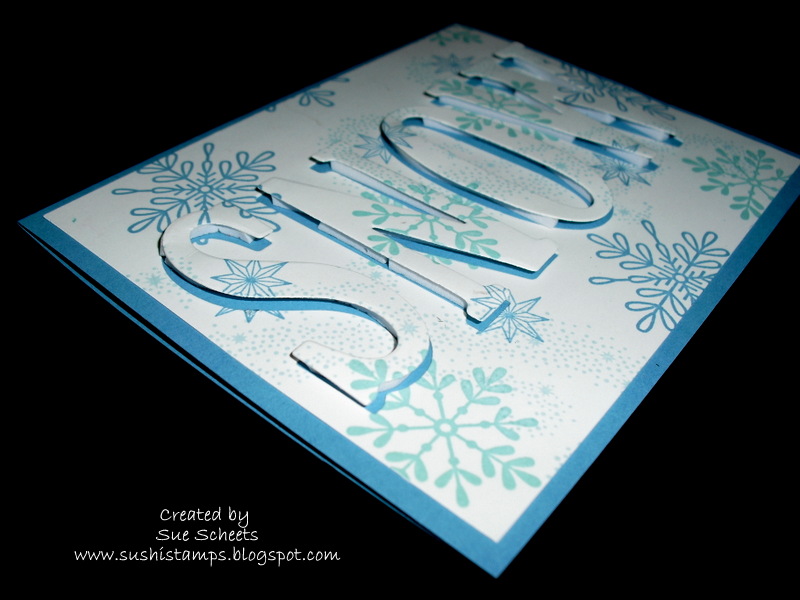
Have you heard about eclipse cards? I have been having a blast creating a variety of them and have lots of more ideas in my head. If they will just stay there.
1. First, stamp you images on a plain piece of card stock, I used Whisper White for this card.
2. Then cut out your saying, what better word than Snow, for a snowflake card.
3. Save all parts even the inside of the O. Glue the remaining card stock piece onto your card base and set aside.
4. Place foam adhesive strips on the wrong side of each letter, but not the inside of the O.
5. Now replace each letter into its spot and you will notice that all the stamped images line up perfectly.
6. Put some adhesive on the back of the little piece from the O and stick it inside the O with your scissor tip or a piercing tool.
It is called an eclipse card because you can see part of the base of the card on the side of each letter.
It is so much easier to make than you think when you look at the end result.
Tomorrow I will show you an eclipse card my downline Jody made at our last meeting using the stamp set Spooky Cat.