Showing posts with label Stampin with Sushi event. Show all posts

Tuesday, October 3, 2017

Eclipse card-Spooky Cat

My downline group called the Super Snails had our monthly meeting on Saturday.  I demonstrated the eclipse technique to them and we each created a card or two using that technique.  

Jody used the Spooky cat stamp set and cut out the word DARE. I love the end result how about you.

Four letter words work the best for Eclipse cards, but if you squeeze the letters together you can get 5 letter words.  I have also seen samples where a rectangular picture frame was used for much longer words.

I am thinking of making a Christmas, Halloween, or even one that says Scheets, our last name.

Once you have tried the technique it is hard to stop.

I will show you a couple of cards I made that featured the cat punch.

Friday, September 15, 2017

Holiday Catalog Launch Party-Treat Bags

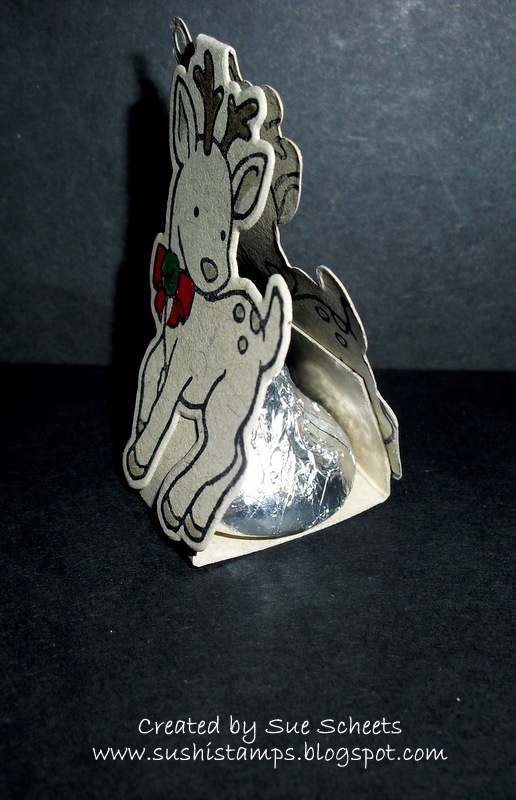
This cute treat is made with the Seasonal Charms stamp set.  There is a reindeet, a snowman and a pumpkin in the set.  The stamps can be used as tags on a package, or as a treat holder as seen above.  What treat might fit in this bag?

How about an Hershey Kiss?

Well, that was a small treat so how about another treat also.

The treat is made with the 2 by 8 cellophane bags found in the annual catalog.  And the topper is the Pumpkin from the Seasonal Chums stamp set.  These stamps are great because there is a front and a back on the stamp. The tiny bit of designer paper is from the Spooky Night designer series paper.  One side is definitely Halloween and the other side can be for any other occasion.

Love the vines on the back side of the pumpkin.  

The third project you will make is a bookmark, because not everything has to be about candy.

I love the cat punch and I don't even own a cat.  There are some cat images on the designer paper that can be cut out using this punch.  That is great and saves a lot of cutting.

I hope you have enjoyed seeing these stamped items we will be making at our Holiday Catalog Launch Party.  If you are in the area be sure and stop by.  

Next week I will be posting the cards you can make at my Card Cafe Creations for October.  

Tuesday, September 12, 2017

Holiday Catalog Launch Party-Christmas Quilt stamp set

  What are your favorite colors for Christmas?  Mine are and I think always will be Red and Green.  And I really like the bright red and green best as are seen in this card.

One of the things I like to do other than make cards and stamp of course, is the sew.  When I saw this quilt card I was thrilled.  I send birthday cards to all the members of a quilt guild I belong to and this set will be especially appreciated by all the members.

Here's a few things I like about the set.

1. The outline that looks like stitching is a separate stamp and because it is photopolymer it is very easy to place over the quilt image.

2. The embossing folder called Quilt Top makes the stamped images look as though they have been quilted.


3. I love the cursive font especially since my cursive is not at all recognizable.

This card will be at one of the make n take tables at the Holiday Catalog Launch party help on Saturday. 

Tomorrow I will feature a gift card you can make using the Carols of Christmas thinlits. Come back and take a peak

Monday, September 11, 2017

Holiday Catalog Launch Party

You are Invited to..
A Holiday Catalog
Launch Party

When: Saturday, September 16th
Where: 1020 Rickard Avenue
              Springfield, Ill

Check out this link for more information and a way to RSVP

Wednesday, November 2, 2016

Home Decor-Advent Calendar


   I like to prepare for Christmas with an Advent Calendar.  This home decor piece was made using several Project Life pieces. 

Individual Pieces made using Hello December 2016 Card Collection

Accents on the cards made using Hello December Accessory Pack

Cards are clipped onto Baker's Twine using the Gold Binder Clips from the annual catalog.

Cost of this project is $50 and includes everything but the frame.

What can you use this for?
   
      Take a picture of some Christmas activity each day of December.  Then you are already to create a scrapbook for the month.  The cards will make great accent pieces in the scrapbook.

     Behind each card list an activity you can do as a family for each day of Advent.

     Do something kind for someone each day of Advent and take a picture or journal about it.

    List a Bible reading behind each card for Advent.

You can think up even more ideas to make this an interactive Christmas decoration.

Come back tomorrow to see the final project you can make at the Christmas event held at my house on Saturday, November 12th from 10-3:30.  


Saturday, January 16, 2016

Enjoy the Little Things project kit

    
     One of the things I like about each Stampin'Up! catalog is the fact they feature several kits.  This is one page from the kit in the new Occasions catalog called Enjoy the little things.

1. There are 13 pages in this kit.  Each one very different from the other.


2. All the supplies that you need to make each kit are included except for some adhesives.

3. The easel the pages clip onto is thick and very sturdy.

    I found a way to organize them so that I could display one each month of the year which I love to do.  The extra page I plan to display the week of a birthday.
     Do you think this is something you might enjoy making and displaying?  Well, I am having a kit class in March.  Make your reservation now so that all you supplies will be ready for you in March.


Friday, September 18, 2015

To You and Yours Shaker card kit

This card has three colors of sequins to shake.


   Do you love to get or make a shaker card?  I think they are great fun.  The kit called To You and Yours shaker card kit is one featured in the new Holiday Catalog.  I made 3 of the cards up to have on display at my Open House last weekend.  Here's is what I like about this kit.

1. It comes with easy to follow directions.

2. The 3 designs are cute and easy to make.

3. All the items needed to make the kit come with the kit.

4. There is a stamp set that coordintates with the kit that steps the kit up even more.
There are silver stars that shake in this card.

This card has white beads that shake.

You see from my samples that I used some of the leftover negative word areas to decorate my envelopes. There are enough materials for me to make 5 more of each one of these designs.  I loved how easy it was to make these impressive fun cards.


Sunday, September 13, 2015

Delicate Ornament and Precision Base Plate

    
     Can you see the paper that was used to make this ornament?  It is the new Red Foil cardstock.  It is firm and shiny and perfect for cutting out the Delicate Ornament Thinlit die.  You might wonder how hard it could be to get all those little pieces cut out of the thinlit.  The new Precision base plate made it so easy.  Here is a video that helps you know how to use the plate.  This was featured at my Holiday Open House and can be used as a tag or an ornament for your tree.

Friday, September 11, 2015

Woodland Textured embossing Folder


    Fall is my favorite season and one of the things I love about fall is the colors of the leaves.  This card reminds me of what I love about fall.  It is one of the cards featured in my Holiday Catalog Open House. Here are the new items....

1. Woodland textured embossing folder.  It is a 6 inch square and will fit any direction on your big shot.

2. Among the Branches stamp set.  The leaves and the saying are from the set which also features Christmas and Halloween items.

  I am excited to show off the new items from our Holiday catalog today and tomorrow 12-3.  It's not too late to decide to come.


Friday, July 10, 2015

Scrapbook Your Life-Best Thoughts Hostess Set


     Can you see the trick I used for this layout?  I ran out of one color of paper for the background, so I used 3 different colors, overlapped and cut small pieces to blend everything together.  So, if you think you do not have enough of one color to create a layout for a class, then just think outside the box and make it work.  I picture using the pictures I took of the flowers in our yard this spring on this layout.

I used an aqua painter, and some ink from the lid of my ink pad to make the flower. 
    
I added several butterflies from the stamp set called Best Thoughts, a hostess set as accent pieces.

 
What pictures would you add to this layout?

Wednesday, June 24, 2015

Bohemian Borders-New Catalog card buffet


      Another card using Washi tape......Yeah!  The people at the Senior center and the library card class made this card as the third card for June.  I loved this card because it has several of my favorite items.........punches, washi tape, and simplicity.

New Items

Delightful Dijon marker and card stock
Bohemian Borders stamp set
Bohemian Washi Tape

Thursday, June 18, 2015

Sprinkles of Life-New Catalog Card Buffet


     Doesn't this look good enough to eat?  This cute card was made using the new Ronald McDonald stamp set.  I think it is one of the cutest designs SU has created for the McDonald charity.
   
   This card was one of the 10 cards featured in my monthly card buffet.  How does a card buffet work you might wonder? Just like a food buffet you browse the cards offered and make as many as you like of as many cards as you like.  The cost? Just $2 a card. Check back tomorrow to see more of the buffet items.

Wednesday, June 17, 2015

Gift Bag Punch board


     Are you a fan of the punch boards that SU carries?  I personally really like them.  So, in our preorder, I ordered the new Gift Bag Punch board.  This bag was the last item people who came to my Open House were encouraged to make.  Can you see all the new items that were included in the bag?

1. Gift Bag Punch Board, the bags can be made in 3 sizes and can be any height you wish.

2. Banner Triple punch.  The knotched edge of each banner was punched out with the new punch-1" 1 1/2" and 2" widths. 

3. Cherry on Top dsp paper stack was used for the banners.

4. The ribbon is the new 1" Dotted Lace trim which comes in all the new in-colors. I used the Mint Macaron color.

5.The bag base is the new in-color called Watermelon Wonder.

6.  The blossom accent is new and also comes in the new in-colors. I used the Delightful Dijon blossom.

7 Finally the accent piece was created using the new stamp set I Think You're Great which features the kissing technique.

    I think everyone who came to my Open House had a chance to put their hands on a lot of the new catalog items.  What would have been your favorite item to make?


Tuesday, June 16, 2015

Sprinkles of Life-Ronald McDonald stamp set


    Are you familiar with the Ronald McDonald House?  The year I started as a demonstrator at Stampin'Up! they started working with the Ronald McDonald House Charities.  Here is what they do.....

1. They donate $100,000 a year to this charity.

2. They create an exclusive stamp set that last for one year only.  $3 from the sale of each stamp set also goes to this charity.

3. Demonstrators all over the country work in the houses and organize events for the families who are staying at the houses.

4. In the time SU has been working with them they have donated well over 1,000,000 to the charity.

    So, to support this work, I purchase the stamp set each year and create a project using the stamp for my Open House.  This year's stamp set is called Sprinkle of Life.  SU even has a punch that coordinates with the stamp set.

Here is how I made the card.

1. I turned the tree on its side for a branch.

2. I stamped the leaves and then cut a little nest out of the leaves.

3. I punched out two clouds and sponged the edges with Soft Sky ink.

  I found the idea for this card on a SU video, and everyone got to make the card and a matching envelope.  What do you think of this year's set?


Monday, June 15, 2015

New In Colors bookmark


     Do you look forward to seeing what the new in-colors are each year?  I know I do but when I see them in the catalog it is not the same as seeing them first hand.  So one of the first things I order are the new in-colors.  I have my open house customers make something with those great new colors.
    I watched a video of the Stampin'Up! convention in Australia and loved this project they demonstrated.  So an in-color book mark was one project for my Open House this year.  Can you tell what the new items are from this bookmark?

New in-colors
    Watermelon Wonder
    Tip Top Taupe
    Cucumber Crush
    Mint Macaroon
    Delightful Dijon
Wouldn't you love to be one who gets to name the colors?

1" Dotted Lace Trim ( also in the in-colors) It is easy to tie and lay flat, very soft and much different than I had imagined from the picture.

Layered Letters ABC  There is also a rectangular shape that the letters can be layered on top of in addition to the circle.

Everyone wanted to make this bookmark and loved the colors.  Come back tomorrow to see what the next project was at the Open House.


Thursday, December 11, 2014

Anything But a Card 3-D Thursday


     What would you place inside this cute box?  I love the Curvy Keepsakes box and found this idea for a Santa box.  This was one of the items my stampers made in the Anything But a Card class.  I loved it so much that Linda and I made 12 boxes to take to Knollwood this month as a Christmas gift for the ladies I stamp with.

Thursday, September 11, 2014

New Gift Card Holder-3-D Thursday

 
   Don't you love finding ways to make life a little easier?  I think this gift card holder is one of those ways.  It is a framelit that can be cut from a 6 inch square piece of card stock or designer paper.  I used the All is Calm designer paper from the Holiday Catalog.  Tags, a heart and circle come along with the framelit.  What would you need a circle for you might ask?


  Check out the back of the holder and see the circles used as a way to close the holder.  I can think of a lot of times I would be able to use this.  But... if you are anything like I am you like the idea of being able to use this for something else.


   Check out the cover for this box.  Yes, it is the gift card holder flattened out to cover a box.  You might wonder what size you should make the box.  Well, I also have that information for you.

Box size  6 5/8 by 7 7/8 inches
Score each side at 2 inches and your box will fit nicely underneath the lid.

  Check out this Stampin'Up! youtube video for directions.  In fact check out more of the videos Stampin'Up! posted for the items that are in the Holiday Catalog.  Don't have one yet, then contact me and I will make sure you have one in your hands.


Tuesday, September 2, 2014

Beautiful Background for Technique Tuesday


   One of my favorite things to do to help me get new ideas is look through blogs.  I recently found this idea on Mary Ellen Stites blog and thought the results were stunning.  I changed up the colors and introduced this to my Press Club members in August.  Each month they make 2 technique cards and place a minimum order.  Every 5th month they are the hostess and earn all the free products. For the next few months we are making cards that focus on background techniques. To copy this technique follow these steps.....

1. Stamp the image of your choice in Versamark on white or vanilla cards stock. I used the flower from the stamp set called Regarding Dahlias.

2. Emboss using the white embossing powder.

3. Sponge your flowers using a yellow color.  I used Daffodil Delight.  Then sponge the center only using a contrasting color.  I used Crisp Cantaloupe. 

4. Finally sponge around each flower using your favorite background color.  I used Pistachio Pudding.

The background part of this card is the color that I have placed behind my embossed images.  What colors would you use, or what stamp set would you stamp?  I think it would be fun to try different colors of embossing powder for a totally different result.

If you would like to join our club just give me a heads up and I will give you more details.

Sunday, February 16, 2014

Changing a Design

The original card design
 

Amanda's design


      Do you like to look at a design and change a few things to make it your own?  At my open house a new friend, Amanda decided to do just that.  Can you see what she changed on the original design?

1. The card went from being  horizontal to vertical

2. The Washi tape is now located on the right side instead of in the center

3.The flower image is a different flower from the stamp set called Happy Watercolor.

4. The sequin accents pieces are kept as a strip and also attached to the washi tape/

   And that's what I love about stamping.  Each person can put their own touch to a design to make it his or her own.  I tell everyone at my classes that my card design is just an idea that they can change any way they like.  What do you love about stamping/
    

Wednesday, February 12, 2014

Gold Looks Good


  Everyone loves Gold.  And at Leadership in January we learned that all things gold is one of the new trends.  So, I found this card on Pinterest and CASED most of the parts.
How many gold items can you find on this card.

1. The flower stamp is from the set called Happy Watercolor from the Occasions catalog.  It was stamped with Versamark and embossed with gold embossing powder. The Thanks stamp is from the photopolymer stamp set called Another
Thank You.


2. The accent cardstock is called Brushed Gold

3. The Washi tape is called Watercolor Wonder and is gold.

4. The sequins were taken off the roll of golden sequins also found in the Occasions catalog.

  I have not always been a fan of gold, but love how all these products look together.  What would you use to make a golded card?