I loved this card as soon as I saw it. Simple but stunning. When I checked further I found the blog post for the card. The blog is called Stampin with Kristen. I decided to see how I could change some parts of the card but still keep it simple.
Here is how I changed it.....
1. Changed the red and green to Cherry Cobbler and Garden Green.
2. Added a bit of designer paper from the new catalog called This Christmas. I love it
3. I used the greeting from Holly Jolly Greetings and the thinlit from Christmas Greetings. I was so glad these two items carried over into the new catalog.
Another fun week. Check out all the ways you can use the Always an Adventure stamp set and matching framelits.
Come back next week when I will change it up a bit and feature the Serene Scenery designer paper stack in several different ways.
No, this stamp set is NOT Always an Adventure, but when I was looking through the new catalog for something to use as a template I came across this card. Here is what I was looking for when I reproduced the template.
1. Images on a smaller piece of cardstock
2. Something on the background
3. A saying that reflected the images.
1. I used the stars, moon , the trees, and the bear.
2. I used the star embossing folder
3. I chose the hello stamp because it looked like the bear was peeking out of the trees to say hello.
1. I used the lake, bears and trees, and stamped the clouds to fill in the empty space.
2. I chose the sky paper from the Serene Scenery designer paper stack.
3. Since it is so HOT and HUMID here in Illinois, I thought the idea of a swim in a lake would be a Happy Day for me and decided bears would feel the same way.
Come back tomorrow to see how I will fix a Christmas card I found on Pinterest, using this very same stamp set.
How do you get your inspiration for your card making? Most of the time I look at samples on Pinterest to help me get interested, but sometimes when I wake up in the middle of the night I get an inspiration at that time.
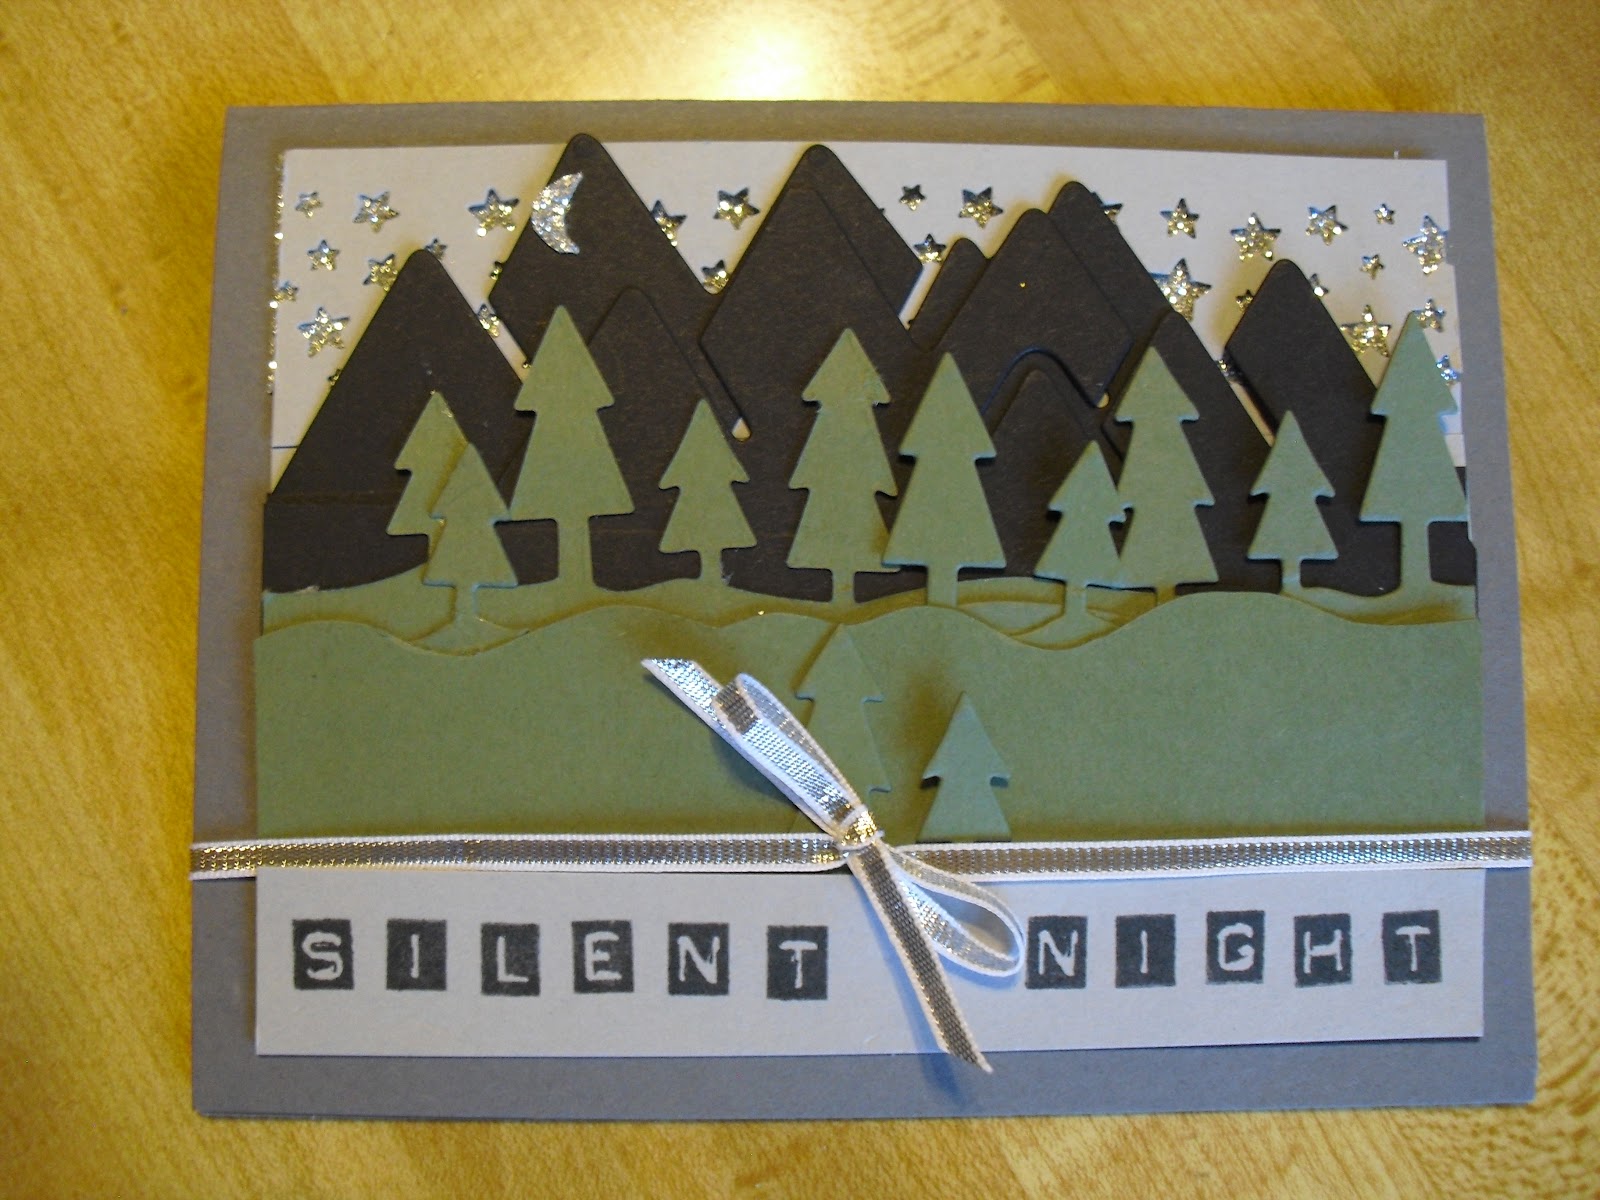
For my Wow this week I knew I wanted to use a night time theme.
1. I thought that the star border punch would be a great start to get a starry sky.
2. I made a couple of layers of mountains by flipping the cut out image. And then I did the same with the trees.
3. At that point I looked at the card and thought about Silent Night and how peaceful it can be surrounded by mountains, and pines.
4. I just received the new alphabet called Labeler ABC and decided to try it out. I like the look.
5. I finally finished the card with some silver 1/8 inch ribbon and liked the finished product. What do you think?
Notice I did not use any stamp sets to create the card, just the matching thinlits called Outdoor Adventure.
Come back tomorrow to see how I use a template to make a variety of cards.
Can you see the cute balloons on this card. The final measurements for the card are 4 1/2 inches by 6 inches. Well, it would not fit into any of our standard envelopes which are meant for 4 1/4 by 5 1/2 inch cards. So.....
1. I got out my handy envelope maker and checked out the possible card sizes. The closest one I could find was 4 1/2 by 6 1/2.
2. I found that I needed to cut my paper at 8 7/8 by 8 7/8. Do you recognize the paper? It is the new envelope paper and comes in 4 designs and each one of the new in-colors.
3 I then placed the paper on the envelope maker at 3 3/4 inches and just scored all the edges. When I was finished the card fit in perfectly.
So when you open the envelope this is what the card looks like, but when you take the card out of the envelope and set it on the table it looks like this.....
I made the mountains 3 different shades of brown,knowing that they look darker the further away they are.
I used the balloon framelit and cut out the balloons from the Playful Palette designer paper stack.
I stamped the clouds in Soft Sky ink to match the card stock and found a saying from the set called Thoughtful Banners. This was fun to create.
Come back tomorrow to see a wow card using this wonderful stamp set.
I really like this stamp set, but it is not the one that captured my attention when I first scanned the catalog. Why am I not featuring that one this week? Well, I thought I had ordered it but guess what, I did not. So I will showcase that stamp set when it gets to my house.
The reasons I really like this set are multiple.....
1. It is cute
2. It has stamps that can be cut out with framelits.
3. It reminds me of all the vacations my husband, son, and I took camping out west in the mountains. And yes we camped in a tent.
I decided this would be the perfect set to use for a Father's Day card for Sam. The sign is not too clear, but I wrote on in the name of a favorite camping ground we stayed at in Wyoming, called the Falls.
Come back tomorrow to see how to use this stamp set to make a Side Step card.