Showing posts with label Envelope Punch Board. Show all posts

Thursday, September 27, 2018

Stamparatus- 3-d Thursday


Isn't this a cute looking purse?  It could hold some candy, a lip gloss, maybe even some hand sanitizer.  And it is made with the Gift Bag Punch Box.  I watched a great video on how to make this from a site called Qbee's Quest.  You can watch it here.

But I want to show you today how to make a mirror effect on the purse decoration using your Stamparatus.  If you look at the flowers on the purse you can see that the leaf is on the left side and then on the right side.  How can you do that?


First, position and stamp the image on the right hand side of your card stock.

Next, stamp the image in the same spot on a Silicone Craft sheet.


Turn your card stock over and place it on top of the  silicone craft sheet.


Now, you have two flowers that are the mirror image of each other.  The card stock picked up the ink from the Silicone sheet.  Amazing.  I was so surprised at how easy this is.


I think I will made this little purses for my roommates at the Stampin'Up! OnStage event I will be attending in November. They might also make really cute table favors for Christmas at my daughter's house this year.  What else can you think of as ways to use these cute little purses?

Check out this video showing another way you can use the Gift Bag Punch Board.

Tomorrow is the last day for my Stamparatus week, and I will show you a card I made using the hinge technique.

Are you thinking maybe you need one of these nifty tools yet?

Till then,
Happy Stamping,
Sushi


Product List
Stamparatus
[146276]
$49.00

Thursday, September 13, 2018

Falling for Leaves-3-D Thursday-Card Holder

 Do you own the Envelope Punch board?  Do you use it?  Did you know it can be used for more than just an envelope?

You can make a card holder from the envelope punch board for just about any sized card you want to make. Check out this video to learn the technique.


So something happened when I made this Facebook Live and the video ended up sideways.  I think I have that problem resolved.  Bear with my learning curve.

 Thursdays will be 3-D Thursday.  These items will help you see something different you can make with your stamping supplies other than a card. Look for a new 3-D item each Thursday.

Tomorrow, I am calling Fun Fact Friday.  Do you ever have a hard time cutting out detailed thinlits?  I will share with you a new way to consider cutting thinlits out that will help you have more success.

Another great day, even though the temperature will be in the 80's it still has the feel of fall.  All the humidity has disappeared. So, I have had a bike ride, looking forward to a walk, and plan to be outside as often as I can.

Enjoy your day,
Happy stamping,
Sushi

Product List
<!-------- TAMS End --------- Product List

Monday, August 20, 2018

All is Bright Designer Paper-Envelope Punch Board

The entire envelope is made from designer paper.  I love doing this because both sides of the paper show up.

  I had such fun this past weekend in Champaign, IL at Vacation Stamping School.  About 100 demonstrators gathered together to share what we love with each other.  I felt privileged to be asked to share ideas on how to use designer paper.  We were encouraged to share ideas that could be used by New, Casual, and Avid stampers.
 I decided I would share ways to use designer paper.  I don't know about you but I love designer paper and seem to collect quite a bit of it.

My first ideas was to use the envelope punch board to make an envelope.  It takes a piece of paper that is 8 by 8 to make one standard sized envelope. This would be an easy project for a beginning stamper.

The directions are on the board and you can make over 60 different sized envelopes. That is amazing to me.  I love it and use it lots.  

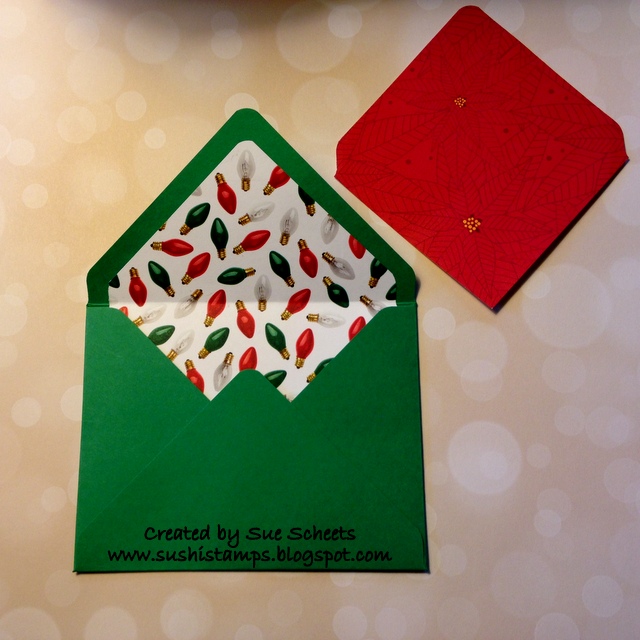
My second idea was to make a liner for a card stock envelope.

The inside of the envelope is the designer paper.  It is a great way to use up your scraps.
First of all, I made the envelope out of Call Me Clover card stock.
Then I used a 4 by 4 piece of designer paper to create the liner. This liner will fit in a standard envelope only.

Line the piece of designer paper with the left edge at  the 4 inch mark and punch.
Find the opposite corner, flip the paper over and lay that side on the 4 inch mark and punch once more. Your punches should be on opposite corners. Round the corner using the top of the punch board, and you are now ready to attach the liner to the inside of the top flap.

CAUTION:  Glue the top two sides only so that the liner does not buckle when attach to the card.

The third thing I want to share is how to use the Punch Board to make a card holder.  Tomorrow I will post a video showing how to make the card holder. Here are a couple of pictures to get you excited about the video.
I hope you can see that there is more than one score line on each side.
When the holder is glued together it will look like this.
Can you picture making lots of envelopes, lots of liners and lots of card holders with all your designer paper?  Don't have an envelope punch board?  You can order it here by clicking on the pictures below.  They will take you to my shopping area.

   Tomorrow I will be sharing a Facebook Live, as I will be doing every Tuesday at 9:00.  I will try to post it here after I have made the video.

Have a great evening.  Here is Illinois it is not quite so humid.  I plan to take an evening walk or bike ride after dinner. 
See you tomorrow,
Sushi


Product List

Thursday, November 23, 2017

Night in Bethlehem-Envelope Punch board box with cards

 Did you know you can make a box with the envelope punch board.  Here are the steps to follow.

1. Look on the punch board for your card size.  Mine was 3 by 3.

2. Add 1 1/4 inches to the paper size.  A 3 by 3 card need paper sized at 5 1/4 by 5 1/4.  So adding 1 1/4 would make the new size for the paper 6 1/2 by 6 1/2.

3. Find the score line for your card and add 1/4 inch to the score line.
3 by 3 score line is 2 5/8 so the new score line would be 2 7/8.

4. Make your first score and punch.
5. Move over 1" and score and punch again.  Continue like you would with an envelope only you are scoring and punch twice before turning 90 degrees.  

I think I have an idea for my next Youtube video.  One of my goals is to do more videos.  

Once your box is put together, then you can make some 3 by 3 cards to put inside the box.  Making some kind of a belly band will help the box stay together with having to seal it. What would you make your box and cards from?

Happy Thanksgiving one and all.  I hope today finds you with family and friends.  I am in Tennessee with my children and grandchildren and loving every minute.

Tomorrow I will share some ornaments I made for the tree using this great and versatile set.

Friday, January 13, 2017

Fix It Friday-Sealed with Love

One of the make n takes we made at OnStage in Madison,Wisconsin last November was this cute gift card.  I used a lot of the new items from the Occasions catalog.  At home using my Envelope Punch board, I made a matching envelope.

When thinking about Fix it Friday, I decided to try and take this cute design and turn it into a full sized card.

1. I enlarged the background paper so that is would fit on a full sized card.

2. I chose Crumb Cake for my card base because of the color of the accent piece on the card.

3. I added some Baker's Twine on the bottom of the card.  How did I get that twin around the fold of the card?  I punched a tiny hole in the fold and on the opposite edge so that the strands would be able to stay in place.

What a great week I had getting back into stamping and working with some products from the new catalog. 

 Next week I will be focusing on the Party Animal Suite.  I will use each item that is meant to coordinate. So, come back Monday to see what Miscellaneous idea I will come up with.

Have a great weekend and Happy Stamping!

Thursday, June 16, 2016

Painter's Palette- Template Thursday-New In-Colors

Sweet Sugarplum
Peek a Boo Peach
Flirty Flamingo
Dapper Denim

   Every year Stampin'Up! comes out with some new in-colors.  These are colors that are trending in fashion and crafts.  These colors stay for 2 years so we have plenty of time to use them.  

   I found a card similar to this one on Pinterest that was created by Beth Rush.  I made it a square card so I could use the new Envelope paper to make a matching envelope.  

Emerald Envy

  Which color is your favorite?  I was drawn to Sweet Sugarplum at first, but now really like them all.  Wouldn't it be fun to be on the team that gets to name the new in-colors?

Come back tomorrow to see a unique way to use this stamp set and how to fix it in many different ways.


Monday, February 15, 2016

Miscellaneous Monday-Spool of Thread card


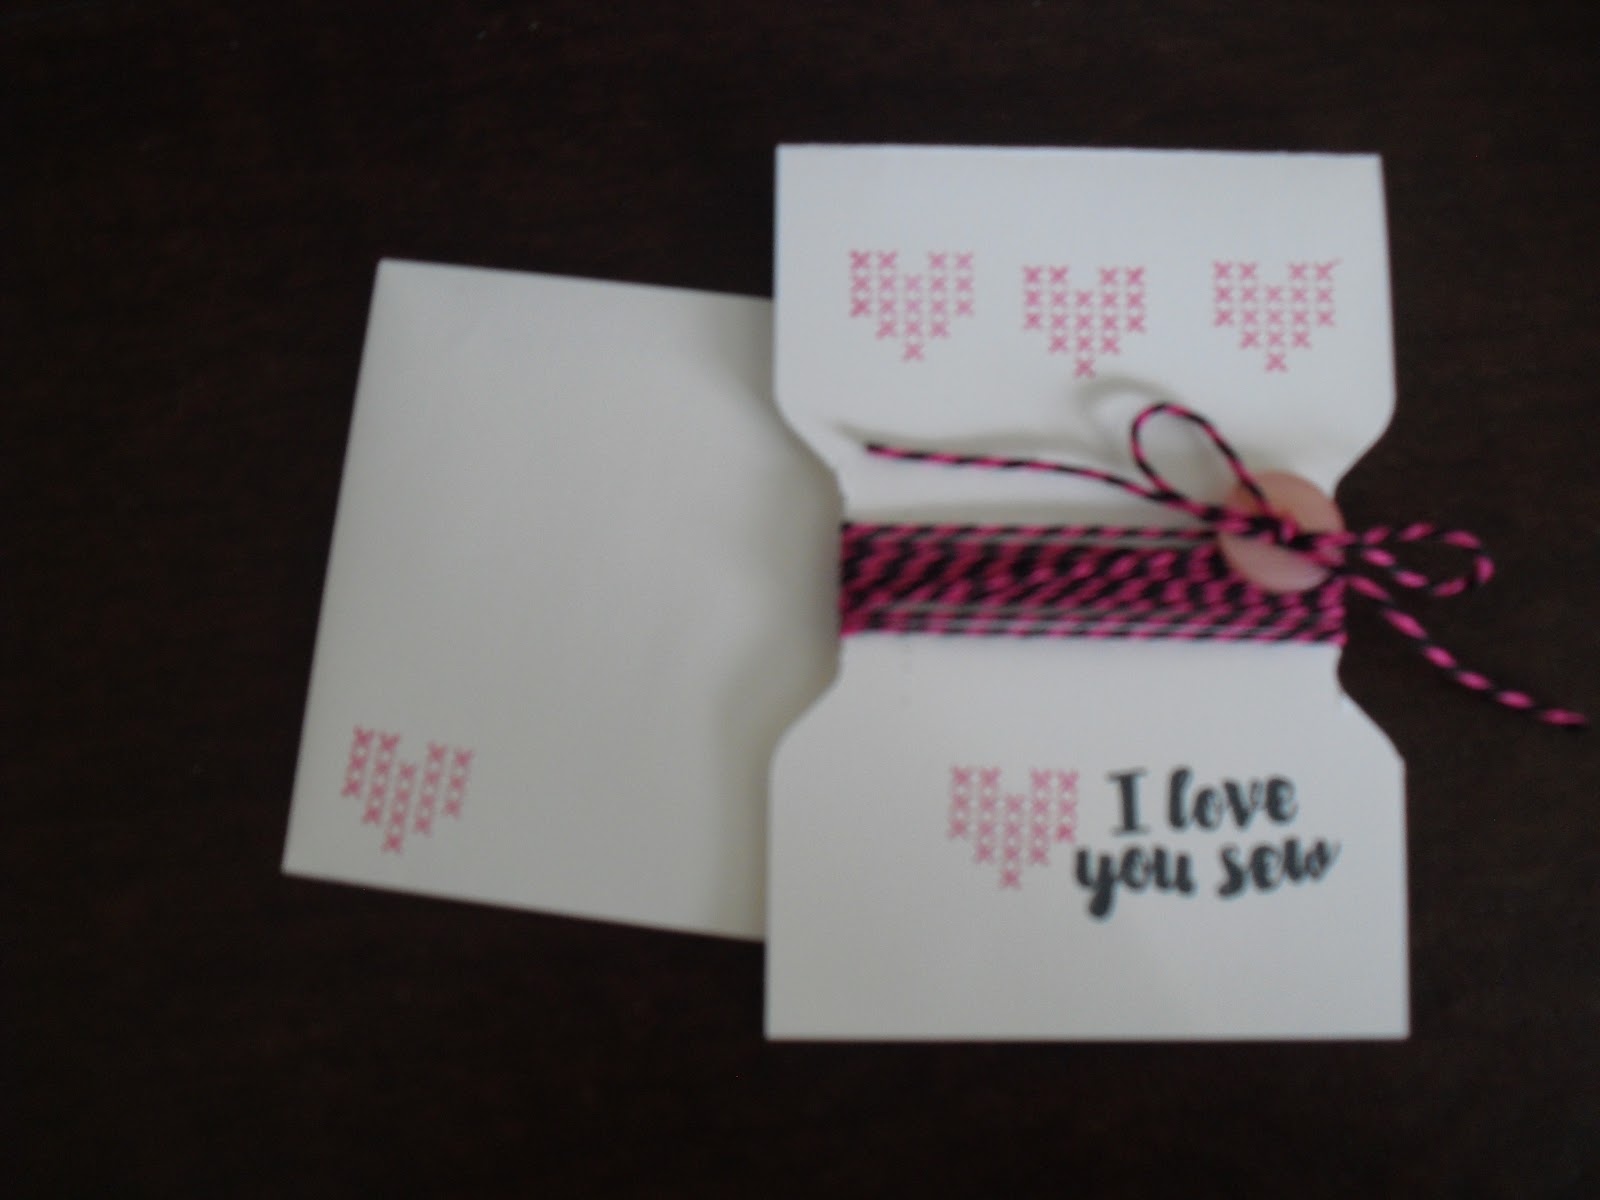
     Happy Valentine's Day, a day late.  I found this card on Pinterest and thought it was so cute.  I am a member of the American Sewing Guild and the Quilter's Anonymous group.  I think this card would be perfect to send to my fellow members for their birthdays.

1. Your cardstock needs to be cut 3 1/2 by 10 inches and then folded in half.

2. Place the folded cardstock at the 2 1/2 mark on the envelope punch board, then punch.

3. Flip the card over and punch again at the 2 1/2 inch mark.  You now have one side of your spool of thread.

4. Repeat on the other side of the card.  You need to use Whisper White card stock because it is light weight enough to punch both layers at the same time.

   I used the hostess stamp set Love You Sew from the Occasion catalog for the sentiment and the hearts. Can't wait to see the reaction to the birthday cards I plan to make with this set.

Come back tomorrow for Technique Tuesday.

Monday, September 8, 2014

Thank You Gift for Barb- Miscellaneous Monday


   July was time for my family reunion.  My sister Barb was the host this year.  She has made something for the hostesses the past 3 years and I wanted to make something for her.  What could I do I wondered?  Barb has sewn something for everyone and she is an incredible seamstress.  I decided to make her something that I can do, and that is to stamp.

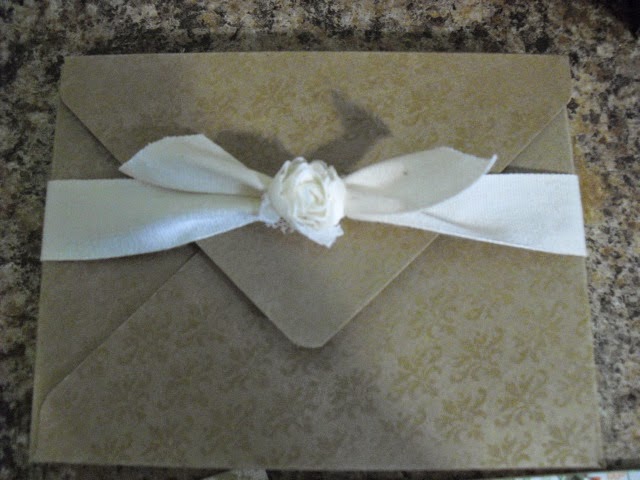
First I made an envelope box to hold several cards using the envelope punch board. The belly band was made using Burlap and Cotton ribbon with some retired roses and a cut out piece from the Sale a Bration designer paper.

 
Inside the box were 6 identical cards made from the Wetlands stamp set and a tiny envelope holding 6 sayings. I had placed dimensionals on the back of each one of the sayings so the cards could be personalized when they were sent out.  It was fun to make and a gift that symbolized something that I can do. Who would you make a gift like this for?


Monday, September 1, 2014

I'm Back and I've Missed My Blog


     Family seemed to fill my time this summer and I really loved seeing everyone.  But I missed my blogging and am really glad to be back.

    One event I love to hold every summer is my Hostess Appreciation Brunch.  I invite any one who is hostess at a party the past Stampin'Up! year, any club member, and any one who had a party order.  This year the number of people who attended the brunch was small, but we had a great time.

    Brunch was Oven Pancake, with fresh peaches and a choice of beverages.  Next was an auction of 3-D items from the past stamping year, and finally everyone made an exclusive make n take I never repeat during the year.

  First we made an envelope box using the envelope punch board. I used some extra retired designer paper that was just perfect for the project.


  Next we made some cards to go inside the envelope box using the Gold Soiree designer paper. Each person was able to personalize the cards with an initial.

 
  We each made 5 cards which fit perfectly into the box, then tied a ribbon around the box to keep it shut and act like a belly band, and finally added some of the wonderful retired roses we carried a couple of years ago as an accent piece.

   We each talked about ways to make this project for friends and family and ended our day with lots of fun and inspiration.
If this sounds like something you would like to be a part of, then contact me and we will talk about setting a date for your own private party with friends.


Sunday, July 13, 2014

Simple Sunday-Mason Jar Swap card


   Do you love finding new uses for items as much as I do?  Well, when I was looking at the Internet the other day I found a card that looked like a Mason Jar that was made using the envelope punch board.  What a find!!! That is a great simple card I will be swapping at convention this year.

New Supplies Used:

Moonlight Designer paper stack
Envelope Punch board
Feel Goods stamp set
Blackberry Bliss ink
Whisper White and Crushed Curry card stock
Linen Thread

   I have had a great week and half attending a Davis Family Reunion, and visiting with my granddaughter Abbi.  Yes, we stamped together. She made some adorable cards for her family and silly me forgot to take pictures.  Now, I am in the last stages of getting ready for convention.  Can't wait to see what I will learn this year.


Thursday, April 17, 2014

Envelope Punch Board Card Box


     I love learning new things.  At a recent visit to my brother and sister-in-law's home, Jennifer taught me how to make a box using the envelope punch board.  The box is just the right size to hold several hand made cards.  Don't you just love seeing the Natural's Composition designer paper used for the box?  I never would have thought of that myself.  Jennifer told me that she actually learned how to make the box from Becky Kittaka who is a demonstrator from Ohio. Here are the directions on how to make a similar box.

1. Cut a 9 inch square of whatever paper you want to use for your box.

2. Lay one side on the 3 1/2 inch mark on the punch board and punch and score.  Do not turn your card stock yet.  Move the card stock so it is now on the 4 1/2 inch mark and punch and score.  This is the last time you will need to measure your box.

3. Move the card stock to the left and line up the pointer part of the punch board with the first score line you come to.  Punch and score.  Now move to the second score line on the same side and punch and score once more.

4. Continue doing this on all sides of the box making sure to punch and score two times on each side.

5. Fold your box together, making a tiny snip on the bottom score line to allow the box to fold easily.  I like to use sticky strip to put my box together for a great hold.

6. Tie a ribbon around the box to keep the lid closed and decorate as you wish.

   Have fun making your own box.  Who could you give some hand made cards to in your own handmade box?

Wednesday, September 25, 2013

Wednesday Wow- Envelope Liners


     Just when I thought I was excited enough about making envelopes I watched Mary Fish's video on how to make an envelope liner.  Now, I just don't want to stop.


    For years I made my  own envelopes from magazine pictures by tracing around a regular envelope that I had opened up to make a pattern.   Now not only can I make these envelopes much faster, but I can also line them with coordinating paper to make a sturdier product.
 
 
     What will you make your envelopes and liners from?  Send me a link to your envelope. I'd love to see what you have done.

Tuesday, September 3, 2013

Little Scrap Envelope


     You've probably heard about the new Envelope Punch board that helps you make over 60 different sized envelopes.  Check out this video.  Well, I had my stamping friends make an envelope at the Christmas in August class.  The envelope used an 8 by 8 piece of designer paper.  That left me with a strip of paper that was 4 by 12.  Not one to waste paper, I decided to try and make a tiny gift card with matching envelope out of this strip. Here's how.

1. Cut a 4 by 4 square.  This will be the envelope.  Your first mark on the new envelope punch board will be at 2 inches. The rest of the punches and score lines will be as directed for any sized envelope.

2. The matching card to be inserted in the envelope measures 4 by 2 inches.  When folded in half it will fit nicely into the envelope.

It is a great feeling to find a way to use up all the scraps from a project.  Now, I have lots of gift enclosure cards to share with others.

What would you do with the extra DSP?