Showing posts with label punch. Show all posts

Monday, September 24, 2018

Stamparatus-Make it Simple Monday


    When I first saw this stamp set, I wondered how on earth a person could line up all the parts and have it look decent. Well, the Stamparatus is how that can happen. I have decided to acquaint you with the Stamparatus this week and show you all the wonderful things you can do with it.

I am calling this simple because you use the Stamparatus in the most simple way to create the saying.


Here is a great video that shows you all that the Stamparatus is capable of doing.


Set up the Stamparatus by attaching each plate.

1. First decide on the size of card stock you want to stamp on and place in the stamp Stamparatus.  You need to use the pad that comes with it along with some kind of scrap paper on top.

2. Decide where you want to place the card stock.  I usually place it in the upper right hand corner.  Anchor it with one of the magnets.

3. Place the outline stamp upside down where you want it on the card stock. Then, pull one of the plates down and it will pick up your stamp. Ink up the stamp and bring the plate down and up and your outline in now on your card stock. (When I use this at Cedarhurst, an assisted living facility, I tell the ladies to shut and open the door.

4. Decide where to place the second stamp, place it upside down and use the top plate to pick it up and stamp it. 

Now, you are wondering, what about the 3rd stamp?  This is the great part of the Stamparatus.

5. Hold one of the plates at a 50 degree angle, remove it and then turn it over and place it back where it came from.  

6. Now you can place the third stamp on the card stock upside down, pick it up with the plate you switched, ink and stamp.  You did not have to remove the stamp and replace it with another, and now you can make several cards with this stamp because each stamp remains in its spot.

If you like watching videos, here is a Stampin'Up! video that shows additional ways to use this stamp set and the Stamparatus.


I hope you can now see why I chose this card as a Simple card.  Tomorrow, I will show you how to create a template that will enable you to use the Stamparatus to make a wreath.

I hope you all had a great weekend.  My husband and I usually have pretty simple quiet uneventful lives, but this weekend we went to the New Chicago Brass Band concert on Friday night, and then last night to a show where the presenter impersonated Patsy Cline.  Great music both nights and fun to get out.

It has started to become fall here, my favorite season.
I hope you enjoy your day what ever the weather.
Happy Stamping,
Sushi

Don't forget.... 

to follow this page, and if you want to know when I post, sign up for an email notification. 

 If you live in the Jacksonville area, I will be glad to add you to my email list.  Just sign up on the right hand side of this page.

If you want to duplicate this card, you can click on any of the items below and you will be connected to my store.  


Product List
Daisy Punch
[143713]
$18.00
Stamparatus
[146276]
$49.00
https://www.youtube.com/watch?v=B2o3rBfUiGw

Thursday, June 21, 2018

Call Me Clover-In color week


 I am thinking this bright green will be great on Christmas cards.  One of the things I enjoy doing is using stamps to create a background on a card.  

I featured the Rooted in Nature stamp set for this card.  I was glad to see Lovely as a Tree still in our catalog.  Since I have been with Stampin'Up! for 15 years, I was around when it first came out.  Back then the only choice was wood mount stamps and we had to cut out our stamps before we could mount them.  Because of that I can see what year Lovely as a Tree came out.  Do you want to guess? 2001.  At that time the stickers you placed on the stamps let you know what year they came out.

When I saw Rooted in Nature I fell in love because to me the stamps look almost like photos and have more options that Lovely as a Tree does not have. And there are several framelits that will cut out the stamped images.  So, I see a place for both in my stamping.


I used 2 other new items on this card.
  -Detailed trio punch for the bottom corners of the card
  -Polka Dot tulle ribbon. This can be colored with markers, reinkers, blends but I decided to leave mine white as a contrast to the Clover.

Tomorrow I will feature the last in-color for the next two years, Blueberry Bushel.


Product List
Thursday, October 26, 2017

Halloween Week-Spooky Night

  Would you  believe me if I told you this card is one of the easiest I am posting to make.  All you need is Spooky Night designer paper, the cat punch and the big shot.  There is only one tiny saying that uses ink. I was inspired by a card posted from the blog called createwithchristy.blogspot.com

The cat, the tree brand, the pumpkin, and the paper on the lower part of the card are all from the designer paper.

The window and pumpkin are cut out using the big shot.

The cat and the saying are cut out with punches.

  Not much easier than that.  I could easily make this card for each one of my 11 grand children.

  Tomorrow I am going to feature a Sushi Original.  I did not go to Pinterest for the idea, just used a Faux metal card base I made with my downline a month ago.  Intrigued, come back tomorrow to check it out.

Tuesday, January 12, 2016

It's My Party Treat Purse


   I made several of these darling gift card holders for Christmas.  When I was thinking of what I could use for Valentine treat holders I thought the purse could hold a mini Hershey bar ( there goes that chocolate obsession again).  I found the directions and a really great video on Jackie Topa's website.  Click here to view the video.
  I made the purse from one of the papers in the It's My Party designer paper stack and the flower from a paper in the Love Blossoms paper stack.  It was great to find how they went together so easily.
   What would you put in this cute purse?

Sunday, November 15, 2015

Tree Punch for Christmas

  Sometimes I use up retired supplies when I take cards to Knollwood with me.  The ladies that stamp with me are in their 80's and love the class but would never order any supplies.  So, this is the perfect place to make use of retired cardstock.  Last year I had leftovers from the Christmas paper stack.  Here is the card I came up with to help use up that leftover dsp.

1. I pre-embossed the white cardstock to make that part easier for the ladies.

2. I showed them how to use a sponge to add color to the embossed image and to the snow.

3. They had fun tearing the cardstock to make the mound of snow on the ground.

4. They love using our designer paper because they can choose which ever side of the paper they like the best.

   The ladies have really nice looking Christmas cards and I have very little of my retired Christmas paper leftover.  Good for both of us.

Thursday, November 5, 2015

Six-Sided Sampler fun


I love the colors in this card that I made at Robin's fall class.  Do you recognize some old friends in this card?

Background stamp Gorgeous Grunge.  I remember getting this stamp at convention one year and thinking to myself, this is one stamp I know I'll never use again.  Well, I guess I shouldn't think that way because I use this over and over again.

Six Sided Sampler and matching Hexagon punch in various layers is the next layer of the stamp

Finally Bold Butterfly, silver glimmer paper, and a rhinestone add the bling that creates a great looking card. 

Don't you love the Greys and Lost Lagoon colors together.  Thanks Robin for such a great card idea.


Monday, November 2, 2015

Flurry of Wishes- October Christmas card


     I love snow, but am not ready for it yet, so I can at least stamp snowflakes.  This card was the Christmas Through the Year card that was featured in October.  I was easy and featured a color combination I usually don't think about at Christmas.  The general consensus was that everyone liked the combo even thought they did not think about it either.
    Don't you love the accent piece. 

First off the new Snow Flurry punch made it easy to create the snowflakes.

Secondly the fact that both snowflakes are on one stamp made it faster to stamp the background.

Finally, using a sharpie to color the White Perfect accent purple to coordinate with all the colors of the card.

   So let it snow, but just on a greeting card for now.

Wednesday, November 27, 2013

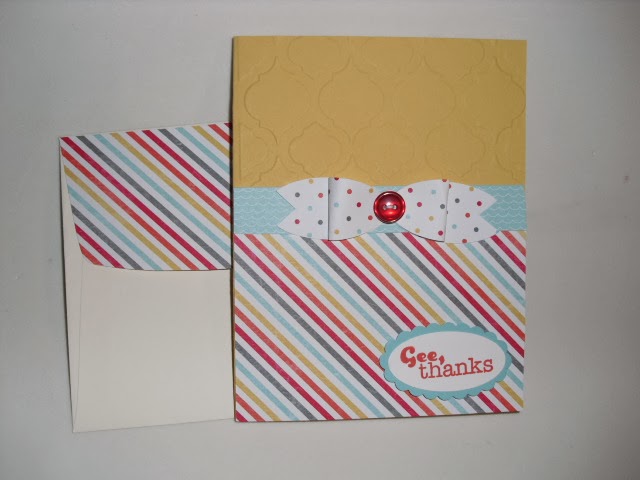
Wednesday Wow-Oval Punch bow


     Want the look of a bow, but don't have any ribbon?  Well, all you need is an oval punch and some cute designer paper.

1.  Punch out 4 ovals of the same paper.

2. Using a glue dot fold two ovals in half and secure at the pointed end with the glue dot.

3. Layer the remaining two ovals together and cut a notch at one end.

4. Create your bow and put a button in the middle to cover the glue dots. 

How simple and cute is that!!!!

Friday, July 26, 2013

Look What a Punch can Do

Turn the Curly label punch into a purse


     Wouldn't this be a cute card for a teenager, or a little girl?  The Curly Label punch has two sides, a long and a short.  If you fold the long layer down about 1/4 inch you have the base of your purse.  How do you make the handle?

1.  Punch the large oval punch making sure you have room on all edges to punch another shape.

2.  Place the scalloped oval punch around the hole that is left from your first punch.  Center it and then punch.  Now you can cut what is leftover and you have two handles.

Easy Peasy!

Another great way to use Designer paper and take advantage of the special that ends July 31st.  Buy 3 get 1 free!
 

Thursday, December 20, 2012

Snow for Christmas (Just not too much)


     I don't know about you but I am feeling a little bit of pressure to finish all the things I want to before my kids come home.  When I had a headache for three days, I stopped and thought hard about things and decided the most important thing for me about Christmas this year was to enjoy the family that is coming to visit.  My kids (4) and their families only come home for Christmas every 2 years so I do not want to be so stressed out by trying like a madwoman to get everything done that I can not enjoy them. So, here's to enjoying what we do even if we do not complete all the items on the list.
     This card was the make n take for one of the Jubilant Butterfly meetings.  Here are the reasons I like this card.
   1.  The image is from one stamp that you can buy individually.
   2.  The colorful background is made using strips of Holiday Cheer designer paper.
   3.  There is a little bit of glitter on the snow using the Silver Dazzling Details.
   4.  The card can be completed in under 10 minutes.
What are the reasons that you like this card?
Supplies needed:
Holiday Cheer designer paper
Whisper White, Cherry Cobbler, Gumball Green card stock
Silver Dazzling Diamonds
Frosty Friends, Sweet Essentials stamp sets
Owl punch ( heart)
Gumball Green 3/4"stitched satin ribbon


Sunday, December 16, 2012

Stampin at Knollwood


     Once a month I go to a local Assisted Living Facility and make cards with a wonderful group of ladies.  Most of the ladies who come are in their 80's and it feels like I am once again with my mom when I go.  I have learned a few things about working with Seniors from the four years I have been going to Knollwood.
    1.  Simple is best.
    2.  It is hard for most of the ladies to use the punches, so I prepunch everything that I can ahead of time.
    3. When stamping a saying, stamp on something that can be attached onto the ,in case something ends up being crooked, it can be re stamped.
    4.  They love to place a stamped by you stamp on the back of the card.
    5.  They will love whatever I bring for them to make.
    6.  It can change my attitude in a positive manner for the rest of the day.

     I prepunched the ornament on the front of the card holding both the accent sheet and the card front together as I punched.  The ladies stamped the inside ornament and I punched it out for them.  The inside ornament was glued into the punched out hole on the front and therefore perfectly placed. A simple but cute card.
Supplies needed:
Cherry Cobbler, Whisper White card stock
Old Olive ink
Ornament punch
Candlelight Christmas designer paper (Holiday catalog)
Rhinestones
Cherry Cobbler seam binding

Wednesday, December 12, 2012

A Delightful Christmas Tree from Alison


     At a recent gift exchange at the Jubilant Butterflies meeting in Springfield this is the gift I received.  I loved it as soon as I laid eyes on it. Here is the story of how it became mine. We each drew a number and had our pick of the packages in the center of the gift table.  I was lucky enough to pick the number 3.  So, I knew there were only two other people that could pick this great gift before me. The person with number one chose a different gift and there was no one that had number 2, so I knew this tree was mine. 
     I found out that Alison made the tree and she did an awesome job.  Here is how she described making the tree to me.  She punched out scalloped circles, glued them in place on a styrofoam tree and actually used an entire package of designer paper punching out all the circles.  In between some of the colorful layers she has added a layer of Front Page designer paper (looks like the pages of a book).  What is your favorite part of this tree? and do you agree with me that I got a wonderful gift?

Sunday, December 9, 2012

Peek-a Boo for Christmas


     My friend Linda and I get together once in a while and made cards. We wanted to use the Peek-a-boo die for the Big Shot and found a really cute card similar to this on the internet.  I hope you can see that you open a door for each of the shapes and a Christmas design is underneath.  This is a fun card to send out to kids.  The window punch was used to create an opening in the designer paper and the saying was stamped inside the hole. On what kind of cards would you love to see a peek-a-boo window?
Supplies needed:
Whisper White, Silver glimmer cardstock
Polka Dot Parade designer paper
Peek-a-Boo frames die
Jolly Bingo Bits, More Merry Messages stamp sets
1/8" taffeta ribbon, old olive
Merry Minis punch pack


Thursday, November 29, 2012

Not Just for Tea


     One of the things I enjoy doing on Sunday morning is relax with a cup of Chai Latte tea and plan out my week.  The tea is one of the International Coffees and comes in a tin.  Now, I am a saver, note I said a saver not a hoarder.  I just can not make myself throw out the tins so I save them.  I decided this is the perfect time of year to make a cute container for a gift for a friend.  So with a little stamping, cutting and punching I came up with this design.  What would you put inside this cute little container?  Come back tomorrow to see what I decided to put inside.
    Would you like one of these for yourself, then come to my Anything But a Card class on the weekend of December 7th and 8th. Check out my website for the time and place for this class.  www.sushi.stampinup.net
 
Supplies needed:
Snow Festival Designer Paper
Scentsational Season stamp set
Holiday Collection Framelits
2 1/2" circle punch