Showing posts with label Occasions catalog item. Show all posts

Thursday, March 21, 2019

Technique-Stamparatus Multiple Images


Check out this video for technique #2 using the Stamparatus.  You will learn how to stamp layers of color using the Stamparatus.  If you missed the first video I posted last week click on this link to take you there.

Come back tomorrow for Fun Friday, where I show you how to color an image using different techniques.  It's amazing how different each technique looks.

Till then,
Happy Stamping,
Sushi


Product List

Monday, February 26, 2018

Magical Day-Miscellaneous Monday


  I made it!!!!  Electricity went out for several hours, recovering from a stomach bug and I still am able to get my blog entry for today online.  Yeah!!!

I can't wait to share the cards I have made using this fun stamp set.  


 Today's card uses items from the Myths and Magic suite from the Occasions catalog.  

1. The designer paper is called Myths and Magic and has some sparkly stars in the background. 

2. The Unicorn is stamped and cut out with a matching framelit.  I had to use some Wink of Stella on that cute little animal to make him sparkle also.

3. The saying came from the stamp set in the Annual catalog called You are Remarkable.  Wouldn't you agree that a Unicorn is remarkable?

4, The thin strip of Dazzling Diamonds glimmer paper and the heart ad d the last bit of glimmer to the card.  

Tomorrow I will share I card using the masking technique and the dragon from the stamp set.

Product List

Tuesday, February 20, 2018

Picture Perfect Birthday-Technique Tuesday

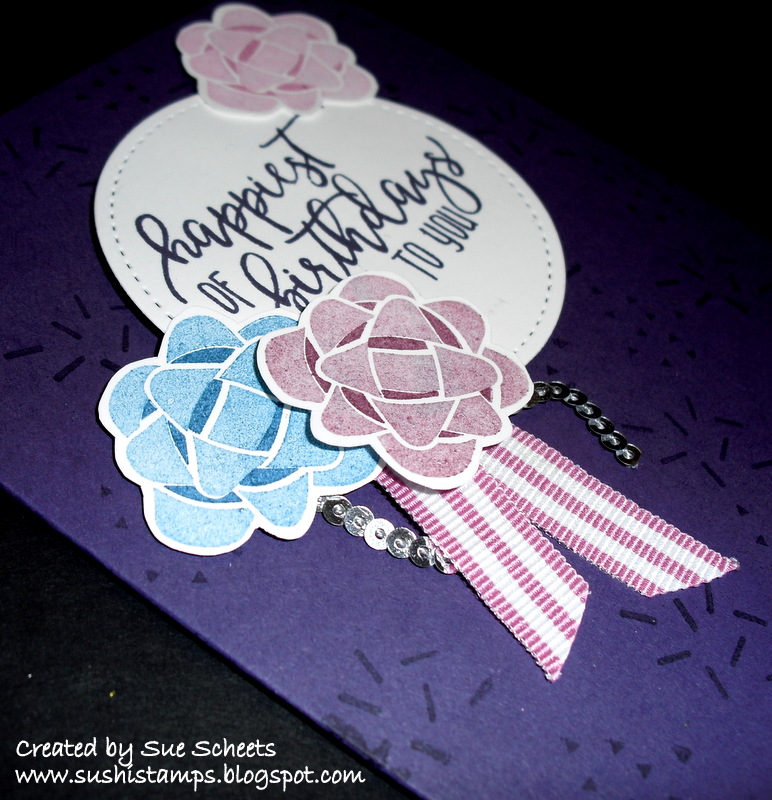
Don't you just love this cute little bow!  It is made using the technique called two step stamping.  What exactly does that mean?

1. First you stamp the darkest color first.  This makes it easy to look through a photoplymer stamp to see exactly where to place the second stamp.

2. Next you use the very same color but stamp it on an extra piece of paper first before placing it on your card stock.

3.  Look through the stamp and find the already stamped piece.  Turn your stamp until the stamps line up perfectly, then stamp and you now have a really cute, complicated looking bow that was made in two easy steps.


Do you like the look of this stamp set?  Check out some of the other  cards I found on my Pinterest page featuring the Picture Perfect Birthday stamp.  Can you find my inspiration for this card?

Tomorrow I will share a WOW card made with this same stamp set.  Till then have some fun stamping.


Monday, February 19, 2018

Picture Perfect Party designer paper-Miscellaneous Monday

Do you like to make a simple easy card?  Well, this card is very easy and here is why.

1. Most of the card is designer paper.

2. There is a simple saying on the card that can be cut out using the Big Shot.

3. A tiny little bow sets off the card.


This is one of the cards that will be featured in my Everything Birthday Card Cafe to be held on March 5th.  So, if you live anywhere near me sign up and come for a fun afternoon or evening.  Need more details, then contact me at sue.scheets@gmail.com.

A new week, and a new chance to win a card by leaving a comment on my blog.  Hope to hear from someone this week.

Tomorrow I am going to show you a card made with a two step stamp.

Product List

Thursday, February 15, 2018

Template Thursday-Brusho with Lots of Lavender


  Can you guess which technique I used to create the background of this card?  If you guessed dry to wet, you are correct. 

Stampin'Up! sells 5 Brusho colors.....
   Prussian Blue
   Yellow
   Moss Green
   Brilliant Red
   Gamboge (Looks orange to me)

Some of the colors have flecks of additional colors in them.  Check out the background of this card I posted a couple of weeks ago.


If you look closely at this color, it is green with some flecks of darker green or brown in it.

For the background of today's card I used Prussian Blue and Yellow and  when they mixed together in spots I got a deeper green.  It is great fun to see what happens when you mix colors together.

The stamp set on today's card is another set that is free to you with a $50 purchase.  I stamped the image in Black ink, and then colored it in with our Stampin' Blends. 

So, if you purchase blends, water color paper, and  Brusho, you too would have enough $ to earn the Lots of Lavender stamp set for free. Sound like a great idea, then shop in my store.  Order the supplies that you will pay for first, then add the Sale a Bration stamp set.

Tomorrow, is the last day for my Brusho week.  Stop by and learn how you can actually water color paint with Brusho and create a wonderful background for the Waterfront stamp set.

Product List

Thursday, February 8, 2018

Lots to Love Box-Bigger Box

Can you believe that this box is made from the Lots to Love Box framelit.  It looks too big right?

A look at the top of the box might help you see a little bit more about how it was made.  See how cute it looks all folded together.


Here's how I made the box.

1. Cut 4 box shapes to start with.

2. Place glue, I like to use the tear and tape adhesive, on the side panels of just two of the shapes.

3. DO NOT FOLD THE TOP FOLD OF THE FLAP.

4. Attach all 4 box shapes together until you have a long box open at the bottom.


5. Cut a square piece with the measurements below. Cut out the tiny square on each corner after scoring 1/2 inch on each side.

6. Attach your adhesive on the little flap on each side and fold these sides in.

7. Secure this piece on the bottom of your box.

  Now, you have a much larger box and it went together quite easily.
What could you put in these boxes?

some lotion
Sanitizer
stuff it full of candy-chocolate of course
Maybe put some cookies inside
Make a goodie bag for your downline or stamping friend with ribbon, and accessories to use on projects of their own.

  What would you put in a box like this?  

What is left that you can make with this box framelit, well, come back tomorrow to see how you can make a small treat holder with just one box shape.

Monday, February 5, 2018

Lots to Love box with cards


Do you love making a box?  The Lots to Love framelit set has a great box pattern.  I will be featuring it this week and showing you several different ways to use the box pattern.  Today I am just going to show the box as it is used in the framelit set.


 You cut out two of the box patterns and glue them together to make this cute small box.  It can be used to hold a gift card, some candy or some cute note cards.

I punched a circle from the designer paper and inserted it in the inside of the envelope to be matchy.
I have used the Bubble and Fizz designer paper that is a free Sale a Bration item to make these cards.  I also used the Whisper White Narrow Note cards and envelopes to make the cards.  These can not be sent as is in the mail, but could be placed in a regular sized envelope.

This is what the front of the envelope looks like.  


 All 4 of these cards and envelopes will fit nicely into the box.

Tomorrow I will show you how to use one half of the box pattern to make a flat envelope that can hold a gift card.