Showing posts with label framelits. Show all posts

Thursday, July 5, 2018

Animal Outings-Template Thursday


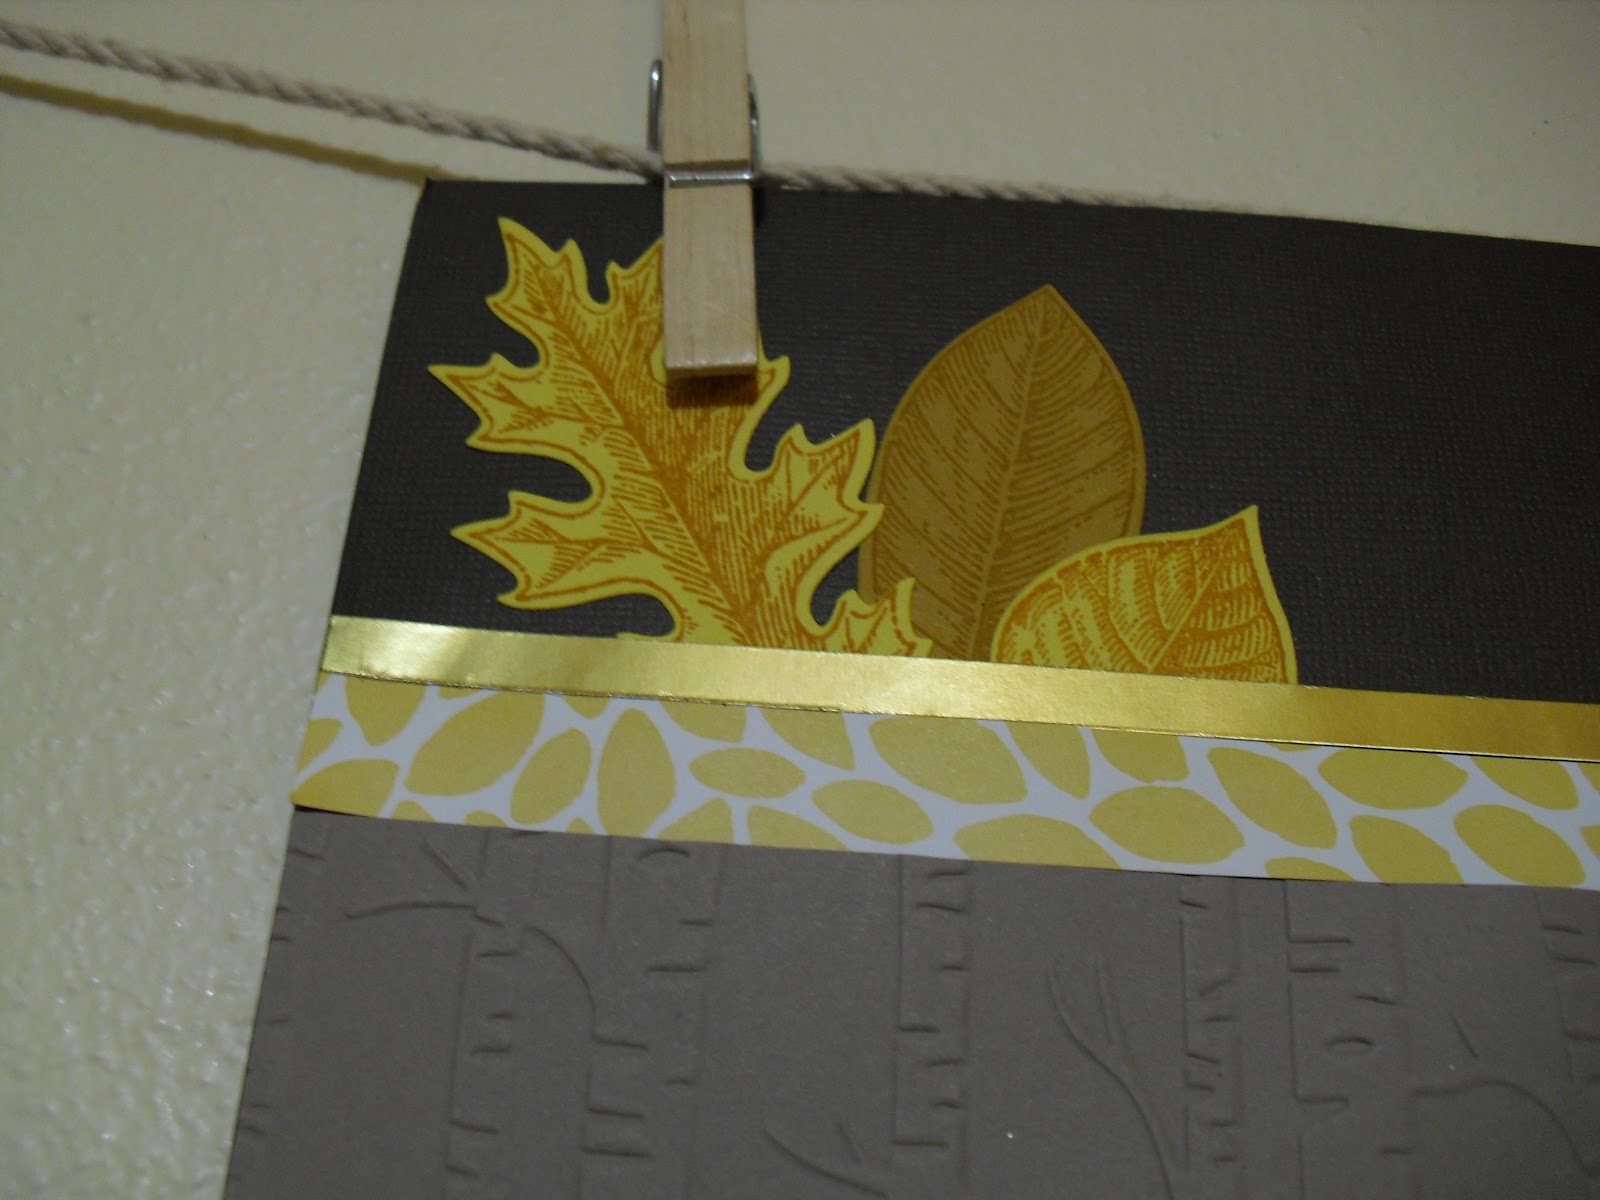
Isn't this background great?  I decided to cut it out several times and use it with the giraffe image for my template this week.

Simple Card
Framelit image for background
One of the animals
Saying

The card base is Soft Suede with a strip of Crushed Curry behind it.


The framelit is the one that looks like the fur pattern on a giraffe.
So, of course I used the giraffe image.
I thought Wild about You would be a great saying to include on the card.


For my second card I took the leaf stalk and cut it out 5 times. It is cool because not all the leaves cut out, some just partially so you can lift them off the paper.


 I backed the Call Me Clover cardstock with Lemon Lime twist as a contrast.

I used the cute little frog images and had them perched on the leaves.  I figured these could be some kind of a water plant. I only stamped part of the branch these frogs are perched on and cut the frog off separately.

Since there are 3 frogs, I decided to use the saying Thank You Big Time. Little critters, big saying.

Tomorrow, I will share a fold I found by watching a video from Jennifer McGuire.  I love watching her videos.  She has great ideas that are using Stampin'Up! products, but easy to duplicate.

Find some time to create something today.
Happy Stamping,
Sushi


Product List

Wednesday, September 7, 2016

Jar of Love-Wednesday WOW

 Where's the Jar you might ask yourself?  Well, the great thing about this stamp set is you can use it for more than just the jar. I loved this version of the stamp set that I found on Pinterest.  It was created by the person whose blog is called Stampin days.

1. I stamped and cut out 6 of the leaf stamps, and 3 of the flowers.
You might think I have a counting problem, but the flowers are one stamp and the thinlits cut them out together.  Since they are so small that is a great thing in my book.

2. Underneath the wreath is a tiny wreath I made using the layered circle.  I knew I would never be able to make a great looking circle without some kind of a guide.

3. Finally I made a bow out of the gold baker's twine from the Baker's Twine Trio pack found in the Holiday catalog.  Don't have an Holiday catalog yet, let me know and I will have one sent to you. 

  This was fun to make and a WOW to look at.  Come back tomorrow to see different ways to make shaker cards using this set.

Thursday, December 24, 2015

Sparkly Seasons


     I thought this ornament turned out to be quite perfect for a Christmas card. To make the ornament I used

Circle framelits
Sparkly Season stamp set
Cucumber Crush ink and cardstock
Black Glimmer paper
Holidays Fancy Foil Designer Vellum

   Can't you just hear someone singing Deck the Halls when you look at this card.

Tuesday, December 22, 2015

Happy Scenes


     You know how when you look through a catalog your eyes are drawn to certain stamp sets.  Well, this set Happy Scenes was one that I liked as soon as I saw it.  I found this card on Pinterest and though it looks like it would be hard to make it really isn't if you make it in stages.

1. Emboss the brick background.

2. Stamp all the images at the same time on green, red, and white cardstock.  Then cut them out using the matching framelits from the Festive Fireside framelit set.

3. Cut out the window and ledge using the Hearth and Home thinlit set.

4. Stamp the saying on the window ledge and assemble the card.

    Now doesn't that sound easier when you break down the steps?

Friday, November 13, 2015

Last Year first, now This Year


    I needed another quick card idea and found this card I made last year for the ladies that stamp with me at Knollwood.  I liked how it used designer paper and a simple image.


Here are the changes I made....

Merry Moments designer paper
Peaceful Pines stamp set and matching framelit
Small Scalloped punch

   I love how this stamp set includes a stamp to place a string of lights on your Christmas tree. 


Thursday, November 12, 2015

Something New from Something Old


   I was looking for Christmas card ideas from the homemade cards I received last year.  I loved the use of a variety of designer papers on this card that Clara sent me.  So, I decided to duplicate it using current items from Stampin'Up!.


     Here is what I used to make the same look, with currents items.

Designer paper is Merry Moments from  the Annual catalog.
The label is from the Deco Labels Framelit collection
I used a scalloped circle punch that Clara used.
Candy dots 
Merry Christmas saying from the stamp set Versatile
Christmas

    Any time you need new ideas, just check out some old favorites to get you started.


Wednesday, September 23, 2015

Woodland Embossing Folder Scrapbook page


     When I saw this layout on Rachel Tessman's blog I knew that I had to use it for my September layout.  One of the outstanding features of this layout is the use of the Woodlands Textured embossing folder.

Once the image was embossed, an ink pad was gently dragged over the embossed image.


The loops of gold cording and the Into the Woods elements add some great finishing touches.

The Vintage leaves and matching Leaflet framelits make great corner accents.


Thanks Rachel for such a great layout idea.


Wednesday, February 11, 2015

Balloon Bash-Wednesday Wow


     Have you ever learned how to do something and then since you don't do it again forgotten about how much fun it was?  I feel that way about shaker cards.  I made my first card several years ago where I have to carefully place dimensionals all around the edge of the open area.  Inevitably I would leave a gap and all my glitter would fall out.  Well, SU has a wonderful tool that I forget about that makes this so easy. The tool is called Shaker Frames.  They come in 6 different circle sizes and are very easy to use.

1. First punch a circle the size you want your window to be.

2. Next place a piece of window sheet behind this circle that is bigger than your circle.  This will keep your glitter inside the shaker card.

3. Attach your shaker frame on the back and against the window sheet.

4. Fill your frame with whatever you want to shake.

5. Attach the front of your card to the main card and once it is sealed you can shake to your hearts content and nothing will spill out.

Occasion catalog supplies used:

   Birthday Bash designer paper
   Balloon Bash stamp set
  
Other supplies used
    Shaker frames
    Circle punches
    Crushed Curry, Mossy Meadow, Night of Navy, and Calypso Coral ink pads
    Oval punch
    Bitty Banners framelit
    Sketched Birthday stamp set
    Confetti star border punch
    Whisper White, Night of Navy, and Calypso Coral card stock


Sunday, January 19, 2014

Fill Your Cardbox with Love


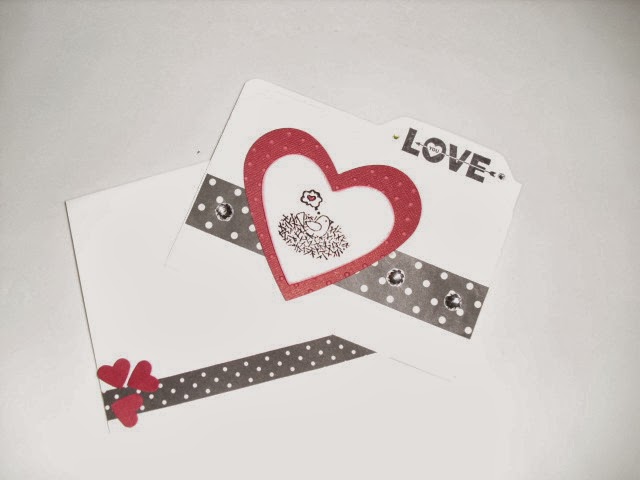
     Are you ready to think about Valentine's Day?  It is just around the corner.  Tomorrow in my Fill Your Cardbox with Love class we will be creating cards that can be used for Valentine's Day.  This was one of the cards I received at Leadership as a swap.  I changed up a few things, but kept my favorite parts of the card.

1. Black and Red, I love that combination.

2. For the Birds stamp set.  Each image is so cute.  I think this might have to be the next stamp set I use for a set sampler.

3. Hearts framelits.

   Who would you send this card to? If you like this card, then please share it.

Tuesday, January 14, 2014

Banners everywhere


     This saying from Just Sayin has some thought bubbles that you can make come down from the saying.  I tried it and did not like the look.  So, since the card already featured some banners, I thought about adding another saying from the Itty Bitty Banners set.  That just supported all that I love about the Stampin'Up! products.

1. Items within a set coordinate so well together.

2. Items from one set to another can coordinate well together.

3. Without too much effort trying to find the right match you can make great looking cards.
    

Monday, January 6, 2014

Just Sayin stamp set


     When I got back from Ohio helping out my daughter I had 3 boxes full of Stampin'Up! goodies waiting for me.  I finally have had the time to start playing.  I decided to focus on one stamp set at a time and explore the different ways I could use it.  So, my first set is called Just Sayin and has a matching set of framelits called Word Bubbles.  This was the first set that jumped out at me when I looked through the Occasions catalog. I also decided to focus on one set of designer papers for these cards.  I chose the paper called Sweet Sorbet, that is free from Sale a Bration with any $50 order.  This wonderful event starts January 28th, but as a demonstrator I was able to preorder items to create some samples.  Finally since I was not sure what to start making I decided to try another Freshly Made Sketch. Can you see how I changed the sketch a bit?

1. I layered the banners instead of stacking them. I used the banner set from the Occasions catalog to create the banners.  Easy Peasy.

2. I used the Just Sayin stamp set for my saying. It was so easy to cut out because of the matching framelits.

3. I applied texture to each one of the colored banners to add some interest to the card.

4. Finally I added little hearts from the owl punch and little black dots to echo the black dots in the DSP.  I used the dots from the cupcake punch.  They were just the size I wanted.

   This challenge got my creative juices flowing.  I made several cards using similar materials and will show them in the next few days.

Wednesday, June 26, 2013

Chalk Talk Tag


    The final project stampers made at my Open House on Sunday was a gift tag using the Chalk Talk and Secret Garden framelits.  I love using the framelits to cut out a stamped image.  Now that we have the magnetic platform the process is even easier than it was before. Here are the items we used to make this gift tag.

1. Chalk Talk framelit

2. Secret Garden stamp set and matching framelit

3. Magnetic platform for the Big Shot

4. New colors, Crushed Curry, Bermuda Bay, Pear Pizazz, and Smoky Slate

  I had a great time at the Open House sharing new items with my stamping friends. Now, on to new classes thanks to ideas shared with the survey attendees filled out.

Monday, March 25, 2013

Dress Up Framelit Leftovers


     Are you a person that likes to use up all your little scraps?  When I was making a recent card using the DressUp framelits, I noticed that the paper that was left over had a great look to it also.  So I created this card as one of my swaps I took Saturday to St. Louis to the StampinUp Regional.  I loved the fact I had no scraps leftover when I finished the card.  

Supplies needed
Dress Up Framelit
Early Espresso, Whisper White card stock
Island Indigo ink
Pool Party Ribbon
International Bazaar designer paper
Loving Thoughts stamp set


Sunday, March 17, 2013

Dana's 3-D downline challenge

    This is what Dana came up with for her challenge project.  We were all so impressed with her creativity.  She found old wooden spools at an antique shop; made a rod to for the hanger, embossed the background; made a jacket for the dress.  She said it is now hanging on a wall in her bedroom.  Didn't she do a great job?  What her project taught me is that you do not always have to do a card when making a project.

Saturday, March 16, 2013

Downline Dress Up challenge part 2


   Here are some more cards from the February challenge issued to my downline.  Check out yesterday's blog for the challenge details. 
 
The front of Amanda's card.  She used ribbon at the bottom of the dress and made it look like a ruffle.
 
 
The inside of Amanda's card.  I love how she incorporated the hanger clip.
 
Janet has some small flower embellishments at the waist of her dress that are really cute.
Darcy added some rhinestones on her dress that give it that extra bling and she gave dimension to the dress that made it seem to pop from the card.
 
   I love how each person had a different perspective on the card, and we all started out with the same pieces.


Friday, March 15, 2013

Downline DressUp Challenge part 1

 
     What project would you make with these items?  At my downline meeting for the past few months I have been issuing a challenge.  The challenge last month was to create a project from these items.  I taught my downline three ways to color the flower trim.
 
1. rub an ink pad over the top of the flower.
2.  Place some reinker and water in a small container and soak the flower in the solution.
3. Use a puddle of ink from an ink pad, dip the aqua painter into the puddle and paint the flower .

 
This is the card I came up with.  My flower has been colored by rubbing the ink pad over the top with Tangerine Tango ink.
 
This is the card my sister, Nan came up with.  She lives in Eugene, Oregon and mailed me her sample.
     How would you use the DressUp framelits and the flower trim to make a project?  Check back tomorrow to see what the rest of my downline did.


Monday, February 25, 2013

Oh Hello birthday card


     How many other uses can you see for this card other than a birthday?  Sympathy, friendship, Mother's Day, thinking of you, and a simple Hello card are the ones that come to my mind.
    What is your favorite part of this card?

Supplies needed
Oh Hello, Bloomin Marvelous stamp sets
Vintage Wallpaper embossing folder
Oval Framelits
Scallop Trim Border punch, 7/8 inch scallop circle punch
Early Espresso ink
Flower Trim

Sunday, February 17, 2013

Fill Your Card box with Female birthday cards


   Do you run out of Birthday cards as fast as I do?  Well, tomorrow February 18th is my Fill Your card box Again with Female birthday cards class.  This great looking card is one of the featured cards.  I received it as a swap at the Leadership conference.  Notice the matching envelope.  You can count on every card you make this year having a matching envelop.  Can you identify the items used that are from the Spring catalog (SC) and the Sale a Bration(SAB) brochure?

1. Vine street folder (SAB)
2. Sycamore Street Designer paper (SAB)
3. Secret Garden stamp set (SC)
4. Secret Garden Framelit dies (SC)

   There are two class choices for you...12:30 or 6:30 and it is really easy to RSVP if you go to my website.  I will have a free card for you to make if you RSVP in any manner, and a treat if you do that on my website.

Monday, January 14, 2013

Hearts a Flutter


     The last swap....  I often ask for comments from my husband when I make a card and he often has some good advice.  So, this time when I asked what he thought, he really did not have much to say except that he did not care for the card.  I tried a lot of things to make it more to his liking and nothing worked. So, I put the card away and as they say slept on it awhile.
     The next day I looked at the design, moved the Love You all over the card, and finally  came up with a design that I really liked.  I knew that a lot of people would be making Valentine cards at Leadership and wanted to make at least one of my own.  This card, another Sushi Original (3 for 3) will be featured in my Fill Your Card Box Again class this month. So, what is new.....

1. Needlepoint Border embossing folders (Spring Catalog)
2. Tea for Two Designer paper (Spring Catalog)
3. Hearts a Flutter stamp set (Spring Catalog)
4. Hearts a Flutter framelit die (Spring catalog)

There is so much more that I love in the Spring catalog.  I can't wait to share it with all of you.  What are you  just loving from the catalog?

Monday, December 3, 2012

Embossed Angel Card


     When I first saw this stamp set in the catalog I was immediately drawn to the angel image.  It has the look of a woodcut to it and that is a look I love.  I often search the StampinUp site for card ideas to start my inspiration and this card was one I loved.  I made a few changes to make it my own.  It was a featured card in my Christmas card stamp camp last month and ended up being the favorite.  What part of this card do you like the best?
 
Supplies needed:
Rose Red, Very Vanilla, Crumb Cake, Vellum card stock
Rose Red seam binding
Crochet trim
Gold embossing powder
Apothecary Framelit
Rejoicing with You, More Merry Messages stamp sets