 |
| The entire envelope is made from designer paper. I love doing this because both sides of the paper show up. |
I had such fun this past weekend in Champaign, IL at Vacation Stamping School. About 100 demonstrators gathered together to share what we love with each other. I felt privileged to be asked to share ideas on how to use designer paper. We were encouraged to share ideas that could be used by New, Casual, and Avid stampers.
I decided I would share ways to use designer paper. I don't know about you but I love designer paper and seem to collect quite a bit of it.
My first ideas was to use the envelope punch board to make an envelope. It takes a piece of paper that is 8 by 8 to make one standard sized envelope. This would be an easy project for a beginning stamper.
The directions are on the board and you can make over 60 different sized envelopes. That is amazing to me. I love it and use it lots.
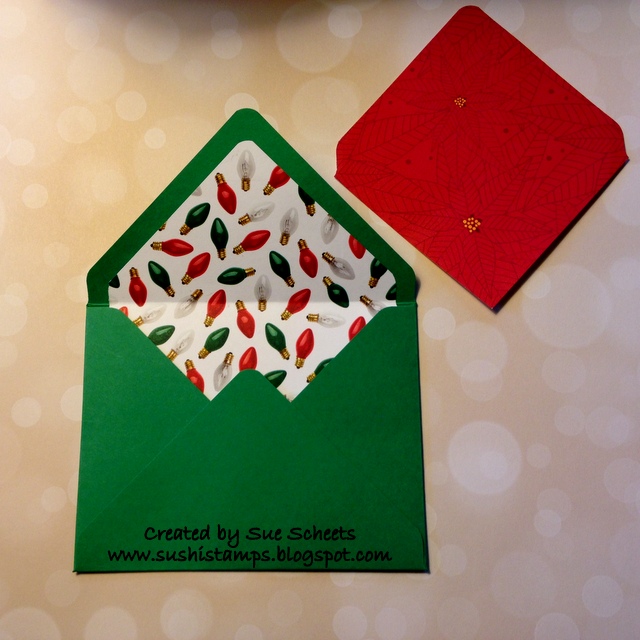
My second idea was to make a liner for a card stock envelope.
 |
| The inside of the envelope is the designer paper. It is a great way to use up your scraps. |
First of all, I made the envelope out of Call Me Clover card stock.
Then I used a 4 by 4 piece of designer paper to create the liner. This liner will fit in a standard envelope only.
Line the piece of designer paper with the left edge at the 4 inch mark and punch.
Find the opposite corner, flip the paper over and lay that side on the 4 inch mark and punch once more. Your punches should be on opposite corners. Round the corner using the top of the punch board, and you are now ready to attach the liner to the inside of the top flap.
CAUTION: Glue the top two sides only so that the liner does not buckle when attach to the card.
The third thing I want to share is how to use the Punch Board to make a card holder. Tomorrow I will post a video showing how to make the card holder. Here are a couple of pictures to get you excited about the video.
I hope you can see that there is more than one score line on each side.
When the holder is glued together it will look like this.
Can you picture making lots of envelopes, lots of liners and lots of card holders with all your designer paper? Don't have an envelope punch board? You can order it here by clicking on the pictures below. They will take you to my shopping area.
Tomorrow I will be sharing a Facebook Live, as I will be doing every Tuesday at 9:00. I will try to post it here after I have made the video.
Have a great evening. Here is Illinois it is not quite so humid. I plan to take an evening walk or bike ride after dinner.
See you tomorrow,
Sushi
Product List


 Designer Series Paper")
