Thursday, June 30, 2016

Serene Scenery-Template Thursday

This design is made to look like the Bokeh technique.


Sometimes the designer paper is so perfect it just does not need much else to go with it.  The stamp set I chose to use on these papers is called Scenic Sayings.  It is bold and large and designed  to go with this paper.


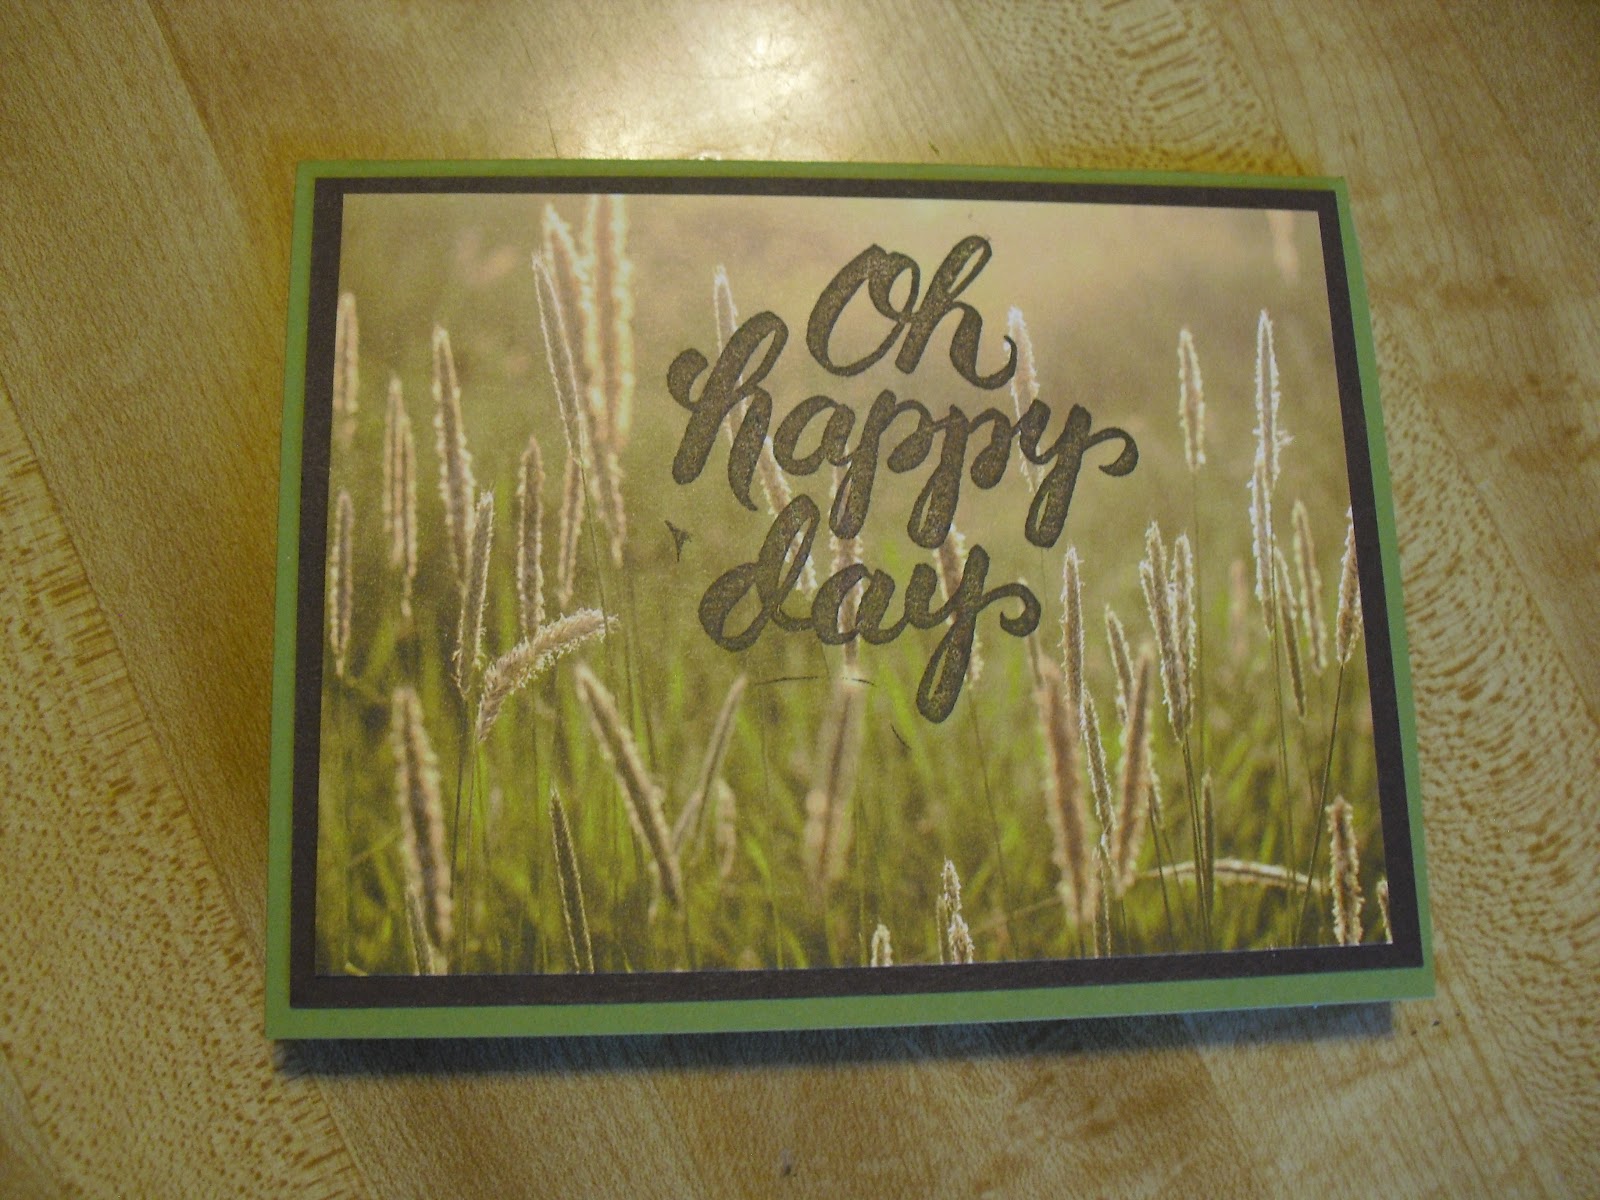
    I love watching the grasses wave in the wind.. and yes it makes it a happy day.

  I am sure you love like me to blow the seeds from the dandelions in the wind.  I love how the picture shows them just on the bottom of the design leaving plenty of room for a saying or accent piece.


The sun shining through the leaves made a perfect spot for this saying. Don't you think anyone would love to get one of these cards?  Simple but beautiful in the art work of the paper.

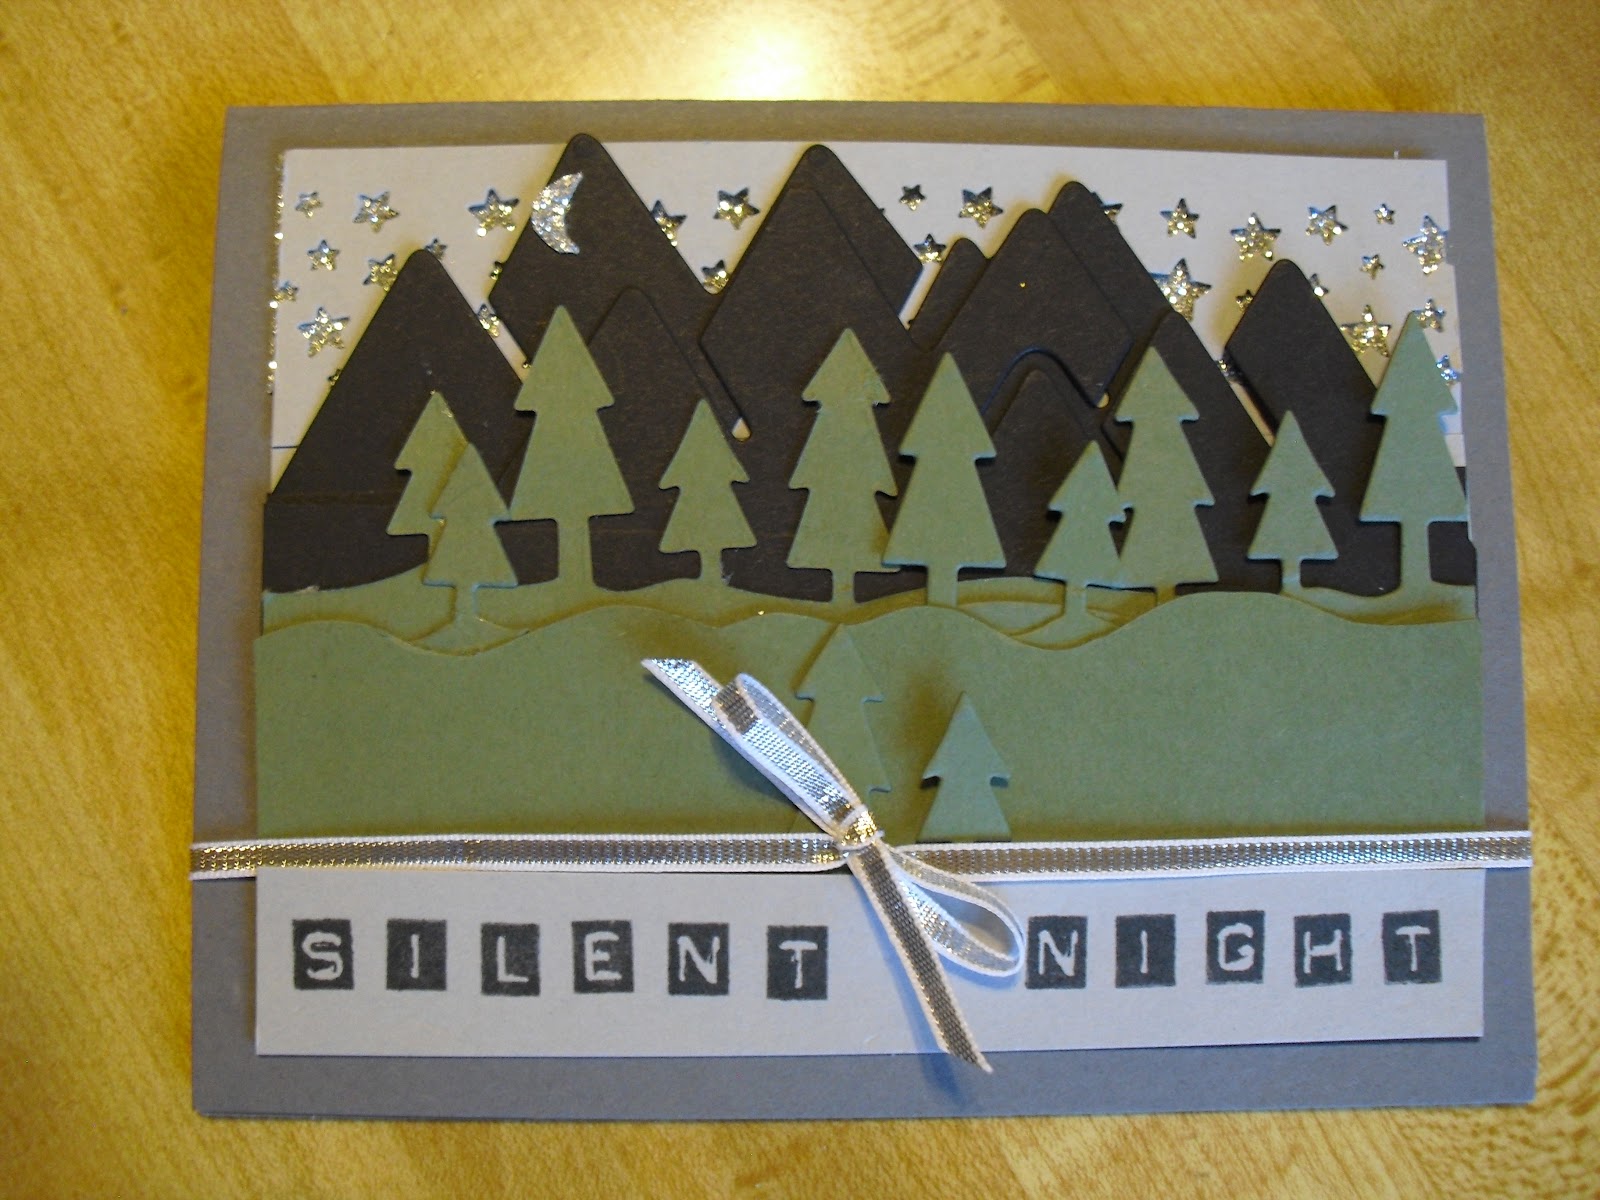
Come back tomorrow to see how I have taken one of these cards and fixed it up.

Wednesday, June 29, 2016

Serene Scenery-Wednesday Wow


   Can you see where a sheet from Serene Scenery is on this card?  It is the background.  The Wow factor for me is adding the jar on top of the designer paper.  I found this card on Pinterest from the blog of Amy www.stampinwithamyk.com.  I made some changes to Amy's card to make it my own.  What do you think?

  Come back tomorrow to see some basic ways to show off the paper in this great designer paper pack.


Tuesday, June 28, 2016

Serene Scenery- Technique Tuesday


  Does the background of this card remind you of a quilt?  This technique is called the Herringbone Technique and is a great way to use up designer paper scraps.

  I used 3/8 inch strips of 4 patterns from the Serene Scenery designer paper stack. One side looks like photos and the other side is designs focusing on the color combo of the paper pack.  I chose the design side.

   After you cut the strips you layer them in a pattern on some adhesive.
Look for a how to video on this technique in the future on Sue Scheets youtube channel.

Come back tomorrow for a Wow card that uses another set from the new Catalog that I really like.

Monday, June 27, 2016

Serene Scenery-Miscellaneous Monday


Have you see the designer paper pack called Serene Scenery?  Each one of the papers has a side that looks like a photograph of amazing scenes of nature.  They could almost stand alone on a card.  I fell in love with this pack of papers when they were demonstrated to us at On Stage in April.

This paper looked like a sandy beach with the waves gently rolling to the shore.  So what better stamp to place on the card than the birds from the Wetlands stamp set.  The card was so simple to make, but really  accentuates the designer paper in a wonderful way.

Come back tomorrow to see how this paper can be used in a technique called Herringbone.

Friday, June 24, 2016

Always an Adventure-Fix it Friday


    I loved this card as soon as I saw it.  Simple but stunning.  When I checked further I found the blog post for the card.  The blog is called Stampin with Kristen.  I decided to see how I could change some parts of the card but still keep it simple.


 Here is how I changed it.....

1. Changed the red and green to Cherry Cobbler and Garden Green.

2. Added a bit of designer paper from the new catalog called This Christmas.  I love it 

3. I used the greeting from Holly Jolly Greetings and the thinlit from Christmas Greetings.  I was so glad these two items carried over into  the new catalog.

Another fun week.  Check out all the ways you can use the Always an Adventure stamp set and matching framelits.


Come back next week when I will change it up a bit and feature the Serene Scenery designer paper stack in several different ways.

Thursday, June 23, 2016

Always an Adventure-Template Thursday


   No, this stamp set is NOT Always an Adventure, but when I was looking through the new catalog for something to use as a template I came across this card.  Here is what I was looking for when I reproduced the template.

1. Images on a smaller piece of cardstock

2. Something on the background

3. A saying that reflected the images.


1. I used the stars, moon , the trees, and the bear.

2. I used the star embossing folder

3. I chose the hello stamp because it looked like the bear was peeking out of the trees to say hello.

1. I used the lake, bears and trees, and stamped the clouds to fill in the empty space.

2. I chose the sky paper from the Serene Scenery designer paper stack.

3. Since it is so HOT and HUMID here in Illinois, I thought the idea of a swim in a lake would be a Happy Day for me and decided bears would feel the same way.

Come back tomorrow to see how I will fix a Christmas card I found on Pinterest, using this very same stamp set.

Wednesday, June 22, 2016

Always an Adventure-Wednesday Wow


How do you get your inspiration for your card making?  Most of the time I look at samples on Pinterest to help me get interested, but sometimes when I wake up in the middle of the night I get an inspiration at that time. 

For my Wow this week I knew I wanted to use a night time theme. 

1.  I thought that the star border punch would be a great start to get a starry sky.  

2. I made a couple of layers of mountains by flipping the  cut out image.  And then I did the same with the trees.

3. At that point I looked at the card and thought about Silent Night and how peaceful it can be surrounded by mountains, and pines.

4. I just received the new alphabet called Labeler ABC and decided to try it out. I like the look.

5. I finally finished the card with some silver 1/8 inch ribbon and liked the finished product.  What do you think?


Notice I did not use any stamp sets to create the card, just the matching thinlits called Outdoor Adventure.

Come back tomorrow to see how I use a template to make a variety of cards.

Tuesday, June 21, 2016

Always an Adventure-Technique Tuesday

     Can you see the cute balloons on this card.  The final measurements for the card are 4 1/2 inches by 6 inches.  Well, it would not fit into any of our standard envelopes which are meant for 4 1/4 by 5 1/2 inch cards.  So.....

1. I got out my handy envelope maker and checked out the possible card sizes. The closest one I could find was 4 1/2 by 6 1/2.

2. I found that I needed to cut my paper at 8 7/8 by 8 7/8.  Do you recognize the paper?  It is the new envelope paper and comes in 4 designs and each one of the new in-colors.

3 I then placed the paper on the envelope maker at 3 3/4 inches and just scored all the edges.  When I was finished the card fit in perfectly.

So when you open the envelope this is what the card looks like, but when you take the card out of the envelope and set it on the table it looks like this.....

I made the mountains 3 different shades of brown,knowing that they look darker the further away they are.

I used the balloon framelit and cut out the balloons from the Playful Palette designer paper stack.

I stamped the clouds in Soft Sky ink to match the card stock and found a saying from the set called Thoughtful Banners. This was fun to create.

Come back tomorrow to see a wow card using this wonderful stamp set.

Monday, June 20, 2016

Always an Adventure-Miscellaneous Monday


    I really like this stamp set, but it is not the one that captured my attention when I first scanned the catalog.  Why am I not featuring that one this week?  Well, I thought I had ordered it but guess what, I did not.  So I will showcase that stamp set when it gets to my house.

  The reasons I really like this set are multiple.....

1. It is cute

2. It has stamps that can be cut out with framelits.

3. It reminds me of all the vacations my husband, son, and I took camping out west in the mountains.  And yes we camped in a tent.

  I decided this would be the perfect set to use for a Father's Day card for Sam.  The sign is not too clear, but I wrote on in the name of a favorite camping ground we stayed at in Wyoming, called the Falls.

Come back tomorrow to see how to use this stamp set to make a Side Step card.

Friday, June 17, 2016

Painter's Palette-Fix it Friday


    Do you recognize this card?  It was copied from the card on page 119 of the new catalog.  118 and 119 show off the Playful Palette Suite.  This includes.......
      Card stock
      Stamp set
      Washi Tape
      Thread and Twine
       Designer paper stack
   All these things coordinate together.  That sure makes it easy to have all the supplies needed to make a bunch of great looking projects.

  I decided to fix up the card that was in the catalog.  Can you see what I changed.

   The direction of the card
   Instead of a heart I decided to use a flower punch instead.  I did however use a heart for the leaves.
    The words are now under the focal flower instead of in the middle of the focal heart.
  Both cards look good but I thought it was great fun to try to fix the card up and make it look a little more advanced.

 Painter's Palette week is now over and I had such fun making the cards.  I used most of the parts of the stamp set and am ready to take on a new stamp set next week.

Come back on Monday to see the stamp set that jumped out at me on my first look of the new catalog.  I had everyone who came to my open house try and guess which stamp set it was.  No one guessed correctly this year.  If they had I would have purchased that stamp set for them.  

Thursday, June 16, 2016

Painter's Palette- Template Thursday-New In-Colors

Sweet Sugarplum
Peek a Boo Peach
Flirty Flamingo
Dapper Denim

   Every year Stampin'Up! comes out with some new in-colors.  These are colors that are trending in fashion and crafts.  These colors stay for 2 years so we have plenty of time to use them.  

   I found a card similar to this one on Pinterest that was created by Beth Rush.  I made it a square card so I could use the new Envelope paper to make a matching envelope.  

Emerald Envy

  Which color is your favorite?  I was drawn to Sweet Sugarplum at first, but now really like them all.  Wouldn't it be fun to be on the team that gets to name the new in-colors?

Come back tomorrow to see a unique way to use this stamp set and how to fix it in many different ways.


Wednesday, June 15, 2016

Painter's Palette-Wednesday Wow


What makes a card a WOW card?  For me it is if the stamp set is used in a way I never would have thought of.  When you look at the swishes in this stamp set do you think of a Christmas tree? Neither did I but Rebecca Scurr did.  I changed up a few things from her sample but kept the swishes the way she designed them.

One of the things I was so disappointed to find out it was leaving was the candy dots.  They were perfect accent pieces for cards that I was going to mail.  I tried to stock up on them so I could still use them, but some of the color families went fast.  I have ordered the new enamel shapes to see what they look like and hope I will like them as well as I have liked the candy dots.

Come back tomorrow to see how one card template can change by changing just the colors.

Tuesday, June 14, 2016

Painter's Palate-Technique Tuesday, Stampin with Bleach


  Do you wonder how the flower became yellow when it was stamped and embossed on Night of Navy card stock? 

Well, bleach is the answer.  In this card a blender pen was dipped in bleach and painted onto the embossed petals on the flower.  It was painted until all the color was bleached out of the petal so the paper looked white.  Then markers were used to color in the petals.


  For today's card I stamped the swirl image from the Painter's Palate stamp set and made it look like the strings on a balloon.  I got the idea from looking at a card that Kathryn Mangelsdorf made and posted on Pinterest.  Only I took it a step further by using bleach as an ink.

1. Place several layers of paper towel in a flat container.

2. Press your stamp on the paper towels using them as an ink pad.  Stamp off once to get excess bleach off the stamp.

3. Press your stamp onto the punched out  balloons. I punched my balloons out of the new in-colors.

4. Once the card stock is dry you can finish your card.  The bleach totally changed the color of the card stock.

  I am thinking this will make a good technique video.  Look for my next Sushi's Stampin' Originals video on the first Tuesday of July.

  Come back tomorrow to see how you can use the Painter's Palette stamp set to make a Christmas card.

Monday, June 13, 2016

Painter's Palette-Miscellaneous Monday


  This looks like a card but is actually a wish list booklet that people got to make at my New Catalog Party.  I used the big swish from the Painter's Palette set and stamped it in each one of the new in-colors.  Now that I have used them quite a bit I have to say I really do not have a favorite.  The designer paper accent is from the paper stack called Playful Palette and coordinates really well with the stamp set.

Come back tomorrow to see how I use bleach with this really bold stamp set.

Friday, June 10, 2016

Remarkable You-Fix it Friday


  Do you ever go to the catalog for ideas?  I went there for the basic card today.  This card was found on page 128.  I really liked it for its simplicity and I just plain love the leaves image in this stamp set.


  Here is how I fixed up the card by making it a little more complicated.  

1. I added some black to accent the black color of the stamped image using the Lots of Labels framelit.  

2. I lengthened the saying by adding one more word from the saying that comes with the stamp set.  

3. I added an accent leaf onto the bottom of the saying.

Which card do you like the best?

And here is what the cards for the week look like in a group. What was your favorite card this week?


Such fun!! Come back next Monday to see what I will do with the first set that is new to the catalog......Painter's Palate.

Don't forget that today is the last day to sign up as a brand new customer to Paper Pumpkin when your first month will be just....$5.  What a deal.


Thursday, June 9, 2016

Remarkable You-Template Thursday

   
  I found a card very similar to this on Pinterest that was posted by Claire Daly.  I thought it would be a great template to duplicate. 
The thin strip of designer paper is called Pop of Pink.  One side of the paper is black and white the other has some Melon Mambo added.


  For this card I just created a mirror image.  I used the designer paper that is new called Affectionately Yours.  I made my leaves the new in-color Emerald Envy which is also in the designer paper.


For this card I turned the direction of the card to make a simple change.  The designer paper is also from the Pop of Pink collection.  The sayings came for the set called You're so Sweet.

Come back tomorrow and see how I fix a card from the catalog and make it a bit fancy.

If you have been thinking about joining Paper Pumpkin this is the time to do it.  For the next 30 hours the first month for a new subscription will be just $5 for the first month.  The months after that will be the regular price.  Check out the link at the top of my page to join. Or contact me at my email address if you have any questions.

Wednesday, June 8, 2016

Remarkable You-Wednesday Wow


  Doesn't this card look like it would be hard to make?  Well it really isn't.  The trick to making this card work is the layers.

White or Vanilla card stock to stamp on
  
   4 by 5 1/4,       3 by 4 1/4,    2 by 3 1/4

Colored card stock to coordinate with the ink

   5 1/2 by 8 1/2 card base,   3 1/4 by 4 1/2,   2 1/4 by 3 1/2,

Light adhear the white layers together and centered and stamp on them.  Don't worry if there is a slight gap in the image on each layer.

Adhear the colored card stock behind each stamped on layer and then attach them all together.  The dark cardstock hides and covers the gaps made in your stamping.  A stunning look when put together.

Come back tomorrow to see how I use the same template to get different looks from the Remarkable You stamp set.

Tuesday, June 7, 2016

Remarkable You-Technique Tuesday


   Notice the leaves on this card.  Do you see the variation in the color on the leaves.  This was done using the Rolling Reinkers technque.  Check out the video below to see how it is done.

I used Always Artichoke and Garden Green reinkers.


For this card I used the new in-color Flirty Flamingo and Blushing Bride reinkers.


 Peek a boo Peach and Cajun craze are the reinkers I used for this card.


  This final card is the one that is featured in my latest youtube video.  I would love it if you would check out my channel and follow me.  Just go to youtube, then Sue Scheets and you will see my videos.  With the one I will be posting later on today my grand total is now 5.  

For this card I used Perfect Plum and Rich Razzleberry reinkers.  This is a really fun technique that you should try.  I would love to see your card samples.

Come back tomorrow to see a Wow card made with this versatile and fun set

I am having major problems with my video so look tomorrow and hopefully I can get the problem fixed.

Monday, June 6, 2016

Remarkable You-Miscellaneous Monday


   Something happened Friday and my post did not get posted.  So you will have 2 to look at today.  I did not realize it was not there until last night.  Hmmm is this something I can blame on being 70?  That is the one good thing I can think of for being older, now I can blame my mistakes on my age.  

   This week I am featuring the stamp set Remarkable You.  I like the bold look of the images and think they coordinate really well with the Watercolor Words sayings.  What do you think?

   I was inspired by a card I saw posted by Brian King.  Here is how I made the look.

1. I used the Woodgrain embossing folder and then rubbed a sponge inked with Chocolate Chip ink all over the embossed image.

2. I stamped the leaves and some extra leaves on Wild Wasabi card stock.  

3. I fussy cut the leaves, the Happy Birthday and layered them on top of the embossed image.

  Come back tomorrow for my next video.  It is for a technique called rolling reinkers.  I will use each one of the images in this set in my video.  If you enjoy the video please subscribe to my channel, like and share the video.

Sunday, June 5, 2016

Botanical Blooms-Fix It Friday


  I received this card in a swap at a recent Stampin'Up! event and loved the simplicity of it. At my second glance, I realized the small heart punch is retired as is the designer paper.  So, I decided this was a perfect card to fix on a Friday.


Here is what I changed......

  Pop of Pink designer paper
  Botanical Blooms flowers
  Saying from Thoughtful Banners stamp set

All of these items can be found in the new catalog and ordered from my website.  Just click on the link on the home page of this blog and you will be in my store.

Another fun week with lots of card items to be made using the Botanical Blooms stamp set.


 Come back next week to see what I make using the stamp set Remarkable You.  

Tuesday, June 7th I will be posting my next you tube video using the Rolling Reinkers technique.  Just go to youtube and look for the Sue Scheets channel.

Have a great weekend, and let me know if you need a new catalog.  I know I will be bookmarking all my favorites in my catalog  whenever I have a chance to sit down.

Thursday, June 2, 2016

Botanical Blooms-Template Thursday


  Where did the day go?  If you were like me, some of the day was spent drooling through the new catalog.  So today, I am concentrating only on the leaves of this stamp set Botanical Blooms.  The flowers seem to be the main focus, but the leaves are really neat also.

  For the first card I decided to use the new in-color Emerald Envy as the card base color.  And then I added some of the colors we already are able to use as the leaves.

    Mint Macaroon
    Pear Pizazz and    As you can see this card just uses the inks.
    Cucumber Crush

   I wanted to see what they would look like together.  The saying is from Watercolor words.


  For this second card I decided to try 3 additional greens and this time use the card stock and the vein stamps.  I stamped each vein in the same color as the card stock.

    Old Olive
    Always Artichoke
    Garden Green

   The saying is from the set called Suite Sayings.  So what do you think?  There are several greens that I think would look great together with our new in-color Emerald Envy.

Come back tomorrow to see how I fixed a card I made a month ago by using more new products.


Wednesday, June 1, 2016

Botanical Blooms-Wednesday Wow


  What is it about white on white that makes it so stunning.  I found this card on Pinterest posted from the blog called starlightstamper.com and thought it was so beautiful. There is not too much more to say about this card.  Word stamp is from Wetlands stamp set.  The metal rimmed pearls are in the new catalog and give the card a great finished look.

  Today the new catalog is live!  I placed my order at 5 AM so that I could get the new stuff soon.  I will be having a new catalog open house to show off the new catalog items I especially love.  Stop by if you are in the area.  Saturday, June 11th 12:30-3:30.

  Come back tomorrow to see how I use the leaves in this set in a totally different way.