Scrappin' and Stampin' It's what I love to do
Wednesday, November 25, 2015
On the Road Again
Today, my husband and I will be back in the car heading out to Lebanon, Tennessee for a family Thanksgiving. Look for a new entry on my blog next week and a Happy Thanksgiving to one and all.
Tuesday, November 24, 2015
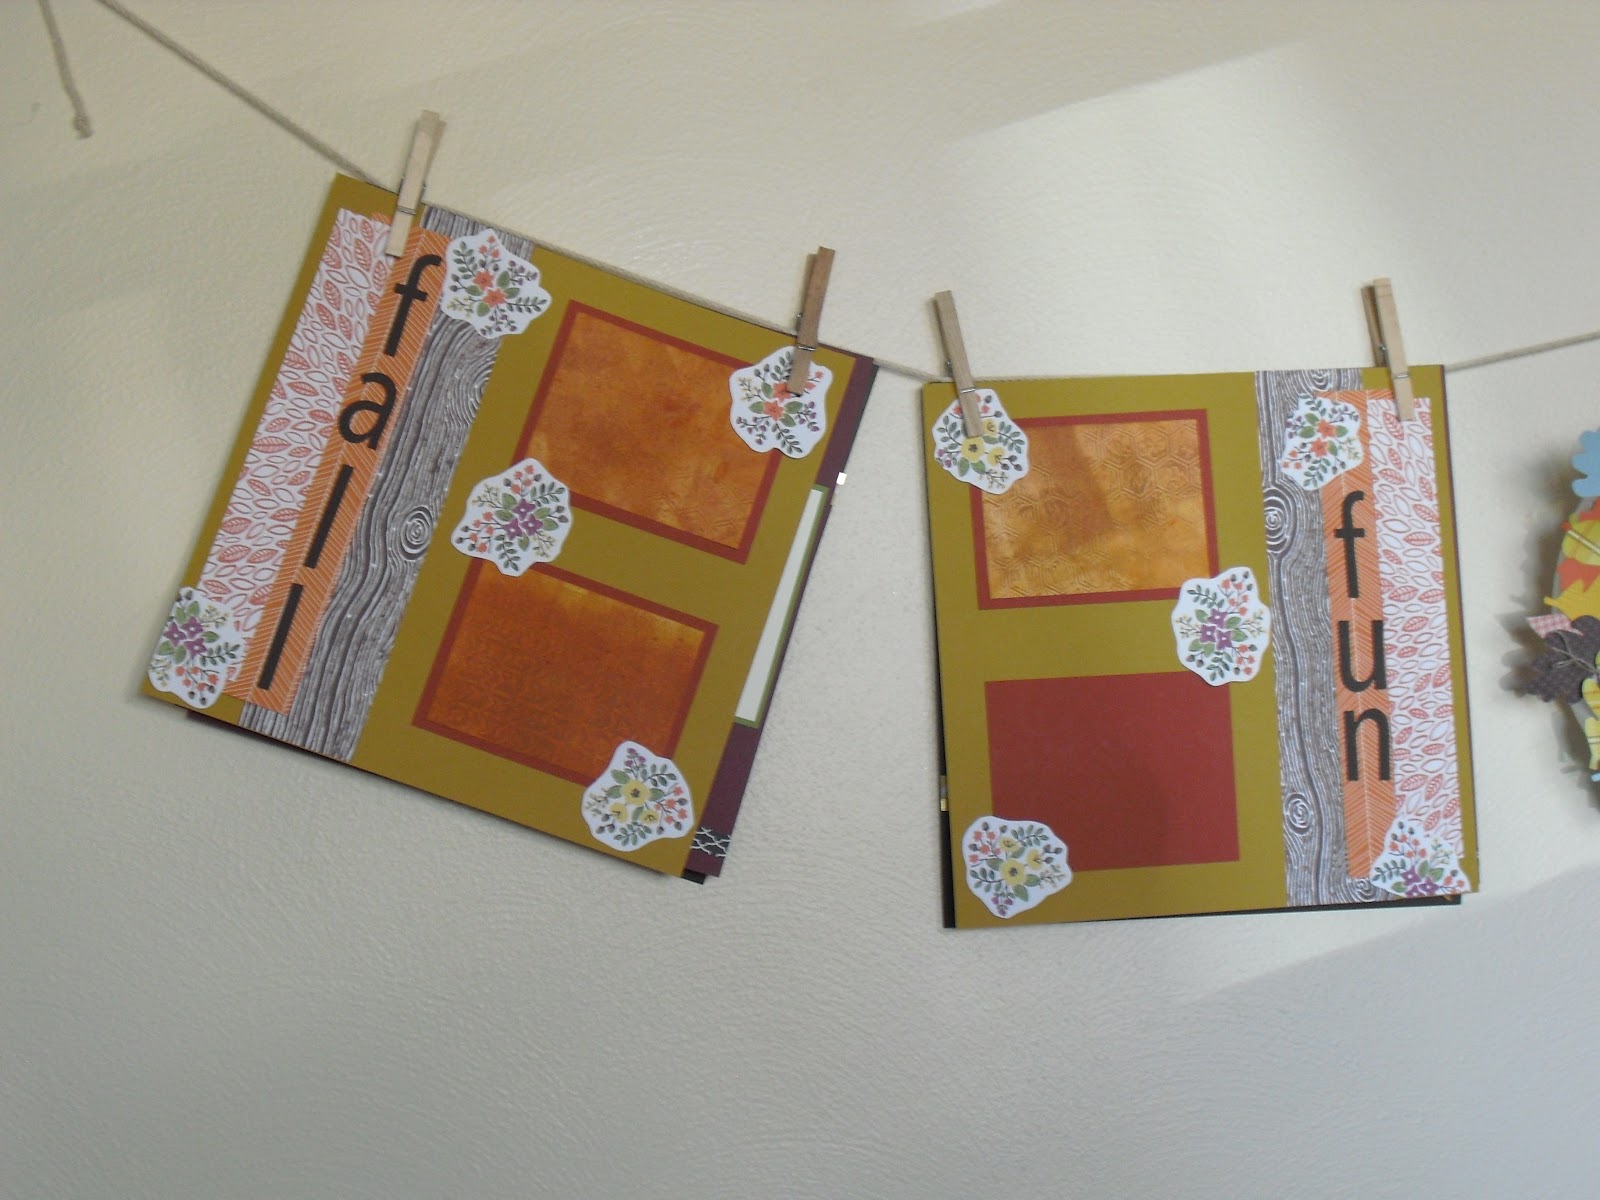
Thankful Layout

I created this layout as a way for my family to list the things they are thankful for. I thought each person could have a piece of paper to write down what they are thankful for and I could attach it to their picture.

This is the year that all my kids gather at Thanksgiving. I am so excited to have everyone together. Now that they are older and some have families of their own, it seems to get harder and harder to get us all together. We will gather in Tennessee, and drive from Missouri, Illinois, and Ohio to be together.
Monday, November 23, 2015
Waxed paper resist fall layout

Sunday, November 22, 2015
Wax Paper resist for Christmas

What a whirlwind trip! 2 full days in the car to drive to New Hampshire for a wonderful wedding, then visit for 2 days, and finally 2 full days in the car to return home! Well worth it, but I came home ready to stand up for a while.
This is a great technique I found online when searching for ideas on Pinterest. The first video I watched talked about using Stampin'Up! glossy paper which we do not make any more. So, I tried photo paper which did not work. I found another video that used just regular card stock and it worked. So here is how you create a card using this wax paper resist.
1. Tear a piece of wax paper and fold it in half.
2. Place inside an embossing folder that has a close design without a lot of empty spaces. Then emboss.
3. Open the embossed wax paper and cut it in half. You will actually have enough to make 4 cards.
4. Make a mark on your card stock so you will know which side is embossed. Cammie came up with the idea of putting the x on the wrong side of the paper so it will not show. Place a piece of card stock on each side of the wax paper.
5. Place a blank piece of computer or scrap paper on each side. Iron this for 30 seconds using the cotton setting and a dry iron.
6. Using a brayer ink with one or two colors on top of the waxed side of your cardstock.
7. Finish off the card to your liking.
For this sample I used the Large Polka dot embossing folder, Delicate Designs framelit, and the White Glitter ribbon.

For this card I used the Lovely Lace embossing folder, and the Peaceful Wreath stamp set.
This was so much fun I know I will use this technique many more times.
Wednesday, November 18, 2015
Forgetful me


We used the Delicate Ornaments which looked a little like snowflakes, kept the Softly Falling embossing folder in the background and the catastrophe was avoided. Sometimes a simple mistake can turn out to be cute.
Tuesday, November 17, 2015
How to emboss trees in the background

When I first saw a card similar to this on Pinterest I had not idea how the Lovely as a Tree stamp became part of the background of the card. After researching I found out the how...
1. Find the raised background side of the embossing folder. Stamp the pine tree image on these raised areas.
2. Emboss the cardstock. Once embossed the stamped trees are in the background and the embossed trees are in the front. Simple, but looks amazing.
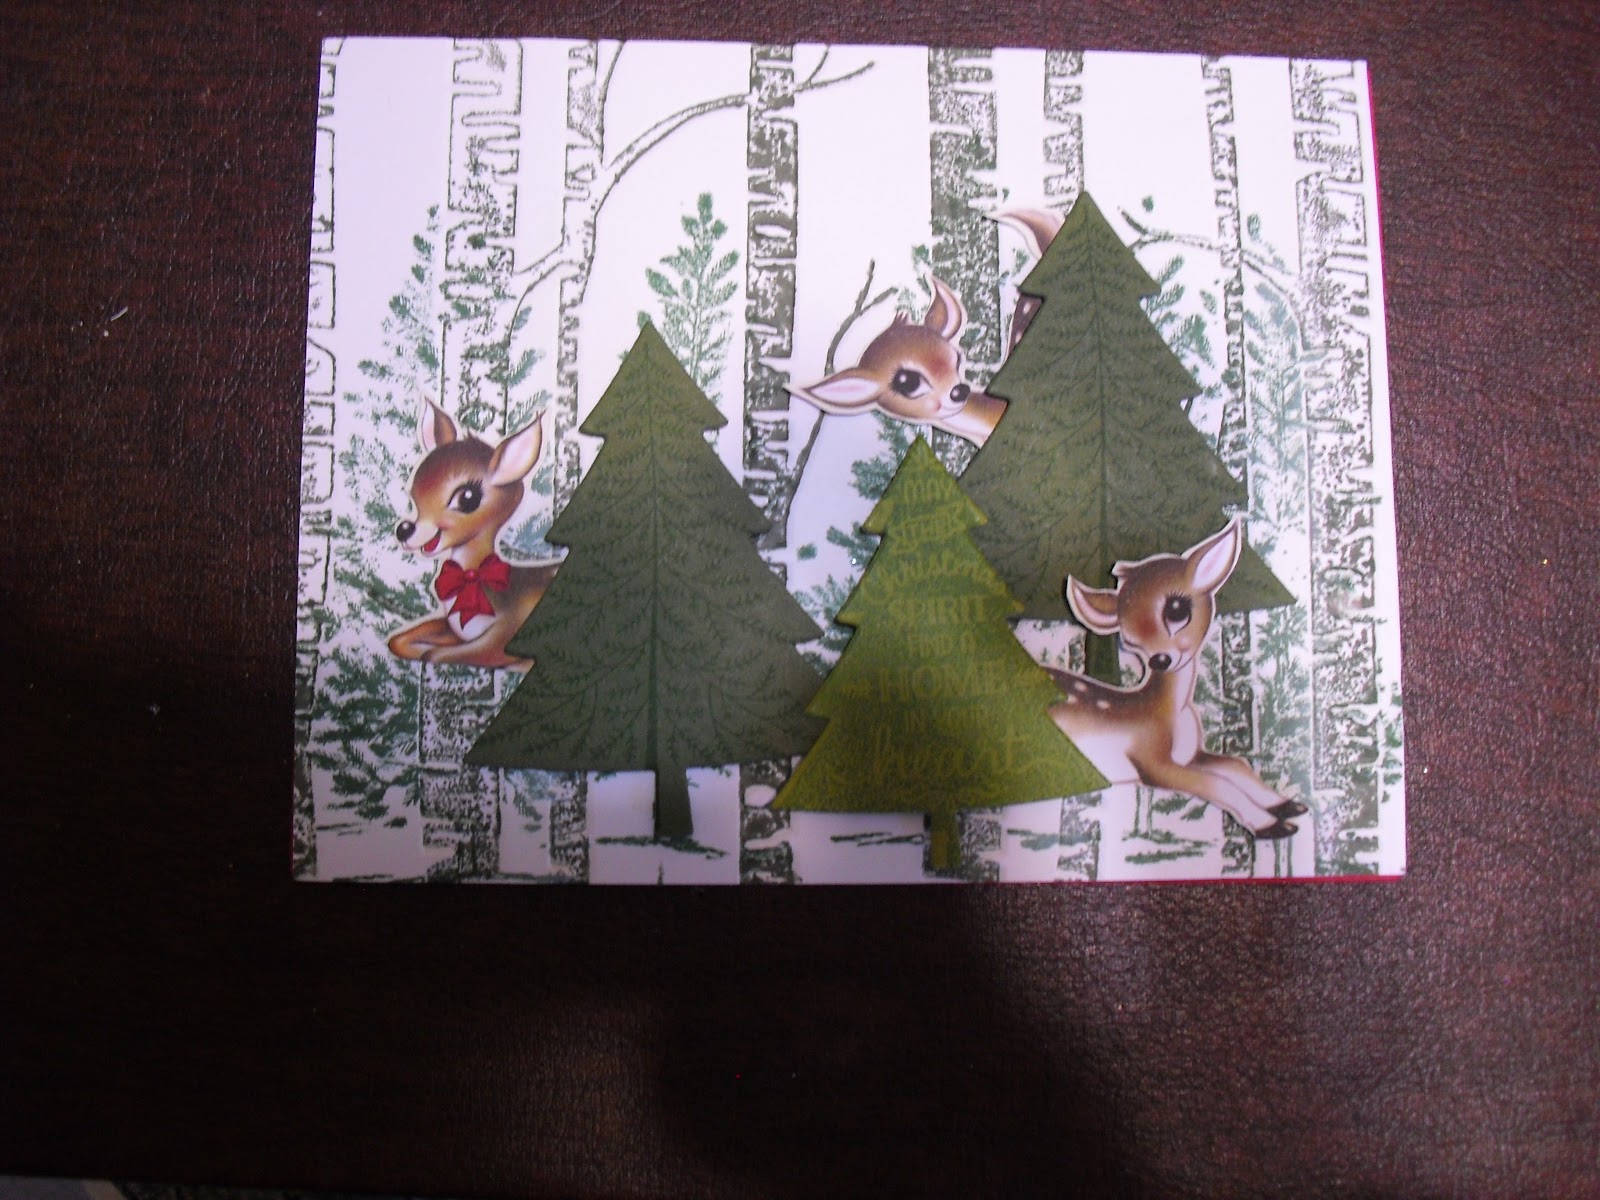
This is how Jody finished her card. Are you wondering where she got the cute deer that are peeking from behind the Perfect Pines? She cut them from the Home from Christmas designer paper. This is so adorable and that Jody is so creative.
Monday, November 16, 2015
Brayered Embossing Woodland folder
 |
| We sponged the branches once they were embossed with Soft Suede ink. |
 |
| We brayered on the raised branches. |
 |
| We brayered on the raised background with 3 fall colors |
At my October downline meeting we learned a variety of ways to emboss using the Woodland embossing folder. We made the backgrounds and the challenge for the month was to take the backgrounds and create a new card. Jody showed me hers this month.
 |
| I love how Jody separated the spider web doily into two separate parts of the card. |
 |
| Jody created this card using the multi-colored background
It was great fun to see how we each incorporated the background into different card designs.
|
Sunday, November 15, 2015
Tree Punch for Christmas

1. I pre-embossed the white cardstock to make that part easier for the ladies.
2. I showed them how to use a sponge to add color to the embossed image and to the snow.
3. They had fun tearing the cardstock to make the mound of snow on the ground.
4. They love using our designer paper because they can choose which ever side of the paper they like the best.
The ladies have really nice looking Christmas cards and I have very little of my retired Christmas paper leftover. Good for both of us.
Saturday, November 14, 2015
Inspiration for a Christmas card


This is one of the cards the ladies at Knollwood will be making this month.
I used Perfect Pines framelits to make the trees on the white cardstock and the green tree. They were perfect for this card because there are 3 different sized trees.
The Merry Moments designer paper worked well for the background behind the cut trees, and the green tree in the front.
Teeny Tiny wishes made a nice small saying to place on the torn snow that covers the trunks of each tree.
At first I was going to throw this idea sheet out, but then I looked at the design a bit closer and decided I could duplicate it. So, don't hesitate to try and copy any old picture you find.
Friday, November 13, 2015
Last Year first, now This Year

I needed another quick card idea and found this card I made last year for the ladies that stamp with me at Knollwood. I liked how it used designer paper and a simple image.

Here are the changes I made....
Merry Moments designer paper
Peaceful Pines stamp set and matching framelit
Small Scalloped punch
I love how this stamp set includes a stamp to place a string of lights on your Christmas tree.
Thursday, November 12, 2015
Something New from Something Old

I was looking for Christmas card ideas from the homemade cards I received last year. I loved the use of a variety of designer papers on this card that Clara sent me. So, I decided to duplicate it using current items from Stampin'Up!.

Here is what I used to make the same look, with currents items.
Designer paper is Merry Moments from the Annual catalog.
The label is from the Deco Labels Framelit collection
I used a scalloped circle punch that Clara used.
Candy dots
Merry Christmas saying from the stamp set Versatile
Christmas
Any time you need new ideas, just check out some old favorites to get you started.
Wednesday, November 11, 2015
Scrapbook Your Life-Into the Woods

What do you love most about fall? Me, I love the colors of the leaves on the trees and the crunch I hear when I walk on the fallen leaves. This designer paper reminds me of all the things I love about fall.

This accent pieces was made using some of my favorite items from the Holiday catalog.
Acorny Thank You stamp set and Acorn builder punch.
Lighthearted Leaves stamp set
Gold Cording trim
And more favorites with this accent piece

Curvy Corner Trio punch
Cheer All Year stamp set
Into the Woods Elements
I have some great fall pictures from our camping trip in September that will look great on these pages.
Tuesday, November 10, 2015
Scrapbook Your Life with Howl o Ween treats

This was one of the layouts we made in October. I just love the images in the Howl o Ween Treats stamp set, and of course the fact that they can be cut out using the Boo to You framelits. I used several Halloween items on the layouts
Spiderweb Doilies both sides

Happy Haunting designer paper
Howl o ween Treat stamp set

Boo to You framelit
This is my favorite thing about using Stampin'Up! products- how well they all coordinate.
Are you wondering where the little ghost accent pieces came from? I cut them out of the designer paper.

Now to find some great pictures for these cute pages.
Monday, November 9, 2015
Lighthearted Leaves

1. Emboss in gold embossing powder
2. Using and aqua painters and pools of color in the lid of your ink pad color in various parts of you leaf.
3. With the lightest color ink collect a bit of ink with your aqua painter to outline the leaf to give it depth.
I wonder if I could make this leaf look like a zentangle?
Sunday, November 8, 2015
Thankful Forest Friends

This card came from a team meeting and was designed by Robin Armbrecht. It showcases a lot of the items that coordinate together.
Stamp set Thankful Forest Friends colored in with markers
Designer Paper, Into the Woods
Cute little wooden banner Into the Woods Elements
Ribbon Into the Woods 3/8 " cotton ribbon Rich Razzleberry
That's one of the things I really love about Stampin'Up!-the way there will be several items that coordinate well together. It takes the planning away from me.
Saturday, November 7, 2015
Garden in Bloom

Another great card from Robin's card buffet. Called Garden in Bloom it features two step stamping. First you stamp a black outline stamp, then you stamp the inside color. And to make it so easy for you, there is a clear tab that helps you place each stamp in the same direction to help with perfect alignment. Don't you just love the bee!
Thursday, November 5, 2015
Six-Sided Sampler fun

I love the colors in this card that I made at Robin's fall class. Do you recognize some old friends in this card?
Background stamp Gorgeous Grunge. I remember getting this stamp at convention one year and thinking to myself, this is one stamp I know I'll never use again. Well, I guess I shouldn't think that way because I use this over and over again.
Six Sided Sampler and matching Hexagon punch in various layers is the next layer of the stamp
Finally Bold Butterfly, silver glimmer paper, and a rhinestone add the bling that creates a great looking card.
Don't you love the Greys and Lost Lagoon colors together. Thanks Robin for such a great card idea.
Wednesday, November 4, 2015
Banner Blessings

I used the Beautiful Bunch stamp set and the matching Fun Flower punch.
The background was embossed using the Lovely Lace embossing folder.
The saying is the called Banner Blessings. Each of the words on the stamps are connected to a scripture verse. I changed the color of the stamp to Basic Grey.
Here's what the changes I made looked like on the finished card.

Tuesday, November 3, 2015
Not Just a Spider Web Doily

Background is Melon Mambo inked once stamped 4 times. Each time is lighter and actually looks like a totally different color.
Going to hunt for some more ways to use these cute little webs.
Monday, November 2, 2015
Flurry of Wishes- October Christmas card

I love snow, but am not ready for it yet, so I can at least stamp snowflakes. This card was the Christmas Through the Year card that was featured in October. I was easy and featured a color combination I usually don't think about at Christmas. The general consensus was that everyone liked the combo even thought they did not think about it either.
Don't you love the accent piece.
First off the new Snow Flurry punch made it easy to create the snowflakes.
Secondly the fact that both snowflakes are on one stamp made it faster to stamp the background.
Finally, using a sharpie to color the White Perfect accent purple to coordinate with all the colors of the card.
So let it snow, but just on a greeting card for now.
Sunday, November 1, 2015
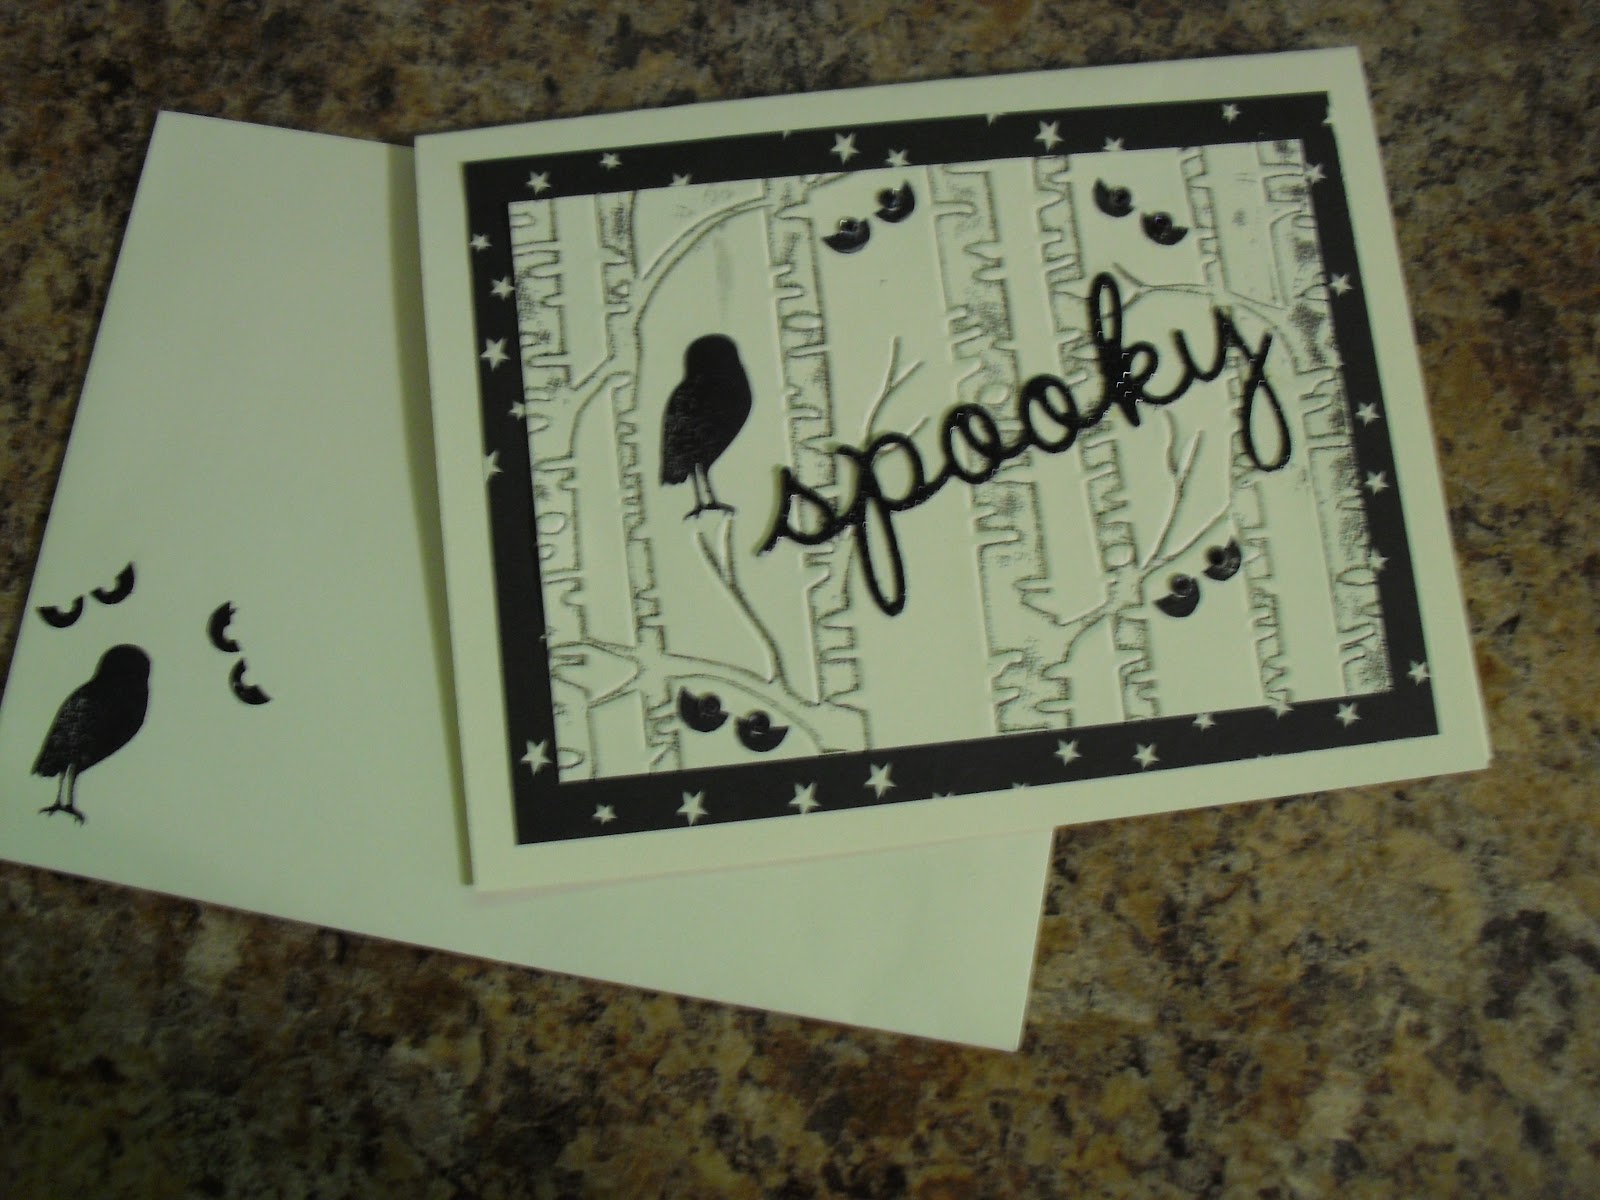
Everything but stamping for Halloween

Are you attracted to this card as much as I was? Here is what I love about this idea I found on Mary Fish's blog Stampin Pretty.
The colors, black and white and Tangelo Twist
The designer paper-love the curly cue ghosts
The simplicity 4 items make such a cute card
Using my big shot The window, the sill, and the work spooky all used the big shot to be cut out.
I wonder if some of the other designer papers would look as good behind a coordination window? Hmm sounds like a challenge to pursue.
Subscribe to:
Posts (Atom)