Monday, March 31, 2014

Everything Easter card choices


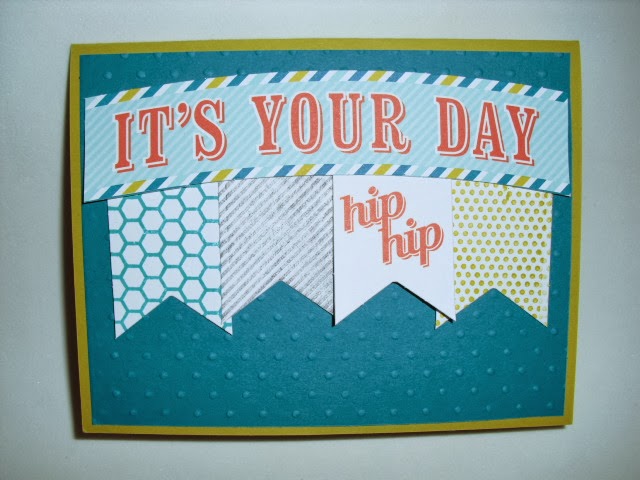
     These are the cards we will be making at the Everything Easter class.  You get to choose which one you would like to make and how many of each you choose to make.  Please RSVP by Friday, April 4th and list your choices.  Check back tomorrow for samples of the treat boxes you can make.


Spring Tulips
Elegant Cross
Hoppy Easter
Chicks in a Row


Sunday, March 30, 2014

Everything Easter new class


     Everything Easter is a new class I have organized to take place on Monday, April 7th.  There are 4 cards and two different kinds of treat bags that are included in the class.  You get to design your own class.

1. Look at the items offered and decide which ones you want to make.  Like them all, then the class is $10 for 1 of each of the 6 items.

2. Let me know your choices.  Example 3 chick cards= $6, 4 cross = $8 one treat box= $1  for a total of $15. 

3. I will have all your supplies ready for you to make the cards and treat containers of your choice. 

Check back tomorrow for a closeup of each project.

Saturday, March 29, 2014

Jubilant Butterlies March make n take


     Can you see the items on this card that are from the Occasions catalog?

1. The tiny flower is from the Petite Petals stamp set with matching punch.  I love how it is used as a closure for the card.

2. The tulips are from the Blessed Easter single stamp and actually pop up from the top of the card.

3.  The Decorative Dots embossing folder was used to create texture on the white cardstock.  You can order this as your free item from the Sale a Bration brochure.  This once a year event is over March 31st so its not too late to place an order for you free item.

     My friend Julie Davison designed this card.  Here is a video she made showing how to make it. Maybe making this card will make spring come roaring.

Friday, March 28, 2014

April Framed art


     When thinking about a possible framed picture for April of course the saying April showers bring May flowers came to my mind.  I like to think about what I am going to make for a while before I actually create the piece.  I had an image in my head and was thrilled when it actually looked like I imagined it would. 

1. I made a stencil for the clouds and sponged 3 different colors of ink around the cloud as I moved it all over the background paper.

2.  The thought bubble from the Word Bubbles framelit set made perfect clouds which I embossed with the Decorative Dots embossing folder that is one of the free items from the Sale a Bration brochure.

3. I found an umbrella in My Digital Studio and changed up the size to make 3 different sized umbrellas.  I made sure I had two of each size on my paper I printed at home.

4.  Using one umbrella of each size, I cut apart the sections of umbrella, attached it to my favorite designer paper, cut it out and glued it to the second umbrella.

5. Finally I punched out raindrops using the mini ornament stamp, rounded off the tops, and added a rhinestone to each drop.  I then colored the rhinestone with a blue marker to complete the look.


   Now, I am imagining what I would like the May framed art to look like........Hmm flowers maybe.

Wednesday, March 26, 2014

Super Snails Swaps


     Dana created a fun swap for all of us to make at the Super Snails Snacking and Sharing event we had last Saturday.  This just makes me smile.  The flags are doubled over a toothpick. We folded a piece of paper in half and then placed the mini banner punch over the paper so that the folded section was just inside the punch.  Great news, the mini banner punch will be in the new annual catalog.


     I love the color combination of the card that Linda created for us to make.  The little mini banners were hand cut after using the stamp on a thin piece of paper.  The stamp we used on this card is called Perfect Pennants.


     Amanda W's card used the Petite Petals card and matching punch.  I like how she separated the flowers with the saying.


     Jody used the Sweet Sorbet designer paper for her card.  That has got to be one of my all time favorite DSP's.  The flowers were from the hostess set in the Occasions catalog called Nature's Hello. She described using a couple of different colors on each flower.  I love the effect.


     Peggy's card is perfect for a small note card.  The baker's twine matches the color of the card perfectly because we dragged it through the ink pad .  I will make more of these cards to use as my thank you notes for customer orders.


     These are the Super Snails that were able to make it to the event.  We missed the ones that were either too far away, or could not make it.  Next time we meet we hope that you will be with us as the newest Super Snails.


Monday, March 24, 2014

Mixed Media designed by Amanda Fox and created by Sushi


     Have you ever heard of Mixed Media but were nervous about trying it yourself?  At one of our recent Stampin'Up! events Carrie Cudney demonstrated some really cute Halloween mixed media pictures.  I loved them but as I can be about new things, just was too nervous to try it myself.
    Saturday was the second Super Snails Snacking and Sharing event.  Each one of us was to bring a shoe box swap, and of course a potluck dish to share.  We had a great time visiting with each other and making each other's projects.  Amanda Fox is the newest Super Snail and her project was this mixed media wall plaque.  It was so much fun and not as hard as I imagined.

We each loved how our version of Amanda's project turned out.


1. First we prepared our burlap plaques, by rubbing different kinds of inks on it in no particular pattern.

2. Next we created our flower by attaching petals to one of the Jumbo sticky rounds.  Since the sticky rounds are super sticky, they attached to the burlap very well.

3. We cut a stem that was intended to be an irregular shape, and not perfectly straight and added it to our picture.

4. Finally we added details, like outlines, more accent colors, string, brads, and sayings to make the project our own. 

  Now that I have my first mixed media project under my belt, I am excited to try some  more. Thanks Amanda for a great make n take.  Would you like to attend our next event as the newest Super Snail?  Contact me before the end of March for a great added benefit while Sale A Bration is still going on.

Sunday, March 23, 2014

Watercolor Wonder Challenge


    One of the last challenges I gave to my downline was to use the supplies I gave them on a card.  I included one card from the Watercolor wonder card kit, small samples of each one of the designer Watercolor Wonder papers, and a small strip of gold sequins. I loved the results.


    Amanda W used tiny strips of each color of the designer paper.  She attached strips of the sequins under her tag.  Notice the matching envelope.


     Cindy said she didn't like the look of the sequins so she tucked them underneath a piece of the designer paper.  I think the touch of gold looks great.


     Nan used the sequins as centers to the flowers and featured the flower side of the designer paper.  She was excited to have blue and green as the colors we used on this challenge.


   Amanda F embossed the card base, made a window to view the saying, and made cute flowers out of the designer paper.  Love the way she used the zigzags as a border on her card.


     I cut out my card front using the Apothecary Accents framelit.  I noticed the flowers on the DSP seemed similar to the Pansy punch and punched them out.  You know me the easy way is the best way.

   I loved the cards my team came up with.  What would you create with the supplies I gave my team.  Have fun thinking and creating.


Friday, March 21, 2014

File Folder card challenge


     A couple of months ago at a downline meeting we made samples of file folder cards.  The challenge was to take the sample and turn it into a finished card.  Amanda F. had just joined our group and used some of her papers she had at home to make an adorable birthday card. 

   Nan turned her card sideways and added a simple but elegant accent piece. 

  
   I covered my card with some of the This and That papers, punched out some hexagons form another paper in the stack, added a saying and tied the card together with some baker's twine.  It was fun to try this challenge.  Look for what we all did for our watercolor challenge.  Check out this link for directions on how to make a file folder card of your own.

Wednesday, March 19, 2014

December Paper Pumpkin projects


     Remember this book I made a couple of months ago.  I used the December Paper Pumpkin kit to make a journal I can record book titles, movies, and websites I want to remember. When I finished making the book I had lots of supplies left over so I went to Pinterest and found some ideas for cards using these leftover supplies.


     Amazingly enough I still have more leftovers from this kit. If you sign up for My Paper Pumpkin before the end of March you will receive a cute kit and a set of markers as a thank you from StampinUp.  I know I can hardly wait to see what my next kit will look like.
 

Tuesday, March 18, 2014

Birthday Scrapbook Layout


     When I was scrapbooking recently a friend's daughter  requested birthday scrapbook pages for the February meeting of Scrapbook Your Life, because her birthday was coming soon.  Cupcakes seemed like a great accent piece for this page.  The paper is called Birthday Basics.  I loved the bright colors.  The liners for the cupcake were run through the embossing machine using the Woodgrain embossing folder.


     When it came time for me to put pictures on my pages I found lots of first birthday pictures of Abby my first grandchild.  I like the mystery of trying to match pictures to premade pages.  What pictures would you put on this page?  

Sunday, March 16, 2014

February Scrapbook Your Life page


   Do you have piles of pictures that are waiting for a scrapbook page?  I finally organized my pictures in a way that I can find them for mounting on pages.  This layout was one of the layouts we made for February.  I looked through all my pictures for shots of Sam and I throughout the years.  I thought it was so much fun to see how we have changed in the over 30 years we have known each other. Here are some of my favorite parts of the layout.

1. The black, white and red color combination.  I used the Modern Medley designer paper.

2. The envelope with hearts coming out of it.  I made it with the envelope punch board and used my own dimensions to make the envelope small enough to fit on the page.


3. The large heart accent piece. I used the Delicate Designs embossing folder, the Decorative Dots embossing folder, and some leftover flowers.

   I really enjoy creating a scrapbook page and then going on a hunt to see what pictures look best on the page. How do you find the pictures for your pages?

Saturday, March 15, 2014

Two for One Washi Tape card


    Do you like the idea of making one card turn into two?  Well, the card I did at Knollwood assisted living facility this month was just that.  I had been wanting to try Washi tape with my stamping friends and created this simple card based on one I had done a while ago with my stampers. I had enough colors of Washi tape to give each lady two colors.  The tearing of the tape was very easy for them.  I did the punching of the butterflies.  Okay you ask how can I make another card from this card?


     The punched out butterflies helped make the second card.  I thought the results looked good and fit my requirements for Stamping at Knollwood: simple, cute looking, and easy to make.  How would you design a two for one card?

Saturday, March 8, 2014

Hexagon Hive by Judy


   Judy is one of my regular stampers who never did any crafts until she started coming to my classes.  Now, she has grown into a wonderfully creative woman.  She crafts most evenings and shares her creations with me.  She loves the Hexagon Hive embosslit and made the above card. 

1. The hive was cut using brushed gold cardstock.

2. The holes were filled in with Presto Patterns cardstock.

3. The entire hive was backed with Champagne Glitter paper.

  I loved her combination of colors, something I never would have thought about.  But, she thought something was not quite right and went home and changed the card a little.


     If you look at the embossing folder carefully you can see the shape of a flower or two.  Judy added some of the gold foil sheet from the Occasion Catalog to accent the flower shapes.  This is what the card needed.  What would you add or change to this card to make it your own?


Friday, March 7, 2014

Sale a Bration Card


   Did you notice that almost everything on this card came from the Sale a Bration promotion? 

1. Decorative Dots embossing folder-This was the first thing I ordered.  I love the size of the dots and the randomness of the location of each dot.

2. Sweet Sorbet designer paper-Every side of every sheet appeals to me and that does not usually happen with designer paper.

3. You're Lovely stamp set-Great for adding color to.  I love to color, so would emboss the design and then go to town with my coloring.

  Other items on the card that are not from the Sale a Bration brochure.

1. Deco Label framelits

2. Pool Party card stock

3. Crisp Cantaloupe card stock

4. Doilies

5. Markers

  What would you purchase to help you get one free SAB item and help you make this card your own? Do you want to make a card like this for yourself?  Then, come to my Fill Your Card Box with spring cards class on Monday, March 17th at 12:30 or 6:30.  Click on this link to RSVP on my website.

Thursday, March 6, 2014

January Paper Pumpkin 4 cards into 6

Basic card instructions
 

     Don't you love making something last longer than expected?  I did that with the January Paper Pumpkin kit.  There were 4 cards in the kit that could be turned inside out if you wished and there were oodles of items to stick on each card.

I made this card like the directions told me to.
 
  For the next card I focused on Basic Grey and Tangerine Tango.  I cut up one of the cards and used a strip of it on a Whisper White card base.

 
For the next card I focused on Blue and Green.  I thought using all of the colors on the card made it look almost too busy so tried to isolate colors on a card together.


The addition of a doily gives this card a feminine touch. I also added the rest of the card front I cut up and attached to a Crumb Cake card. 


  Finally, a card with lots of embellishments and some leftover parts from other cards added onto another crumb cake card base.


 I was a little unsure when I started making the cards, because lots of color is out of my comfort zone, but when I was finished I loved the results of my creating.

HINT:  For some reason the stick-ons were not too sticky so I added either snail or some glue dots to the pieces to help them stay stuck.


Wednesday, March 5, 2014

July Paper Pumpkin Alternate Ideas


   What do you do with leftovers?  The July Paper Pumpkin Kit was a banner that you could make to place in a birthday cake.  Well, I do not do birthday cakes and would really rather not do birthdays, so I was not too sure what to do with the kit.  So, I did what I do each month my kit comes.....

1. I went to Pinterest and typed in Paper Pumpkin.

2. I found cards that people had made with the banner kit

3. I CASED the cards and added my own touch when I wanted to.

Front of card

 
Inside of card

CASEd from Patty Bennett


   I love what I came up with and now have a use for most of the items that came in the July kit.  I have a couple more items leftover that I will use in future postings. I see some spring flowers that could be made with the skewers that came with the kit.  HMM better get on Pinterest and check out that idea.

Tuesday, March 4, 2014

Happy Watercolor-Spring card


     Don't these colors help you think of Spring?  After this tough winter anything that helps us think of Spring is very welcome.  This is one of the cards that I will be showing at three different classes this month.
 
 Fill Your Cardbox with Spring cards
 
 Stampin in the Stacks at the Jacksonville Public Library
 
and Stampin with the Seniors at the Jacksonville Senior center
 
   I hope that you will be able to attend one of these classes to make this great looking card.


Monday, March 3, 2014

Petite Petal punch card- A Touch of Spring


     There is something so appealing about small things, babies, kittens, butterflies, and tiny punches.  I saw a card very similar to this on Pinterest.  Yes, I do go to Pinterest a lot for inspiration. 

1. I love the small flower punch and matching stamp set called Petite Petals.  This is one of the neat bundles in the Occasions catalog. When purchasing a bundle you actually save yourself 15% off the cost of purchasing the items separately.

2. I love the rainbow colors of the flowers.  I actually have my clothes in my closet organized by color.

3. Isn't the background of lines just the added touch for the card.  Can you guess where they came from?  The are part of the stamp set called Gorgeous Grunge.  When I first saw the set I was not impressed, but it is the first one I go to when I want something great as a background.

    This card is one of the featured cards for this months Fill Your Cardbox class.  The cards will be spring-like to get us ready whenever the season decides to come.