Friday, February 26, 2021

Put it together Friday One inch card #2 using Bouquet of Hope (Card 49)


Can you believe its Friday already!  Time to put the card of the week together.  This is card idea #49.  I am amazed each time I think about this. I want to let you know that this layout is inspired by Jackie Bolhuis.  She is the queen of simple cards made with designer papers.  Check out her blog Klompen Stampers.

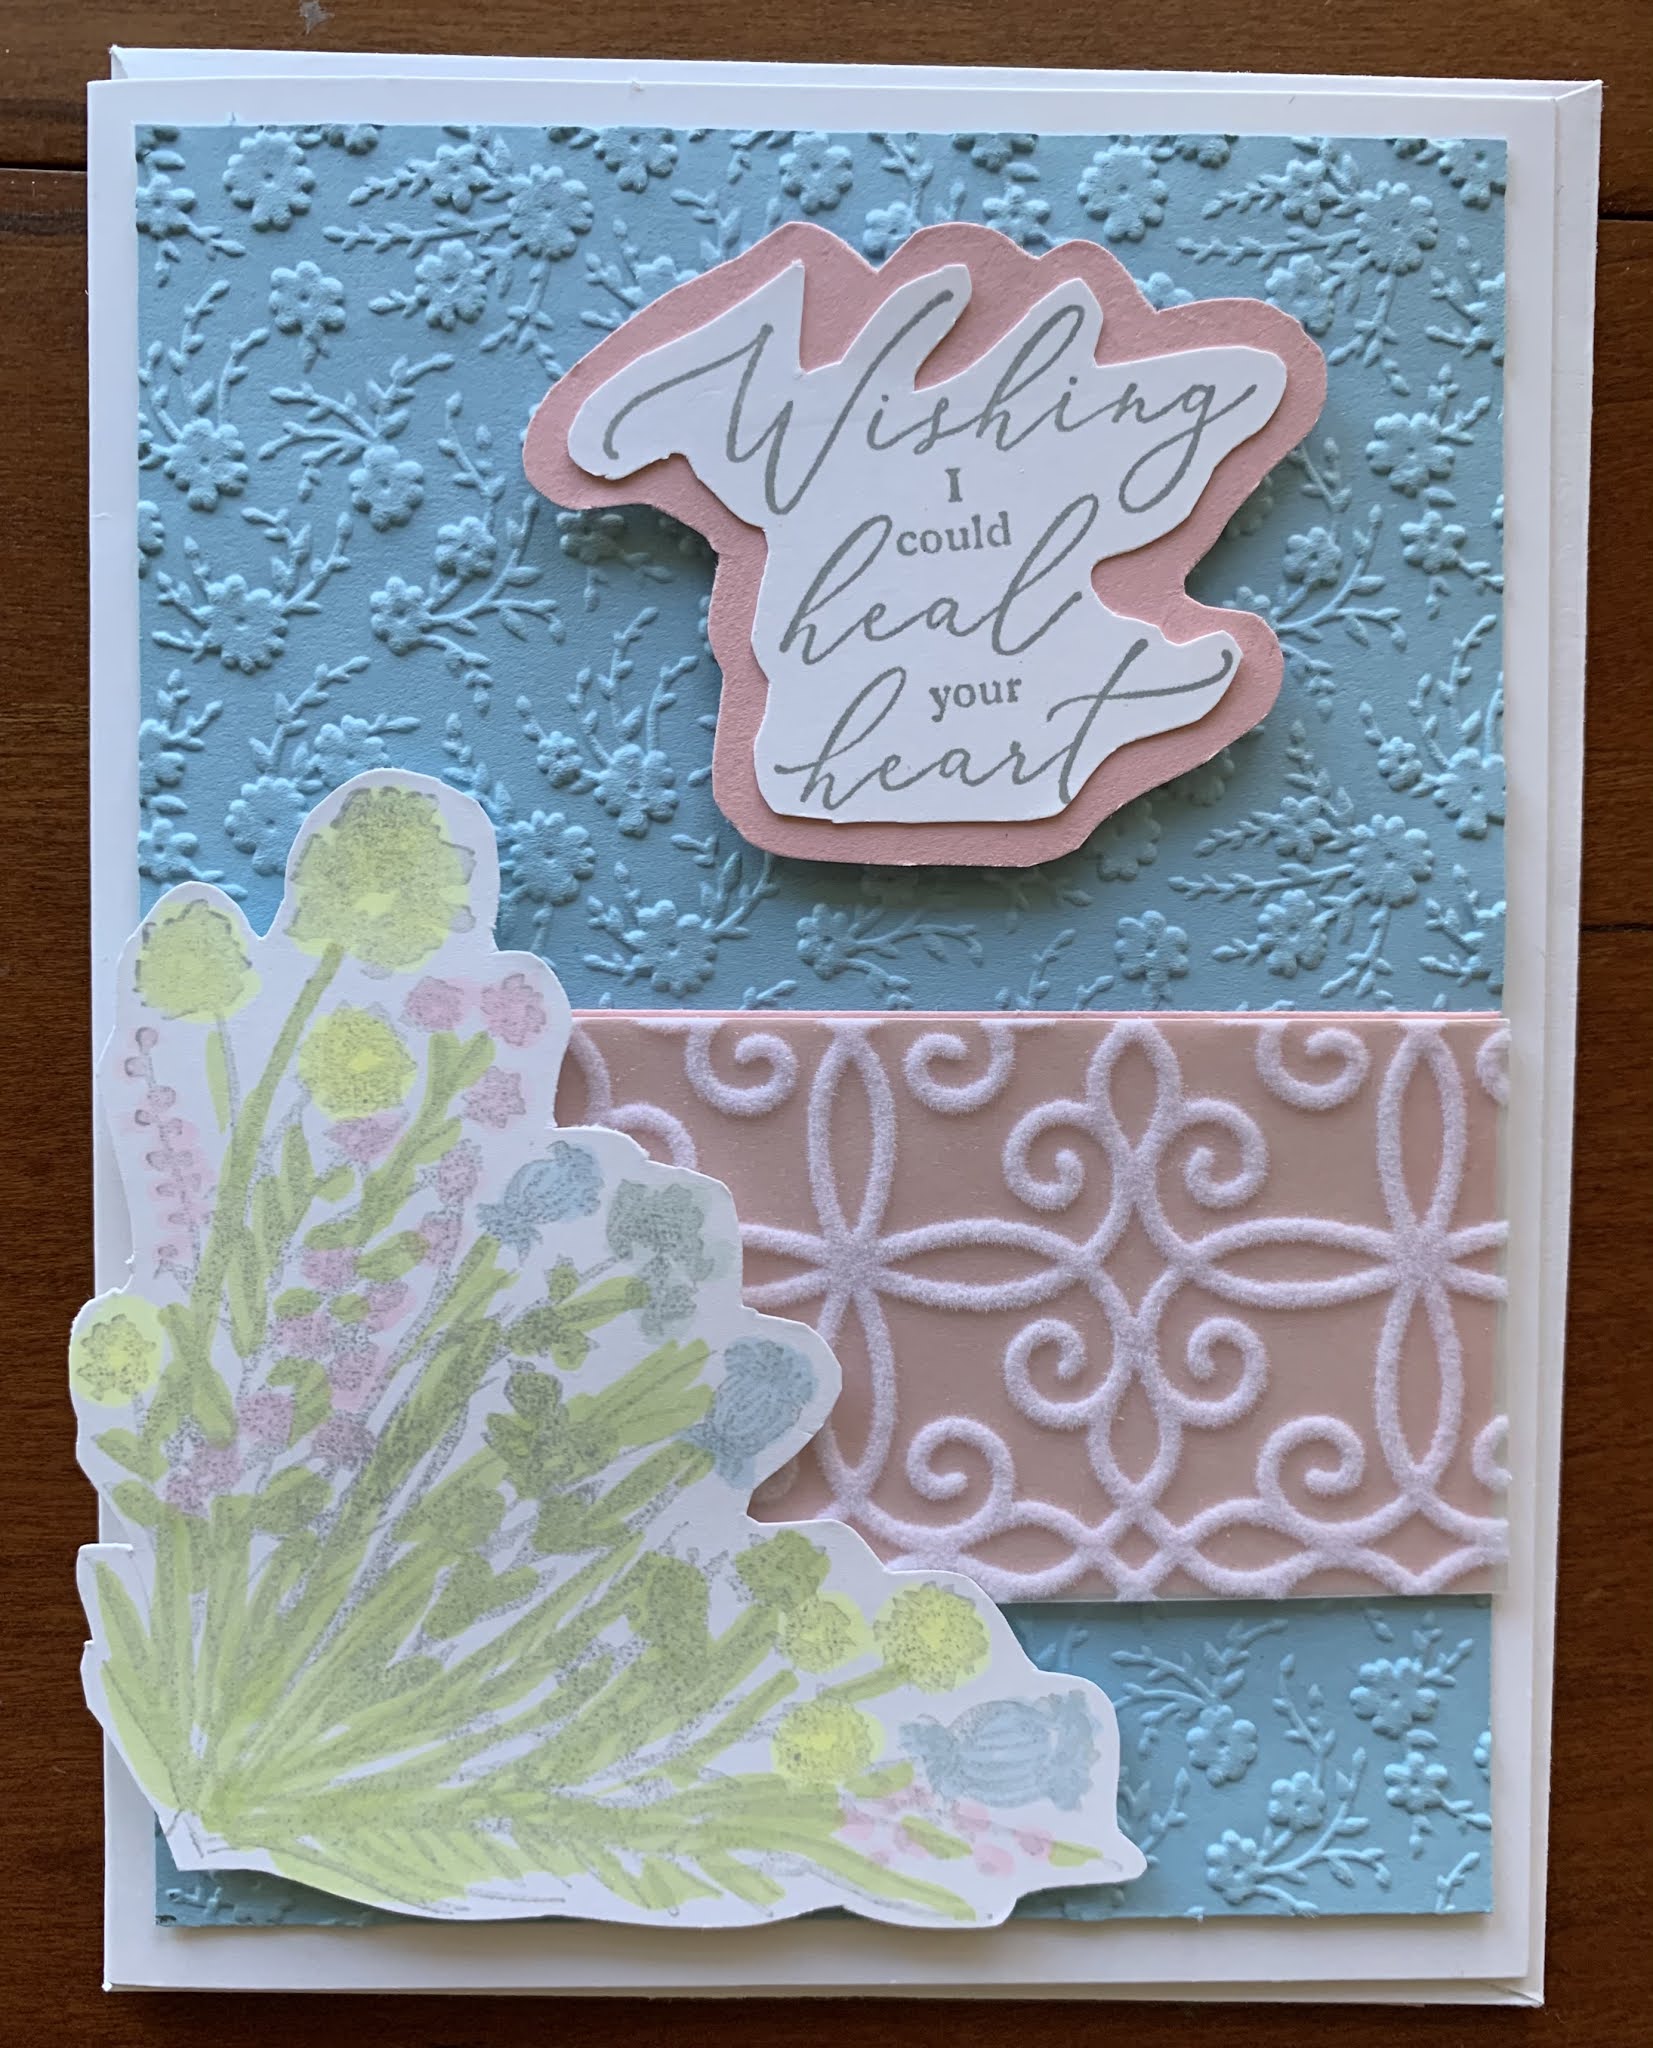
This card was made using the Flowers and Field designer paper and parts from the Bouquet of Hope paper pumpkin kit.


Another card with the same items.  I cut the saying in half since there was not enough room to place it where I wanted to put it.


This sample was made using the new bundle called Butterfly Bouquet.


How about another variation where I enlarged the 4 strip of designer paper to make them fill the entire card front.  Do you know what paper I used for the strips?  It is the Magic in this Night, the Halloween designer paper.  It is flowers on one side and Halloween on the other.

And finally one of my favorite Sale a Bration stamp sets the Darling Donkey.


I know this layout is one I will use over and over again.  


Product List


Have a wonderful weekend, hopefully with some sunshine.
Come back Monday for a new template and new simple carda.
Till then,
Happy Stamping,
Sushi

Thursday, February 25, 2021

Step it up Thursday with Bouquet of Hope

This week’s template. 


A simple card made using Bouquet of Hope paper pumpkin kit. 


A stepped up version using the February paper pumpkin kit and the Flowers and Fields designer paper that is one of the Sale a Bration offers. Free with a $50 order. 


Further detailed card using more layers of designer paper and additional paper pumpkin punch outs. See how easy it is to go from basic to detailed. 


For my final card I have taken the template and used two of the Sale a Bration stamp sets. 
Corner Bouquet, and Heal Your Heart.


Product List


Come back to see how to put together the card of the wee.
Till then,
Happy Stamping,
Sushi

Wednesday, February 24, 2021

What is it Wednesday-4 ways to stencil with paper pumpkin


Have you heard?  The March paper pumpkin kit will include 4 stencils.  In case you are not sure what to do with a stencil, here are 4 techniques I used today in my video.

1. Use a sponge and your favorite ink pad.
2. Use a dobber on one of your fingers to get a different look.
3. Use our new tool, a blending brush for a smooth look.
4. Use a spritzer, rubbing alcohol, and reinker for a totally different look.


Did you know that the part of Paper Pumpkin you might throw away can make a great stencil.  Here are a couple of cards using the leftovers from some leaves.


This next card also features one of the Sale a Bration stamp sets., A Touch of Ink.  This set is free with a $100 order.  I love how it looks with the leaf stencil as background.


Finally, I used the leftovers from a new designer paper that is coming up in March to make a stencil behind each one of the butterflies.
 

I had such fun playing with my stencils.  Share some of your projects that you have used  with stencils.


Product List
Check out today's video to see how I used each one of these tools.


Tomorrow I will be showing you how I stepped up my simple card using the Bouquet of Hope stamp set.  
Till then,
Enjoy the sunshine and some stamping,
Sushi

Tuesday, February 23, 2021

Cut it Out Tuesday One inch strip #2 (card #49)

Are you ready for another card made with 1 inch strips.  They are so easy to make and a great way to use up your designer paper scraps.  I learned this technique from Jackie Bolhuis..

Here are this week's cutting instructions.

1. Card base 5.5 x 8.5
2. Next layer 5.25 x 4
3. One is strips of designer paper cut
2-1 by 2 inches
2-1 by 3 inches
Ribbon, a saying and some accessories


For this first card I used several items from the Bouquet of Hope paper pumpkin kit
and the Sale A Bration designer paper called Flowers and Fields.  The kit was designed to coordinate with the designer paper.  The paper is available at no cost to you  with a $50 purchase  


The Sale a Bration stamp I am featuring to day is the adorable Darling Donkey stamp set.  This is another set that is free to you for a $50 order.


Darling Donkeys Cling Stamp Set
[155264]
$0.00

Check out this video that talks about today's cutting instructions and the paper pumpkin kit.


Have fun getting your supplies ready for Friday when we will be putting this weeks card together at 10:30 on Friday.
Tomorrow I will be sharing several different ways to use a stencil. So come back and see if you will learn something new.
Till then,
Happy Stamping,
Sushi

Monday, February 22, 2021

Make it Simple using the Bouquet of Hope paper pumpkin kit

Time for a new template and a simple card.  This week each card I feature will be made using the February  Bouquet of Hope paper pumpkin kit.


This simple card was made using the following directions.

1. Cut the gold doily in half.
2. Cut one of the cards into strips to use on the card.
3. /Stamp the saying on one of the labels that are part of the kit.
4. Add one of the flower punch outs to complete the card.

Now that was really simple.


This week is also the last week that Sale a Bration is around.  I will be featuring one of the stamp sets that you can receive for free with a $50 or $100 order.


 Today's set is called Berry Blessings and comes as a bundle with the Berry Delightful designer paper.
The card I made using the stamp set and paper follows today's simple card template.


Product List
Berry Blessings Bundle (English)
[157613]
$0.00

Check out this video that shows how to make today's simple card.


Tomorrow I will share the card of the week and how to cut your supplies and be ready to put the card together with me on Friday.  Be sure and come back at 10:30 for these instructions.

Till then,
HAPPY STAMPING,
Sushi

Friday, February 19, 2021

Put it Together Friday_Dandy Garden Memories and More

Check out these samples of the Slide card,  When the card is assembled It looks like this.

Card base is 1/4 of a sheet of card stock.  5.5 x 4.25


When you slide the belly band to the left your saying shows up.The belly band measures 11 by 2 inches and folds over the card base to the back where it is glued together.


These cards have been made with the Dandy Memories and More card pack.


Here is another version showing how I have cut up some of the cards for accents on the belly band.


And move the band and there is another message.  Easy and fun to send.


I  based this weeks card on a card I received from my friend Dina.  When I slid the belly band over to the right this time, there was a message underneath.  What fun!


Product List
Dandy Garden 6" X 6" (15.2 X 15.2 Cm) Designer Series Paper
[154297]
$11.50

Check out this video to see how I put the card together.


Have a great weekend.
Come back Monday for a Simple card using the Bouquet of Hope paper pumpkin kit.
Till then,
Happy Stamping,
Sushi

Thursday, February 18, 2021

Step it up Thursday-Dandy Garden Memories and More

This week's template.


A simple card made from the Dandy Garden Memories and More card pack.


A stepped up version.
1. added white layer behind several card features.
2. saying is a separate component of the card.
3. The ribbon takes the place of a horizontal strip of card stock.


The final version.

1. 2 layers behind the focal point.
2. Ribbon instead of strips of designer paper.
3. Bees and saying added on top of layers.


Another easy way to step up your cards is to use a laser cut card front.  Each and elegant looking.


Product List

What do you think of the dandy laser cut paper?
Come back tomorrow when I will share with you how to put the card of the week together.
Till then,
Stay warm, stay safe, and find some time to stamp.
Sushi

Wednesday, February 17, 2021

What is it Wednesday-Dandy Garden Memories and More

Memories and more kits are for more than scrapbooking. Check out what else you can do with each card pack. 

1. Put the cards into a pocket layout.
2. Place the cards just as they are on a card front.
3. Trim the cards and place an assortment on a card.
4. Combine a card with the matching designer paper/

Check out these cards I made using the above techniques.


In addition to the Dandy Garden Memories and More card pack, there are some card bases and envelopes that are a  part of the Dandy Garden Suite.
These cards are ready for any saying to be added at any time.


 Product List

Today's video shares how I used each of these components to create cards that are ready to go without any stamping.


Tomorrow I will share how to step up your cards using the Dandy Garden Memories and More card pack.  Come back at 10:30 to hear my hints.

Till then,
Stay warm and Safe 
Happy Stamping,
Sushi

Tuesday, February 16, 2021

Cut it out Tuesday Slider card using Dandy Garden Memories and More

This is what the card of the week will end up looking like when it is put together.


When you slide the belly band your message is underneath.


Cutting directions
Background 5 1/2 by 4 1/4
Next layer 5 1/4 by 4
Next layer (I used designer paper) 5 by 3 3/4
Saying and accessories


Product List

Come back tomorrow for What is it Wednesday where I will share with you what you can do with a Memories and More kit.

Till then Stay Warm and Safe,
Happy Stamping,
Sushi