Showing posts with label StampinUp. Show all posts

Wednesday, July 21, 2021

What is it Wednesday-6 Embossing Techniques

If you like using embossing folders in your card making, here are some different techniques you can use..

1. Ink up one side of your embossing folding by gently rubbing your ink pad as straight as possible over the image fold it and then emboss..  In this card the back ground was raised so that is where the ink went making the flowers pop up as white images.


 Now, ink up the opposite side of the folder and follow the same steps as for #1.  Ink, fold, emboss.  This time the flowers were raised so they caught the ink and the background is white.


2.   Emboss using a piece of Vellum Card stock.  The images will come out white.


3.  Emboss on Foil.  The images come our very sharp and shiny.  For this card I punched out the foil with the dragon fly punch.


4. First, I embossed the basic white card stock using the Painted Texture folder.  Then, I ran the same piece through a second time using a new folder from the mini that comes out August 3. It is called Timeworn Type. With a closer look you should be able to see both images on the embossing.


After embossing twice with the same folders, I gently rubbed the surface using a blending brush.  It help show off the embossed images a little better.


5. Before embossing I used Stamin Markers to color the card stock in graduated colors.  Then I spreitsed the paper with water and finally embossed with the snowflake folder.  (This might be a retired folder.)


6. For my finally technique, I used blends and spritzed them with alcohol.  I think this method blended the colors better.


Cn you till that I had a great time playing with these different techniques on my embossing folders.  See if you can come up with a different technique and let me know. 


Product List

Which technique is your favorite.  Leave a comment and I will send you that card.

Tomorrow I will be stepping up a card 3 times using the oldie but goodie, Forever Blossoms.

Till then,
Happy stamping
 Sushi

Friday, July 9, 2021

Put it together Friday-Triple Arrow fold

I just love this fancy fold card the Triple Arrow Fold.  If you want cutting directions you can check out my blog post from Tuesday or, my Tuesday video on my Stampin with Sushi face book page.

This first card is made using the Pansy Petal designer paper, on of the papers that are on sale this month for $9.78.
Next I made a card using the You're a Peach designer paper also a part of the sale for $9.78. .  
Finally, this  card was made using the stamps from the June Expressions in Color paper pumpkin kit. And the Expressions in Ink designer paper which is NOT part of the sale.

I am having so much fun using the different designer papers in my projects this month.  Be sure and make a list of your favorites.


Product List

What are some of your favorite designer papers?

Come back Wednesday for my next blogpost-What is it Wednesday?  I will be sharing techniques you can use on designer paper.

Till then, Happy Stamping,
Sushi

Monday, July 5, 2021

Make it Simple Monday-Expressions in Ink and Color

Greetings,

I recently had surgery of my right thumb which made it hard to do things with only my left hand, so I was absent from my blog while I healed. I have looked at my weekly schedule and made some changes to my blog.  I will be posting Wednesday, Thursday and Friday of every week.  In each post I will share my video for the day and also post my video on YouTube.

I hope you will enjoy my posts and share them with your friends.

This is the template of the week.
And this is the simple card that I made using supplies from the June Expressions in Color paper pumpkin kit as well as items from the Expressions in Ink bundle which coordinates with this month's kit.

 Paper Pumpkin Supplies

  The card base
  The tag backing
  The tag
  The saying

Expressions in ink designer paper and the Artistically Inked Bundle

The striped designer paper
The flower and leaves which I cut out of the designer paper


Product List

I hope you will try to make a simple card of your own using this template.  Post your card on my page when you do make your card so we can all see it.

Tomorrow, I will share the cutting instructions for the card of the week, the Triple Arrow card.

Till then, 
Happy Stamping,
Sushi

Monday, June 7, 2021

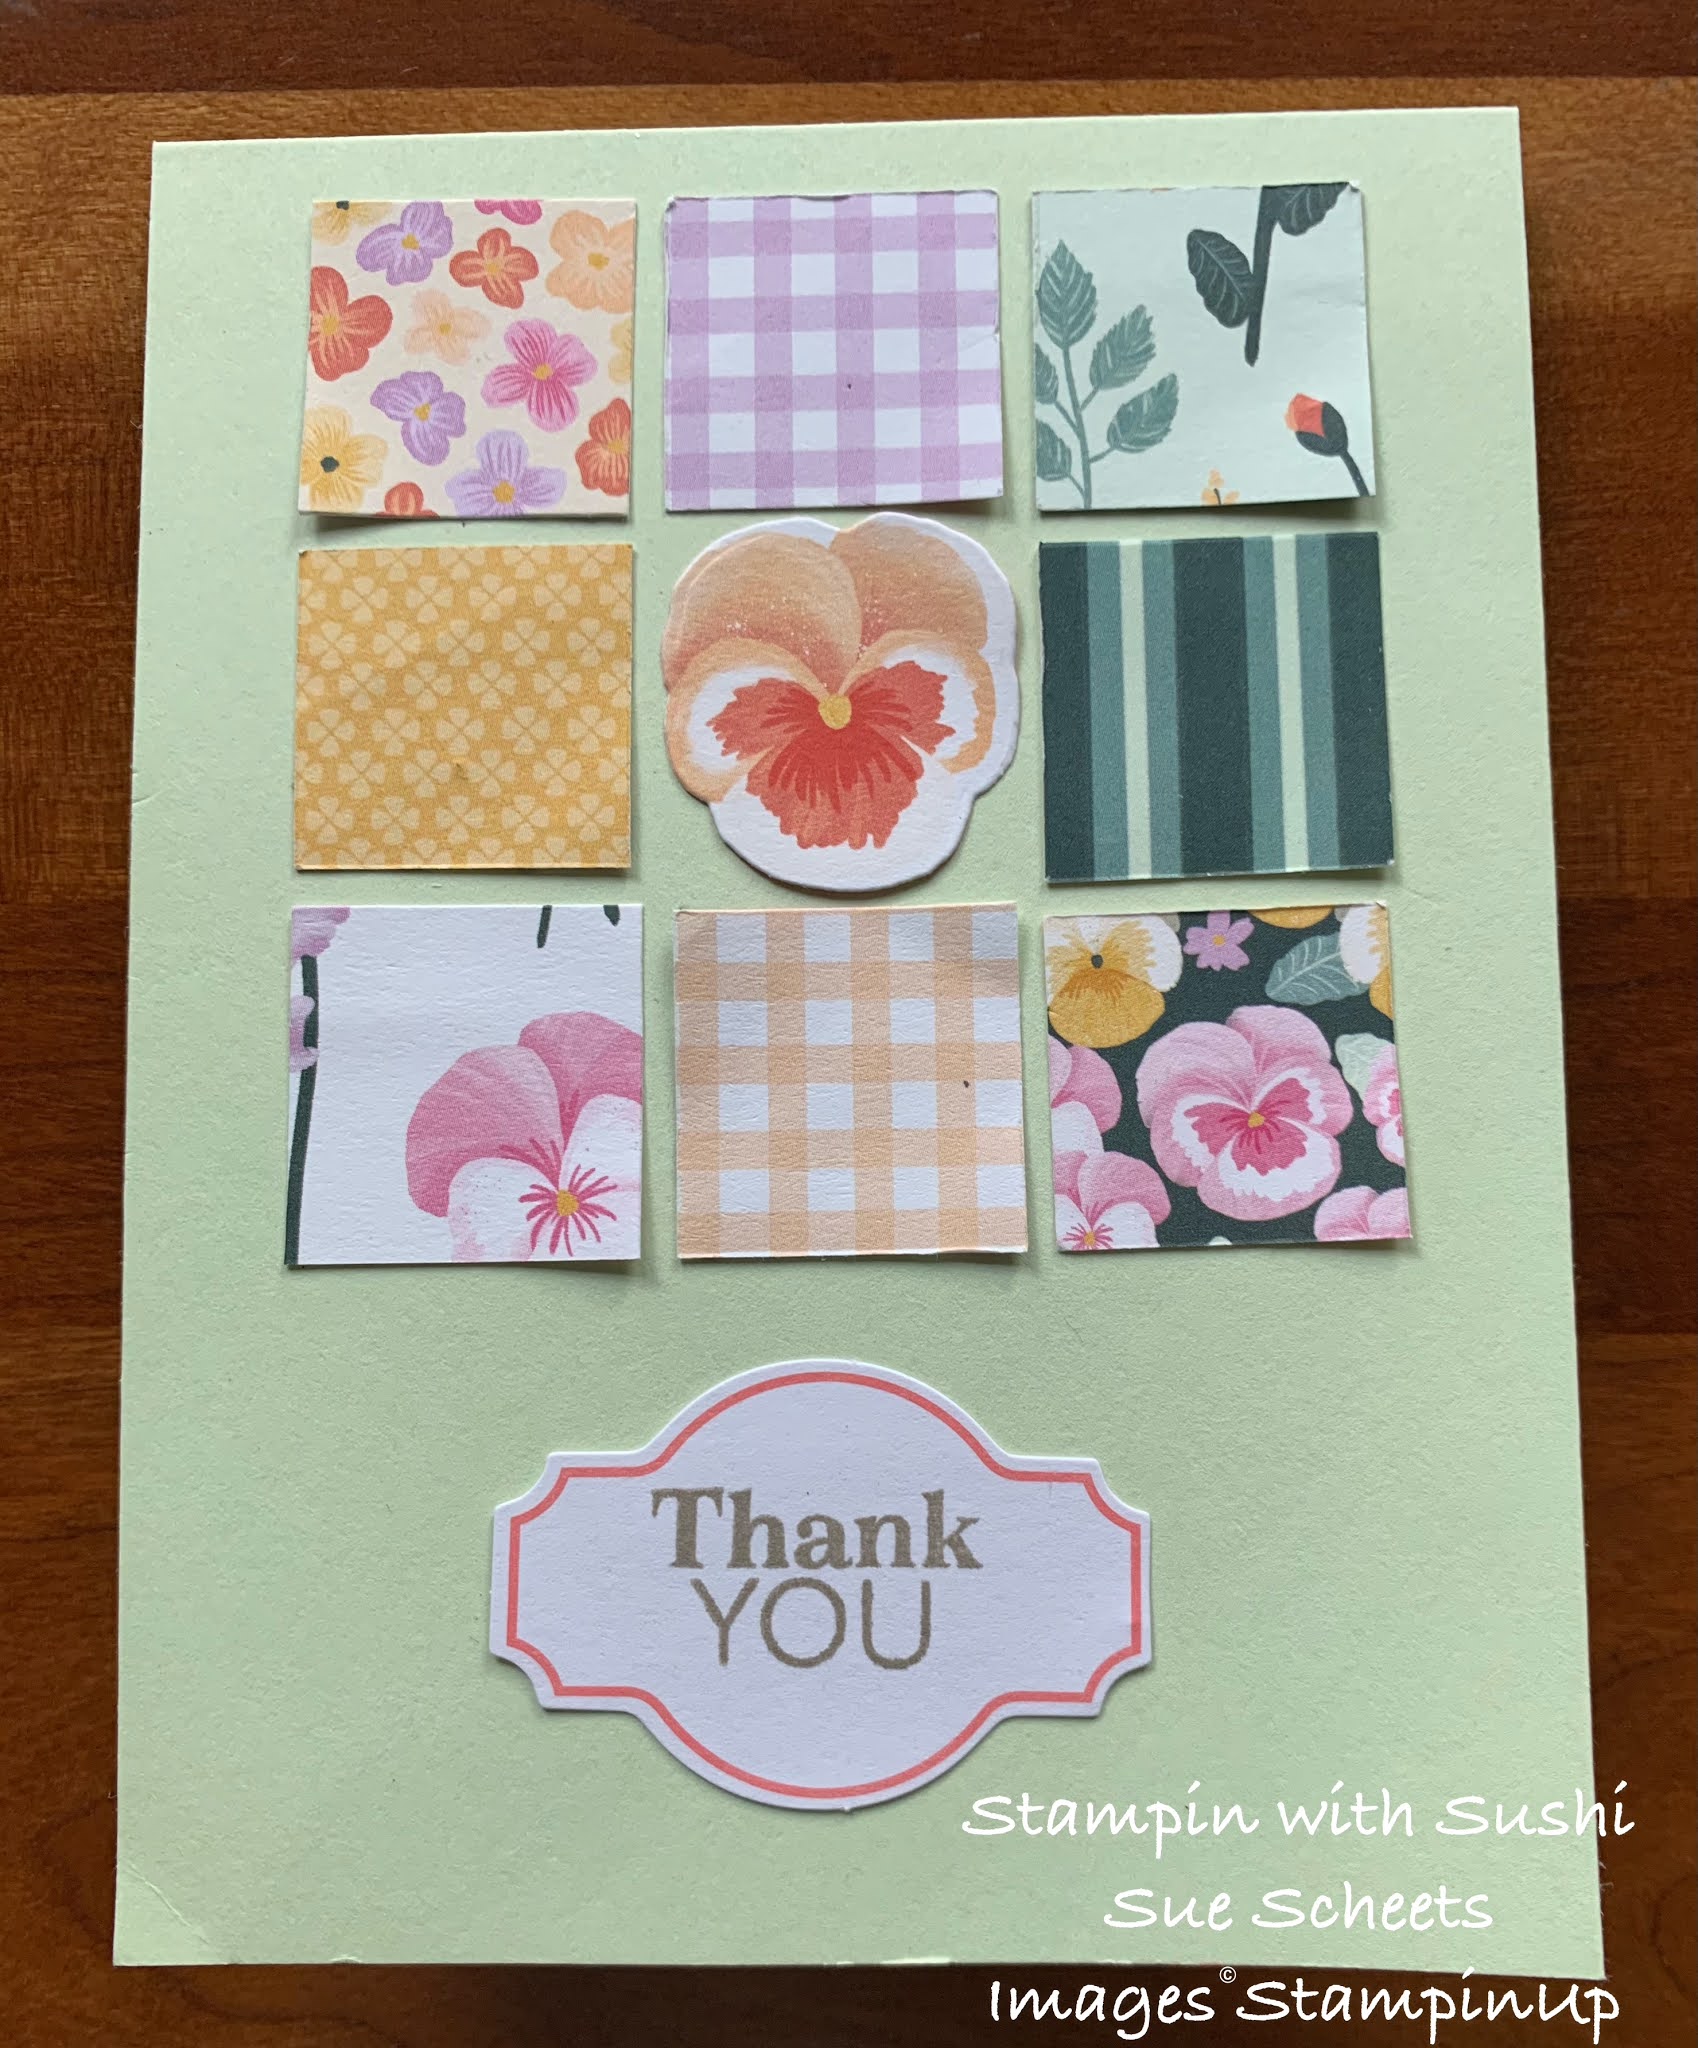
Make it Simple Monday-using Pansy Petal Suite and a template


A new week and a new template.  A simple card is a great way to start off the week.


The great thing about a template is that is can start your creative juices flowing.  Today's template made me think of 9 shapes organized in rows. 


The next thing I thought of was what to put in place of the shapes and I decided designer paper would be a great thing to put into 9 shapes.  It would be a great way to show off the Pansy Petal designer paper, many designs at once.

Finally, I decided I wanted my shapes to be squares so I could put the saying at the bottom.  I also wanted to place one of the cut out pansies in the center.  That is how my mind worked with this week's template.


Product List
Pansy Dies
[155680]
$32.00

Friday, June 4, 2021

Put it together Friday-Opposte card


Check out what the Opposite card looks like when you put it together.


Here I used some retired Christmas paper and attached opposite colors.  I placed a saying in the center to set the entire card off.


 For this sample I switched the designer papers and came up with the great contrasting look. I placed half of a vellum doily under one half of the center, and placed a small pansy in the middle of the squares.


This was a fun easy to put together card.  I plan on making several and trying a few different ways to put the pieces together.

Is supposed to be a very hot weekend here in Illinois.  Stay cool, find some time for stamping and being around those you care about.

Till Monday,
Hsppy Stamping,
Sushi

Thursday, June 3, 2021

Step it up Thursday in a patriotic way and with the Pansy Patch paper

Step it Up day is a fun day for me.  First off is the template for the week.


Next is the simple card I made using the Pansy Petal suite.


I stepped up the first card, by...,.

1. Creating a background for my designer paper strips.
2. Creating a background for my horisontal strip.
3. Popping up the Happy Birthday with dimensionals..
4. Adding a small pansy cut from the designer paper.

r
And here's how I stepped up the card once again.

1. I added an embossed layer of card stock on top of the card base.
2. I layered a second color card stock behind the designer paper strips.
3. I added an additional layer behind the horizontal strip.
4. I added a second pansy as an accent.

Which of the above 3 cards is your favorite?

Here is how I stepped up my patriotic cards.


1. I added a Paper Pumpkin Batter Up card as the base.
2. I changed the colors of the strips, one is the envelope flap from the Batter Up kit.
3. I placed the thanks on one of the vertical strips.
4. I wove the horizontal strip through the other strips and added some stars to the strip.


Finally, 
1. I cut apart the paper pumpkin card and mounted the front on some Night of Navy card stock.  
2. I also backed the 3 strips on the same card stock.
3. Lastly I added my saying to the horizontal strip.


I loved this template.


Tomorrow, I will put together the card of the week, the Opposite card.  Come watch on the Facebook Live at 10:30 or at the Zoom meeting at 6:30.

Till then,
Happy Stamping,
Sushi

Monday, May 31, 2021

Make it Simple Monday-Pansy Party Suite

It's Monday again and time for a new template and a simple card.


My first card is made using items from the Pansy Petal Suite.


My next card was made for Memorial Day and as a way to remember those who have served our country and those are serving now.  My gratefulness goes out to all of you.


Product List
Pansy Dies
[155680]
$32.00

Tomorrow is Cut it Out Tuesday.  Come back to  get the directions for your Opposite card.

Till then,
Happy Stamping,
Sushi

Friday, May 7, 2021

Put it together Friday-Faux Quilting card #59

Today is the day to put together the card supplies you cut out on Tuesday.

Here is the one I put together in the video I have posted below.  It sure was a lot of fun to put together and a great way to use up my 1 inch strips of designer paper.


 Have you tried to make one yet?  If not check out the video and make your card then post it in the comment below or on my Face book page called Stampin with Sushi.  I have a posting where you can share your photos with those who look.

I have been using the same stamp set and dies all this week and have had great fun doing so.  Next week I will be focusing on the bundle called Simply Succulents.  You might see some of the same designer paper, but very different stamp sets.  Hope you will join me next week for some new ideas.


Hope this video inspires you to make a faux quilting card.

Monday, come back for a simple card made from a template.
Till then, 
Happy Stamping,
Sushi

Wednesday, May 5, 2021

What is it Wednesday-Blending Brushes meets Flowering Cactus


What is it Wednesday?  Let's explore the stamp set and dies from the Flowering Cactus medley.


The stamp  set has some great stamps to create colorful cacti, and the dies match and can cut them out. In addition there are 3 dies in the die set that add extras to your cards.


These are the great colors that are included in the designer paper that is a part of the medley.
  Mossy Meadow, Highland Heather, Mint Macaron, Calypso Coral, and Pear Pizzazz.


I'm not done, there are 4 sheets of felt flowers with white stitching (this picture is just of 2 sheets) and 2 colors of twine.


One of the sheets of designer paper has pictures of a variety of cacti, which can be cut out using the matching dies.


Finally, the stamps.  Top row first.  I used the rock and roll method and found it to be too defined so I stamped, rocked and rolled and took a blending brush and blended the ink before stamping.  I liked that a lot better.

Second row, Rock and Roll, Rock and Roll and then blended before stamping, stamped image then second color added with the blending brush afterwards.

I had lots of fun making these.  Watch the video and you will see me in action.


Product List

I hope you will try the rock and Roll techniques with your blending brushes.

Come back tomorrow to see how I step up a simple card using the template of the week.
Till then,
Happy Stamping 
Sushi