Sunday, March 31, 2013

Sending out Monthly Birthday cards


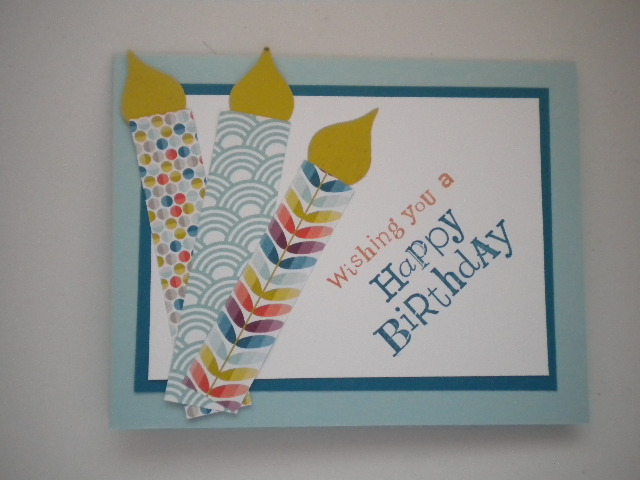
Cards for the grandkids and great nieces and nephews
The candles reflect their age

       It seems the need for birthday cards never ends.  I have lots of cards in my stash for adults, but not so many for little kids. So today I created several kid cards using the same card base.  Each month I send out birthday cards to family, Quilt Guild members, and stamping customers. I love doing it and consider it one of my services to those I care about.
    As someone who always has good intentions, I find myself being really good about sending out cards for the first couple of months in a year and then slacking off about March.  So, this year I came up with a great system.

1. In January I addressed envelopes and chose cards for everyone who had a birthday in January and February.

2. In place of a stamp I write the date that I need to mail the card to get it to the person on time.

3. At the end of January I addressed envelopes and chose cards for those who had birthdays in March.

4. In February for those who had birthdays in April and yesterday for those who had birthdays in May.

    I feel very organized and pleased to know that I am almost half-way through the year and have kept up with cards.  Yeah Me!!!


Saturday, March 30, 2013

A Bunch of Bunnies for Easter


     Wouldn't you love to get one of these cute little bunnies on your Easter table tomorrow?  I found the design on Shelli Gardner's blog ( Shelli is the founder of StampinUp) and made 24 of them for my grandkids, their parents, and my sons.  They were so easy and fun to make.


     My daughter, Jen, told me she got her box yesterday and thought the Easter Mice were cute.  Now, who has ever heard of Easter mice! I think they look like bunnies don't you?  Inside each bunny are some foil covered chocolate Easter eggs.  YUM!
 

Friday, March 29, 2013

Single Stamp Celebration


     Would you like to receive this card in the mail?  I just finished making 3 of these for my downline to congratulate them on their coming anniversaries as a demonstrator with StampinUp.  I wanted to use one of the single stamps that will be retiring on March 31st.  Each card has a different number of Pool Party glasses based on the number of years they have been a demonstrator.  The phrase You are a Star is from a stamp set we got free at last year's convention.
     Check out these cards that also use some of the Single stamps. Information and pictures of the stamps can be found on my website.
     If you think being a demonstrator is something you might like to do I would love to talk to you about my experiences.  Just contact me at my email address or on my website.  email:  sue.scheets@gmail.com
website www.sushi.stampinup.net or just leave me a message at this posting and I will get back to you as soon as I can.
  

Thursday, March 28, 2013

Lucky Scrapbook Layout


     Everyone once in a while I like to work with just one color.  And what color could be more perfect for a March layout than green.  I checked through all my designer paper and found a variety of greens to use.  One strip is Wild Wasabi card stock with the shamrock from  Every Little Bit  stamped on it with Wild Wasabi ink. Don't you feel a little lucky just looking at this layout?
Closeup of the accent piece

Wednesday, March 27, 2013

DressUp Scrapbook Layout


       What kind of pictures would you put on these layouts?  These were two of the pages that my Scrapbook Your Life class created last week.  I had so much fun thinking up the design. Do you see how I used the dress stand and the leftover card stock in the same layout?


Supplies needed
12 by 12 Whisper White card stock
Pool Party, Summer Starfruit card stock
Sycamore Street designer paper

Tuesday, March 26, 2013

How to change your card to make it look different


     My second swap for the regional in St Louis.  I love using the same design and just altering it with different DSP and a different accent piece.  This is the first card I made using the same design.
 
     Can you find the changes I made from this card to my swap?
 
1. I changed the designer paper from Tea for Two to Summer Smooches.
 
2. I changed the basic card stock color from Early Espresso to Rich Razzleberry.
 
3. I changed the accent from a pinwheel to a flower.
 
     Which card is your favorite?

Monday, March 25, 2013

Dress Up Framelit Leftovers


     Are you a person that likes to use up all your little scraps?  When I was making a recent card using the DressUp framelits, I noticed that the paper that was left over had a great look to it also.  So I created this card as one of my swaps I took Saturday to St. Louis to the StampinUp Regional.  I loved the fact I had no scraps leftover when I finished the card.  

Supplies needed
Dress Up Framelit
Early Espresso, Whisper White card stock
Island Indigo ink
Pool Party Ribbon
International Bazaar designer paper
Loving Thoughts stamp set


Sunday, March 24, 2013

Best of Flowers for Easter


     What do you like most about Spring?  Looking out the window today I think it would have to be the flowers.  I just hope all the flowers that started to poke their little heads above the ground are not going to be ruined by the biggest snow storm of the season.
    This is year 25 for StampinUp and each month they come up with a Best of stamp set that is made up of favorite stamps from the past 25 years plus one new never seen before stamp set.  This sunflower is from the Best of Flowers stamp set and boy would I love to be able to see one right now.

Supplies needed
Card stock Summer Starfruit, Early Espresso and Whisper White
Stamp set:  Best of Birthdays, Wacky Wishes

Saturday, March 23, 2013

You are My Sunshine

    
      Are you as ready for Spring and the sun as I am?  Especially since it is supposed to snow later on today.  When I looked at this stamp from the single stamps that we offer, it made me hopeful that the sun will shine and spring will come before I know it.  Don't you love the single stamps that StampinUp has been offering?  I love the idea of a set of stamps that match, but also the idea that I can order just one of a special stamp.

Supplies needed
Daffodil Delight,  Marina Mist, Not Quite Navy, Whisper White card stock
Parker's Patterns designer paper
Stazon Black ink
Cherry Cobbler Scalloped Dot ribbon
Daffodil Delight marker

Friday, March 22, 2013

Sale a Brate the Rain


     What was your favorite part of Sale a Bration this year?  I loved the designer paper, that matching buttons and ribbon and the petite curly label punch.  The great thing about the punch is that it will be in the new catalog that comes out in June.  Yeah! I have one thing from the new catalog already. This card was featured in my Spring Fill Your Card box class.  When I think spring I think rain and thought this card would be appropriate.  But, now I hear that this year when I think spring I might have to think SNOW!!!  That just does not seem right, but hey, this is Illinois where anything goes.

Suppplies needed
Island Indigo, Whisper White, Baja Breeze card stock
Sycamore Street designer paper, Sycamore street button
Bootiful Occasions
1/8 inch Basic Black taffeta ribbon


Thursday, March 21, 2013

Single stamp for Easter


     Don't you just love this stamp? I love the fact that it is a single stamp.  This is one of several single stamps you can purchase from now until the end of March.  What I like about this stamp..... It is simple, cute and easy to stamp.  I CASED a card that Mary Fish created.  I just changed the designer paper, the color of the accent color, and the bunny tail. This paper is one of the sheets of the free Sycamore Street designer paper featured as a Sale a Bration freebie.  I am going to miss this paper.  Love the colors!
    What will you miss from Sale a Bration? You know it's not too late to create an order and earn one last free item. Just head on out to my store and place an online order.


Supplies needed
Sahara Sand, Basic Gray, Pool , Whisper White card stock
Basic Gray ink
Sycamore Street designer paper
Oval Framelits, Edgelits
Itty Bitty punch,
Basic Pearls
 

Wednesday, March 20, 2013

Bloomin Marvelous spring card


     What do you like most about Spring?  I like watching the leaves bud out and grow on the trees and the colors of the early spring flowers.  This card reminds me so much of what I like about early spring and was one of the cards featured in my Fill Your Card Box with Spring class that was held Monday. Next month I will be featuring Male Birthday cards.  If you love the idea of a montly card class, then save the third Monday of the month to make 5 cards at Sushi's place

          Supplies needed from Sale a Bration (each item free with $50 order)                 
 
  Bloomin Marvelous stamp set
Vine Street embossing folder
 
Supplies needed from Big Catalog
So Saffron, Baja Breeze, Old Olive ink and cardstock
Oval ,and scalloped oval punch
 
Supplies needed from the Spring catalog
Paper Doilies
3/8 inch Old Olive striped organdy ribbon


Tuesday, March 19, 2013

Sale a Bration Ferris Wheel


     Do you know where Ferris Wheels were made?  At one time the Eli Bridge company made Ferris Wheels here in Jacksonville, Illinois.  I was immediately attracted to the Ferris Wheel stamp in the Feeling Sentimental stamp set, one of the free items available during Sale a Bration.  Sadly, sale a bration ends this Friday.  Were you able to get all the free items you wanted?  Check out your wish list and look back on this site for the next few days.
    This card was one of the cards stampers made at the Fill Your Card Box for spring card class that was held today.  Check out the next few days for more cards and let me know which card is your favorite.
 
Supplies needed
Sycamore Street designer paper
Island Indigo ink
Feeling Sentimental stamp set
Designer Silver basics buttons
Pumpkin Pie 1/8 inch taffeta ribbon


Sunday, March 17, 2013

Dana's 3-D downline challenge

    This is what Dana came up with for her challenge project.  We were all so impressed with her creativity.  She found old wooden spools at an antique shop; made a rod to for the hanger, embossed the background; made a jacket for the dress.  She said it is now hanging on a wall in her bedroom.  Didn't she do a great job?  What her project taught me is that you do not always have to do a card when making a project.

Saturday, March 16, 2013

Downline Dress Up challenge part 2


   Here are some more cards from the February challenge issued to my downline.  Check out yesterday's blog for the challenge details. 
 
The front of Amanda's card.  She used ribbon at the bottom of the dress and made it look like a ruffle.
 
 
The inside of Amanda's card.  I love how she incorporated the hanger clip.
 
Janet has some small flower embellishments at the waist of her dress that are really cute.
Darcy added some rhinestones on her dress that give it that extra bling and she gave dimension to the dress that made it seem to pop from the card.
 
   I love how each person had a different perspective on the card, and we all started out with the same pieces.


Friday, March 15, 2013

Downline DressUp Challenge part 1

 
     What project would you make with these items?  At my downline meeting for the past few months I have been issuing a challenge.  The challenge last month was to create a project from these items.  I taught my downline three ways to color the flower trim.
 
1. rub an ink pad over the top of the flower.
2.  Place some reinker and water in a small container and soak the flower in the solution.
3. Use a puddle of ink from an ink pad, dip the aqua painter into the puddle and paint the flower .

 
This is the card I came up with.  My flower has been colored by rubbing the ink pad over the top with Tangerine Tango ink.
 
This is the card my sister, Nan came up with.  She lives in Eugene, Oregon and mailed me her sample.
     How would you use the DressUp framelits and the flower trim to make a project?  Check back tomorrow to see what the rest of my downline did.


Thursday, March 14, 2013

Paper Pumpkin Thank You


     Tomorrow is the day that the first My Paper Pumpkin kit gets mailed out to those of us that ordered it.  Are you excited?  I know I am because I LOVE getting things in the mail.  As my way of thanking people that have ordered My Paper Pumpkin and mentioning me as the demonstrator, I have created a thank you card that I will send out. Here is what is included in the thank you card.

1. A pumpkin card CASED from Ronda Wade with a handwritten message from me on the back.

2. A picture of a way to enhance the basic card design for one of the cards and the kit to make the enhancements.

3. My Digital Studio created directions on how to build the card.

     It is not too late to join My Paper Pumpkin.  Whenever you join you will receive the welcome kit as your first kit. There is an acrylic block included in the welcome kit and it is needed for the kits that follow.
     When you join make sure you mention me, Sue Scheets, as your demonstrator so you can receive your own Thank You card and kit. 

Wednesday, March 13, 2013

How to create the Faux tile look


     I had such fun creating the cards for last weekend's technique stamp camp called Faux fun.  This is the last card from the camp that stampers got to make if they RSVP'd for the class. I always offer a free card for anyone who RSVP's.  It makes it so much easier for me to plan when I have an accurate account. The steps to apply this technique are fast and easy.

1. Using a diagonal scoring plate score a square piece of card stock every half inch.

2.  Turn the scored piece of card stock 90 degress and score again every half inch.

3. Sponge ontop of the scored piece with a light color.  See how the scored area looks like the grout on tile. 

4. Stamp a simple image ontop of the scored piece using the same color ink that you used to sponge.

5. Finish the card to your liking.

A closeup of the tile
 

  What was your favorite Faux technique?  Check out previous posts to see the other cards we made at my Faux Fun stamp camp.

Tuesday, March 12, 2013

Faux Patina What is it?


     I love this look, but what is patina?  It is the look that bronze, copper and other metals get from being exposed to the elements, chemicals and other ingredients that change their composition.  This technique is so much fun to make because as you progress through the steps you see such awesome changes to the card.

1.  Find the side of an embossing folder where the background is raised. Then, ink it with a light neutral color like Crumb Cake. Place your paper inside the folder and roll through the Big Shot.  The Crumb Cake color will now be on the background of your paper.

2. Sponge three colors in progression from lighter to darker over the embossing.  I used Marina Mist, Always Artichoke, and Early Espresso.

3. Tap a Versamark pad in just a few places over the top of the card. Emboss with gold embossing powder.  It will leave a scattered look and that is what you want.

4. Finish the card anyway you want.  Experiment with other color combinations and have fun.

Monday, March 11, 2013

The Shaving Cream look without the mess


     Have you ever tried using shaving cream to create the background of a card?  If you have you know it can be quite messy.  The flower in the center of this card was made with the Faux Shaving Cream technique and not only was NOT messy, but quick and easy to do.

1.  Ink up a solid image stamp set with a light color.

2.  Ink up the roller of a wheel in a darker contrasting color.

3.  Place the wheel on the stamp; press and twist; remove and place on a different part of the stamp and repeat the press and twist.

4. Huff on the stamp to make sure it is moist, and place the image on some card stock.  Easy Peasy!

    Each flower you make will look different but resemble what it would have looked like had you used shaving cream.  I love Faux techniques don't you.

Sunday, March 10, 2013

How to Create a Faux Metal Embellishment


    Don't you think metal on a card adds a little bit of extra fun?  But, the thickness of metal adds to the cost of mailing the card to someone.  This technique called Faux Metal solves the problem.  And it is an easy technique.....I love the idea of easy don't you.

1.  Use a Versamark pad and stamp one area of a piece of card stock thoroughly.

2. Sprinkle the area with a thick layer of silver embossing powder.  Shake of the excess powder.

3.  Repeat steps 1 and 2 two more times so you have three layers of embossing on top of each other. Before adding each additional layer make sure the first layer has cooled enough you can touch it without leaving an impression in the embossing.

4. Choose your stamp you want to have look like metal and stamp it in versamark. The versamark on the back of the stamp will keep it from sticking to the embossed card stock. Have it close by so you can reach it quickly.

5. Versamark, and emboss the card stock one more time and as soon as you have finished grab your stamp and press it into the heated layers of embossing powder and hold it steady for 5 seconds.  When you peal the paper off of the stamp you will have an embossed image that looks like metal.

     Here is a closeup of the Faux Metal embellishment.


Friday, March 8, 2013

Faux Bleach How To


     Do you love the look of a card that has been bleached but hate the mess?  This card was made using the Faux Bleach technique.  It is so easy but looks so very hard.

1. Choose a solid image stamp; stamp the image on a light colored card stock with Versamark; emboss with white embossing powder.

2.  Mix up some reinkers and water in a spritzer.  I chose Gumball Green and Midnight Muse.  The colors need to be darker shades, lighter ones do not show up very well.

3. Spray your reinkers on the embossed image till you get the look you like.

4. Lay your cardstock while still wet on several layers of paper towel.  Place a piece of white computer print paper ontop of the embossed image.

5. Using the highest non-steam temperature of your iron press on the computer print paper until you see some ink coming through the paper.

6.  Peel off the computer paper.  The embossed powder should transfer into the computer paper and leave the look of a bleached image.  I had to press my iron on the embossed image a few times to get all of the embossing powder off the main card image.

     I love this technique and plan to use it on some more cards in the
future,

Thursday, March 7, 2013

What does the Paper Pumpkin Welcome Kit look like?


     You might have heard about Paper Pumpkin and wondered what the cards  look like in the welcome kit. Check them out.  There are very precise directions which makes this kit ideal for the very beginning stamper.  But for the more courageous, you can move the items around, turn the card sideways, and just have fun.  These 3 cards took me about 20 miuntes to make.

    
    After searching Pinterest, I found an upgraded version of the card and loved the idea of adding a little bit of matching cardstock to get an even more different look.
   In case you are wondering what Paper Pumpkin is check it out here.  And on one of my earlier posting I took a picture of what the first kit will look like.  So, check that out here.
   I personally love the idea of getting a box in the mail  each month and being surprised by the project inside.  I know StampinUp well enough to know the projects will be fun to make and top quality.  If you are like me and want to be a part of Paper Pumpkin you have until the 10th to sign up in order to receive the welcome kit before the end of March. If you sign up after March 10th you will receive the welcome kit in April. The welcome kit will always be the first kit you receive. The other monthly kits will all be different and available for one month only.
    Contact me with any questions. sue.scheets@gmail.com
    

Wednesday, March 6, 2013

Faux Torn Paper Technique


     Don't you think this card looks like there is a blue layer over a white layer?  Well, that is not the case. This is an example of the Torn Paper technique and will be one of the featured cards at the Faux Fun stamp camp I am holding on Friday, March 8 and Saturday March 9th.  Details and registering for the class can be found on my website.
  
1. Tear a piece of scrap paper into a shape that you like.

2. Adhere it to your cardstock with a removable adhesive.

3. Sponge ink away from the torn line all over the empty space.  You can use several colors like I did.
     
   And that is all it takes to make a card using the Faux Torn Paper technique.  Don't for get to RSVP on my website to be able to make one of these cards for your own.

Monday, March 4, 2013

How to make a gift certificate in My Digital Studio


     Have you ever had the need to have a business card, insert for a card, or a gift certificate and needed it right now?  Well, that has happened to me quite often.  I get a great idea that I want to follow up on before I forget about it and am not sure how to do it.  Ever since I purchased My Digital Studio 2 my problem has been solved.  I can create anything I want whenever I want and even print it on my own computer.  Here are the easy steps I follow.

1. I open a new document in the customize category.

2.  I create the document in an 8 1/2 by 11 page format.  That make it really easy to see all the parts I am creating.

3.  Once I have my item created, I go to the section called Share.  I save my document as a jpeg item.

4. When I go later on to the document to print it, I choose the number of items I want to print.  For these two gift certificates I chose 9 per page.  

5. I print them using SU card stock, and cut them to size.

    I include the certificate on the left in the birthday card I send to all my customers.  The one on the right I just created and am planning to send those to stampers I have not seen for a while.  

Wouldn't you just love to get one of these in the mail? 

 Wouldn't you love to be able to create something like this on your own?  MDS 2 is the answer!

Sunday, March 3, 2013

How to make notecards from Designer Paper


     I had a wonderful day on Thursday creating all these notecards.  I used the stamp set and Designer paper called Sent with Love. These items are one of the current specials from StampinUp that can be purchased now through the end of April. Here is how I made them.

1. Cut and punch out the banners, tags, and details on one sheet of Designer paper.

2. Cut a sheet of 12 by 12 Whisper White card stock into 8 pieces of 3 by 6 card stock.

3. Use stamps, Designer paper, and embellishments to create the cards.

    I made more 3 by 6 pieces of card stock and rearranged additional embellishments until I ended up with 18 total notecards.  It was fun and fast.

Saturday, March 2, 2013

Gift Cards Galore


     Wouldn't you just love to have several gift card boxes on hand so you are ready for any occasion that might arise?  If this is you, then sign up for my Gift Cards Galore class to be held on March 26th.  Your RSVP is needed by March 16th in order to have all the supplies ready and waiting for your use.

    Every gift card box needs a card for your special message.  These cards and the boxes can all be made using the Boutique Boxes designer kit found in the Spring catalog. Check out my website events page for more details and a chance to RSVP for a special gift.

Friday, March 1, 2013

A card for a Science Fair winner


     You might be wondering what on earth a washing machine and jeans have to do with a Science Fair.  Well, my granddaughter Abby's project came about when her mom and dad had a difference of opinion of what would shrink clothes when they were washed. Abby and her dad did a lot of research and hands on experiments that resulted in her getting a first place award. I wanted to send her a congratulations card because that, in my eyes, is quite an accomplishment for a 5th grader and her first science fair. So, I had to make a card for her that addressed the project ( and my sense of humor)  The Sale a Bration stamp called Patterned Occasions had the jeans I needed to make the card. Notice her dad's jeans that are shorter than her mom's.  Another Sushi Original.