Friday, December 22, 2017

Butterfly Friends-Calendar


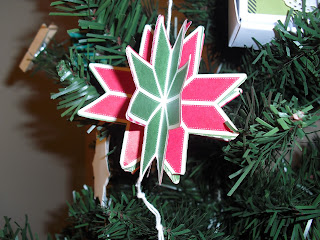
 This was my favorite 3-D item I made for the stocking.  It folds together in an unusual way that makes it fun to open and tricky to make.  


1. Cut the card stock 10 1/4 by 2 1/2
2. Score at 2 3/4, 3, 6 1/2, 6 3/4.
3. Accent piece 2 1/4 by 3 1/4
3. Second accent piece 2 by 3"
4. Designer paper for front of calendar 1 1/3 by 2 3/4
Decorate the rest of the front as you desire according to whatever the occasion might be.
5. I decided to add additional designer paper on the inside, but it is not necessary

Do not attach all the layers to the calendar.
Attach the accent pieces together.
Place two dimensionals to the left side of the back of the accent piece.
Then attach this piece to the top of the calendar ( the longer flap)

Open the accent piece, place the second flap under this piece,and that will close your calendar. This sounds difficult, but once you actually make one you realize how easy it is to put together.

Imagine all these items inside the stockings surrounded by candy and some lip gloss.  It was a fun stocking to fill, and enjoyed by my team member who opened it.  

Next week I plan to share some cards I made with my favorite suite from the coming Occasion catalog.

Thursday, December 21, 2017

Butterfly Friends Stocking-Post it Note

 Open this up and  you will find a little post-it-note. I don't know about you but I love post it notes, actually any kind of office supply.  It might be as dangerous for me to be in an office supply store and to be ordering from a Stampin'Up! catalog.

1. Cut card stock 4 1/2 by 2"
2. Cut designer paper 4 1/4 by 1 3/4
3. Cut adhesive backed Velcro dots in half.
4. Place them together and  attach one to the top flap, then when you fold the holder the other side will stick to the bottom in the correct place.

I did not score this, but instead creased the card stock around the post-it-note.  This holder could easily be changed according to the size of the post-it-note.

Tomorrow I will show you the final item I created for the stocking.

Wednesday, December 20, 2017

Butterfly Friends Stocking-Drink Mix


 I love the idea of decorating whatever the gift, item might be.  So instead of just putting a Singles to Go in the stocking I decided to place it inside a cute looking holder.


1. Cut card stock 10 1/2 by 1 1/4".
2. Score at 4 7/8 and 5 1/8.
3. Accent piece cut at 4 1/4 by 1"

How easy is that!  Can't you see this made with all kinds of Designer paper for all kinds of seasons and occasions.

Tomorrow I will share a cute little post-it-note holder.  Come back and check it out.

Tuesday, December 19, 2017

Butterfly Friends Stocking-Santi-tizer

  Doesn't this remind you of Santa?  Well inside is a bottle of hand sanitizer.  Therefore the pun Santa-tizer.

1. Real Red card stock cut 8 1/2 by 2"
2. Scored at 1/2", 1 1/2", 3 5/8', and 4 5/8"
3. Punch one long end with a tag topper punch.
4. Put sanitizer in center, fold and glue together.

Belt is 2 by 1/2"
Small square of silver glimmer paper and a 1/2 inch square complete the buckle.
White strip is 3/4" by 2 1/8" and can be embossed.

These are quite easy to make and fun to receive. This was placed in one of the stockings.

Tomorrow I will share with you how I made a holder for powder you add to a water bottle.


Monday, December 18, 2017

Butterfly Friends Stocking


Do you love Christmas parties?  Recently I was a part of a party with my upline's group called the Butterfly Friends. We were supposed to purchase a pair of Christmas stockings, make a great tag on the stocking and fill each stocking with whatever goodies we wanted.
I thought I would share what was inside my stocking.

First, I found a cute pair with penguins on the top.  I made a tag and also attached one of my foil snowflake ornaments I blogged about last week.


Tomorrow, I will share the Santa-tizer I created and added in one of my stockings.

Wednesday, December 13, 2017

Several New Jobs-

   Hard to believe it is Wednesday already.  My husband had ankle fusion surgery at the very end of November and is recovering nicely at home. But he can not climb stairs, or put any weight on his ankle for 2-3 months.  As a result I have taken on many of the jobs he does on a regular basis.  I of course do not mind doing anything I can to help him and to take care of the chores that are needed to keep our house running.  What this experience has done for me is to realize how much he does. So now that I am doing all the shopping, cleaning, cooking, and errand running I am a little behind on my blog. I plan to start it back up next week.  Thanks for understanding and continuing to enjoy visiting my blog.

Sushi who is not stamping at the present time.

PS If you do enjoy this blog, then how about liking it and following it.

Friday, December 8, 2017

Christmas Ornament-Eastern Medallion Garland

Does this look easy to make, and yes it was.

1. First I cut with the thinlit,the front design in Cherry Cobbler and Emerald Envy card stock.

2. Next I cut out just the outside thinlit from Whisper White card stock.  I wanted some of the white to show when the little petals were opened.

3. Finally a glued some 1/8 inch ribbon  in between the two layers.

You can make this garland as long as you'd like, just try to space the design elements evenly apart.

Have you gotten some good ideas on how to make easy but attractive ornaments for your tree? 

If you have enjoyed these postings how about following me and then you can see each posting as soon as I make it.

Come back next week to see some cards made with my favorite bundle from the Occasions catalog.  A Sneak Peak for all of you.

Thursday, December 7, 2017

Christmas Ornament-Designer Paper

Simple but good looking, that is my style.

1. Start out with a clear ornament.

2. Cut strips of designer paper measuring 2 inches by 1/2 inch or any size that appeals to you.

3. Roll each strip tightly around a pencil or thin paint brush.

4. Keep the roll as tight as possible and push it through the opening of the ornament.  It should unroll a little as it goes into the ornament.

5. Add some foil or glimmer paper rolls for accent colors.

6. Tie a ribbon on the top and hang from your tree.

I can see gifting this ornament to a person that loves music.

Tomorrow I will share how I used the Eastern Medallion thinlits to make a garland for my tree.

Wednesday, December 6, 2017

Christmas Ornament-Eastern Medallion thinlit

 I love finding different ways to put the Eastern Medallion thinlits together.  They make a WOW ornament with just cutting them out from card stock.

1. Place the thinlits on your chosen color of card stock and cut them out.

2. Save the exact order you placed the thinlits in for the back of the ornament. Cut the back out.  Since the design is symmetrical you do not have to worry about trying to flip the design, you just have to cut two out that are exactly the same.

3. Glue one side onto a piece of waxed paper that is the size of the outside of the ornament.

4. Turn the ornament over and glue the second piece on top of the waxed paper, matching up the designs.

5. Not to worry if you did not get the designs exactly matched it really does not show when the ornament is on the tree.

Do you have any clear ornaments that are waiting to be placed on your tree?  Come back tomorrow and see how easy it is to make a personalized ornament.


Tuesday, December 5, 2017

Christmas Ornament- Quilted Christmas designer paper

Have you seen the Quilted Christmas designer paper?  The colors are primarily Garden Green, and Real Red.  One side is just a simple pattern and one side is more detailed.  There are several papers that have the quilt design pictured above on one side.

The Christmas Quilt bundle has a framelit that cuts out this quilt pattern.  No hand cutting at all.

To make this ornament, I cut using the framelit 4 green designs and 4 red designs.  I then alternated gluing them together.

Once again, before I glued the last design I glued some baker's twine to make a loop to be able to attach this to my tree.  

Another simple ornament!

Tomorrow I will share how I used the Eastern Medallion thinlits to create another ornament.

Monday, December 4, 2017

Christmas Ornament-Foil Snowflake

I love the look of handmade ornaments on a tree. In fact when I was putting my ornaments away at the end of Christmas last year, I decided to only save the handmade ornaments.

Can you see how easy it would be to make this ornament?  

1. You will need 6 foil snowflakes folded in half.

2. Glue the left side of one ornament to the right side of a second.

3. Continue in this manner until you have one more side to glue.

4. Place your string between the last layer before pressing the glued sides together.  

Now you have a simple, but elegant looking ornament for your tree.  Since there are silver and gold foil snowflakes you can make some of each.

Tomorrow I will share an ornament I made with the Christmas Quilt designer paper.

Friday, December 1, 2017

Snowflake Sentiments-Gift cards


Wouldn't these made great gift cards on your packages/

Background is a 2 3/4 inch square of Christmas Quilt designer paper.

The center is also from the same designer paper, just using the alternate side of the paper.

There is a small snowflake in the center and a white perfect accent in the center.

I used the wood crate framelit to make the box holding the gift cards.  You might be curious about the paper that the crate was made from.  I made my own, by stamping the snowflake images on a piece of whisper white card stock before cutting out the crate.

The tag on the front of the crate is another framelit that is part of the Snowflake Sentiments Bundle.

Have you fallen in love with this bundle.  Connect to my website from the link above and make it your own.

Next week I will be sharing some ornaments I have made using Stampin'Up! supplies.