Monday, June 30, 2014

Miscellaneous Monday- Ronald McDonald Convention Swap

 
Submitted to the Card Concept as a Clean and Layered card
 

     Do you know what a swap is?  When I go to any Stampin'Up! event, I take card fronts and trade them with other demonstrators. And that is called swapping. Since I do not like making a lot of the same card fronts, I usually make 20 of each design to keep the process enjoyable. I love coming home with lots of new ideas.
   This card uses the current Ronald McDonald stamp set called Flamingo Lingo.  I love the versatility of this stamp set, baby card, breast cancer awareness, or a congratulation card are some ideas that I can think of right now. For what occasion would you use this card?
   Each year SU designs an exclusive one year only stamp set for the McDonald House.  $3 from the sale of the stamp set is then sent on each quarter to the house.  My first year of being a demonstrator was the first year that SU developed this partnership.  And in that time we have donated over $1,000,000 to this special charity.  The current McDonald stamp set is always on my first order of the year.

New Supplies used:

Flamingo Lingo stamp set
Delicate Dots embossing folder

Returning supplies used:

Starberry Slush,  Crisp Cantalope , Smoky Slate ink
Smoky Slate, Whisper White card stock
Bitty Banners framelits
Scalloped Oval, and Petite Petals punches
Rhinestones

   The visitors to my new catalog open house were able to create this card for their own use.


Thursday, June 26, 2014

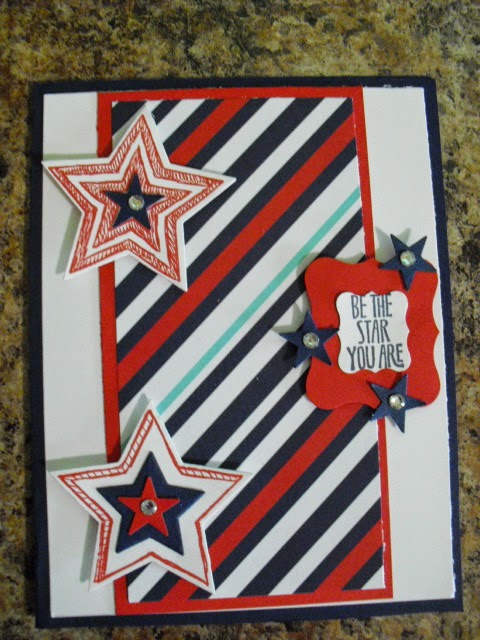
3-D Thursday- July framed art


     More red, ,and blue and most of it is new! I love how this framed art for July turned out.  I am almost through the first year of framed art.  If anyone wishes to have a new class for the coming year I would be glad to rerun this year's classes.  Just send me a message.

New Supplies used:

Heart and Stars decorative mask
Little Letters Thinlits
Be the Star stamp set
Stars Framelits

Returning Supplies used:

Real Red, Whisper White, and Night of Navy card stock
Night of Navy and Smoky Slate ink
Rhinestones

Monday, June 23, 2014

Miscellaneous Monday- Downline in-color challenge


My creation

   Who doesn't love a challenge?  Each month I give my downline a challenge that helps encourage their creativity.  This past month the challenge was to use at least a little bit of each one of the new in-colors.  I loved how each card looked so different.

  I love the centerpiece on Nan's card and the brightness of the centerpiece.  She thought her card looked dull, but I thought it was stunning.


   Linda doesn't usually do our challenges, thinks she can't do a good enough job, but this is adorable.  She incorporated ink, designer paper and cardstock to get all her colors.


  Dana stamped the Six Sided Sampler images on the card stock with Versa Mark and then punched the hexagons out with the matching punch.  I like the emphasis on the colors.


   Amanda W used the flower we had colored from our previous meeting as her focal point and then created the background using the in colors.  I love how these colors work with so many other colors.


  Amanda F used the chevron punch and was able to show case some of the colors through the punched out shapes.  Love the creativity of that.

  What would your card look like if you tried to use a sample of each one of the new in-colors.  Don't have them yet, then contact me at my website www.sushi.stampinup.net, or my email sue.scheets@gmail.com or through this blog and I will be glad to help you out.


Sunday, June 22, 2014

Simple Sunday-In-color Congratulations


   Do you like the new Stampin'Up! in-colors? I do and think it is fun to create cards that feature the new in-colors to get a feel for different combinations of those colors.  This is a card we made at a recent Jubilant Butterflies meeting in Springfield.  I am pretty sure Julie Davison created this card for us to make.  If you take a close look at the word Congratulations you can see an sample of each one of the new in-colors. Simple, but gets the message across.

New Supplies used:

Bravo stamp set
Tangelo Twist, Lost Lagoon, Hello Honey, Mossy Meadow, and Blackberry Bliss markers
Tangelo Twist, Blackberry Bliss  card stock
Silver Glimmer paper

Returning supplies used:

Whisper White card stock
White baker's twine


Friday, June 20, 2014

Fix it Friday-Bow Ties for Knollwood

My original card for Fill Your Card Box with Male birthday cards


This is how I changed the original card to take to Knollwood to use with my Senior friends.  Can you see the changes I made and guess why I made them.
 
1. The paper has been changed.  I did that because no one at Knollwood can afford to place an order so it is a good place to use up retired paper.
 
2. There are no buttons, just small circles in the center of each bow tie.  The ladies do not like cards where they have to pay extra money for bulk so I try to avoid whenever I can.
 
3. There is no embossing on the background paper.  The ladies can use the embossing machine, but it is hard to monitor and since I do this by myself I did not want to bring the machine.  I decided against pre-embossing the background paper.  The designs were busy enough and the card looked fine with the added embossing.
 
The ladies loved the card and had fun choosing which side of the DSP they wanted to use.  You should consider taking cards to a Senior Center for the individuals who live there to make.  I find this a very rewarding day.
 

Thursday, June 19, 2014

3-D Thursday-French Fry Box


   Isn't this the cutest gift box?  I love that we have a French Fry and Hamburger box as a Big Shot die in our new catalog.  I wanted to make a simple container so that everyone at my Open House could try out the box.  Very easy to assemble and cute to boot.

New Supplies used:
French Fry box
1/4 inch Daffodil Delight cotton ribbon

Returning Supplies used;
4 by 6 inch cello bags
White baker's twine
Label Something stamp set
Wild Wasabi ink
Wild Wasabi designer paper

   What would you put inside this cute little gift box?  Guess what I put inside mine.

Wednesday, June 18, 2014

Wednesday Wow- Rectangular Color combo


    Rectangular Color combos are made from two sets of complementary colors.  In this card the colors used are orange and blue, and red and green.  I wanted to feature the new in colors and a great new saying called Bravo.

New Supplies used:
Mossy Meadow, Tangelo Twist, Lost Lagoon card stock and ink
Bravo photo polymer stamp set

Returning Supplies used:
Very Vanilla and Cherry Cobbler card stock
Cherry Cobbler ink

  Why don't you try making a rectangular color combo card?

Tuesday, June 17, 2014

Template Tuesday-Monday Lunchtime Sketch


   I think I am really changing my dislike of red, white, and blue to a like.  What really helps is the stamp set, Be a Star and the designer paper called Maritime.

   Today I am trying a new challenge site, called Monday Lunchtime Sketch. It was fun to create and turned out pretty good.  What do you think?


Monday, June 16, 2014

Miscellaneous Monday-Red White and Blue Challenge fromPals Paper Arts


Yes, I am making another red, white, and blue card!  I used to avoid making anything using these colors, not because I was not patriotic, but just because I did not like the combination.  I guess in my old age I have changed my mind.


I thought I would try a challenge I have never tried before so I went to Pals Paper Arts to see what the challenge was that ends on Tuesday.  I decided I could make something with red, white, blue.  In case you read my blog yesterday this also meets my criteria for a simple card.

Supplies used;
Be the Star stamp set NEW
Stars Framelits NEW
Work of Art stamp set NEW

Whisper white card stock
Night of Navy and Real Red ink

What would your red, white, and blue card look like?

Sunday, June 15, 2014

Simple Sunday-Freshly Made Sketches challenge


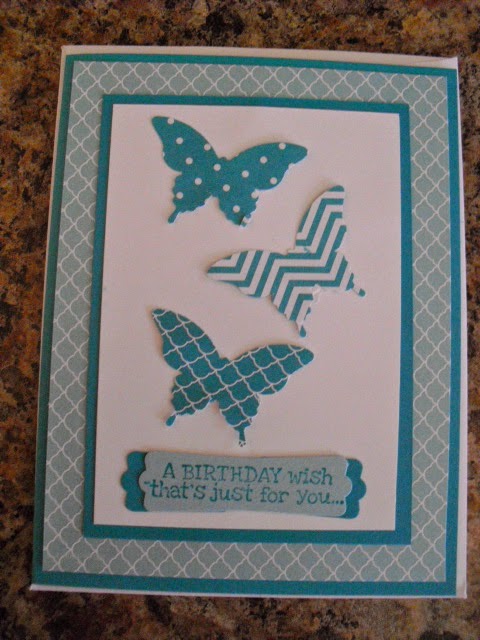
     What makes a card simple? I usually try to make a simple card in just 15 minutes or less.  Let's see if this card really is simple.

1. Cut the layers of card stock and designer paper- 5 minutes especially if you already know the size of the papers.

2. Punch out the butterfly 30 seconds

3. Stamp the saying in versa mark 30 seconds

4. Emboss the saying with gold embossing powder 1 minute

5. Punch out the embossed saying 30 seconds

Layer the card and you  are finished in less than 10 minutes.  So, according to my definition of a simple card this qualifies.  What is your definition of a simple card?


  I made my card using this sketch from Freshly Made Sketches.  I like trying out challenges- they get my creativity going.  Do you try any challenges? If so which ones?

Supplies used:
Whisper White and Brushed Gold card stock
Gold Fancy Foil designer vellum
Gold baker's twine
gold embossing powder
Versa mark
Elegant Butterflu punch
Really Good Greetings stamp set

Lots of supplies but simple to make.


Saturday, June 14, 2014

Scrappin' Saturday-Project Life at the Library


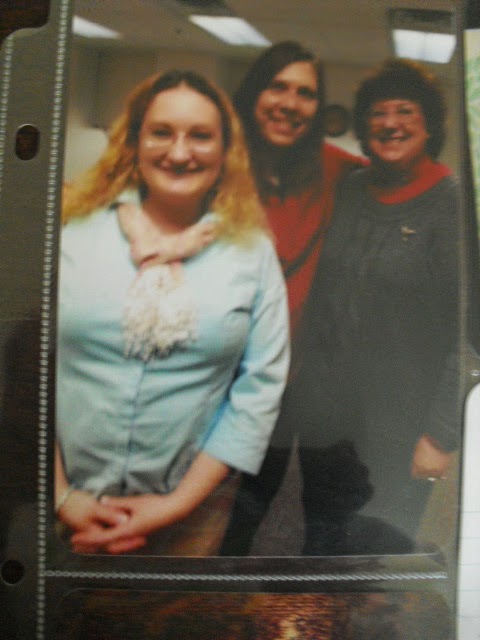
   Have you heard about Project Life?  It is way to scrapbook for those who want lots of pictures in an album but don't have either the desire, money,  nor the time to put lots of time and supplies into a scrapbook page.  I like the idea for some of my pictures and decided to try it out with my Stampin in the Stacks ladies.  We met in February to make cards.  Two of the ladies had never made a card before but turned out to be very creative.  I took pictures of each person's card, and the group and made a page layout in about 10 minutes.  I think I have several other pictures I can scrap in this manner.

Here is what I like about the Project Life materials.
1.  Pictures just slide into pockets that have a side opening. You can round the corners of the pictures to give them a special look.


2. You can choose journaling cards that are designed to fit in two different directions and use them to tell the story of the pictures.


3. You can add dates and other items to your pictures and journaling cards to help tell the story.

  I think I am going to print off some pictures of my other stamping events and include them in a scrapbook of stamping adventures.  What would you scrapbook if you had pages like this?

  Want more information on Project Life, then check out this video from Becky Higgens the creator who is also collaborating with SU to promote Project Life.


Friday, June 13, 2014

Fix it Friday- Super Snails Challenge

Original card designed by Julie Davison


     Does this picture look familiar?  Well, I posted it awhile ago as a make n take from the Spring Into Stamping event I went to in April.  I thought it would be fun to teach my downline how to make the card and then turn it into one of our monthly challenges.  This is the original card.


Nan's challenge card outside


Inside of Nan's card


Dana's card on the outside

Sue's card on the outside

Sue's card on the inside

You can tell how much fun everyone had making their quarter fold card.  Would you like to make one yourself?  Check out this link from Julie that gives awesome directions.


Thursday, June 12, 2014

3-D Thursday-Hamburger Box


     Isn't this hamburger box the cutest gift holder?  At first you might think it is hard to put together, I know I did when I first saw it.  But, after I watched this video that Stampin'Up! put on their You Tube site I changed my mind.
   This was one of the make n takes at the latest Jubilant Butterflies meeting held last Tuesday.  I can hardly wait to own the die to be able to make some more for gift holders.

Supplies used:

Hamburger Box Bigz XL die
Real Red, Whisper White card stock
Flashback designer paper
Hello Honey 3/8 stitched satin ribbon
Petite Petals, Something to Say stamp sets
Curly Label punch

Wednesday, June 11, 2014

Wednesday Wow- Analagous color combo


     Can you tell what two of my favorite items from the new catalog are?  If you guessed the Blended Bloom stamp set and the Blendabilities markers you would be correct. These two items used together definitely make a WOW!
   This is one of the last two cards that my club members will be making for our Color cards.  This card is my take on the Analogous color combo.  There is one featured color which on this card is Coastal Cabana and two colors on either side on the color wheel. I chose Garden Green and Wild Wasabi.  They make a wonderful combination.

Supplies used:

Garden Green, Whisper White card stock
Coastal Cabana and Old Olive blendabilities,
Bermuda Bay ink
Bravo stamp set
Very Vintage designer buttons, colored with the blendability
Linen Thread

  If you like to color as much as I do then you will love the Blendabilities which will be available to order the end of June, early July.  Watch for an announcement.

Tuesday, June 10, 2014

Template Tuesday-Friday Mashup


     The little octopus in this stamp set makes me smile.  How about you?  Sea Street was one of the stamp sets that we could pre-order and I thought to myself...why not.  Tuesdays, will be a day that I follow a template.  I looked around and found a different kind of a template that I thought I would enjoy.  This is called Friday Mashup.  They offer two challenges and if you choose you can mashup the challenges and use both on one card. That's what I decided would be fun to try and do.

Challenge:  Use different colors of designer paper on your card, or follow the template below, or do both. 
  

Supplies used:
Sea Street and Remembering Your Birthday stamp sets
Whisper White and Night of Navy card stock
Maritime Designer paper
Real Red 1/8" taffeta ribbon

  For a girl who really is not into red, white, and blue colors on cards I really like how this turned out.  How would you like to get this card for your birthday?

Monday, June 9, 2014

Miscellaneous Monday- clean and simple card challenge

The card concept 11 Clean and Simple

   Don't you love the simple look of this card?  I have decided to organize my blogging a little better.  So, I am going back to my daily posting categories.  Check out my blogs this week for the daily category.
   Miscellaneous Monday will be whatever I want it to be.  Today I am trying to stretch myself and be a part of some challenges.  I love the challenges mentioned on The Card Concept.  As a part of the challenge suggested each week, you make your card in the style of your choice.  This week I chose the style of clean and simple.


  Supplies used;
      Daffodil Delight Blendabilities
      Memento Black ink pad
      Basic Grey and Whisper White card stock
      Basic Grey, Smokey Slate markers
      Something to Say stamp set

  What would your card look like if you used these colors?
     

Sunday, June 8, 2014

Summer Wreath Class


     Summer is upon us and so is the class to make the final seasonal wreath.  Have you ever made a pinwheel?  I remember making them when I was much younger out of any kind of paper I could find.  If you come to this class you will go home with leftovers.

Supplies used

1 Styrofoam wreath I used a 10 inch white

2 strips of muslin torn at 2 inches and wrapped around the wreath so each time the strip overlapped a bit.

12 4 inch squares of Gold Soiree designer paper

straight pins to pin each pinwheel to the wreath

Various colored buttons for the center of each pinwheel.

8 inches of Natural 7/8 inch cotton ribbon for the hanger

Spring Wreath


Check out these links to the other wreaths we made this year, Fall, Winter.

Saturday, June 7, 2014

Stamping at Knollwood part 2


  I had several leftover card kits from my Congratulations Fill Your card box class and decided to alter the card so the ladies from Knollwood would be able to make them.


1. The ladies like to make birthday cards, so I first changed the sentiment and made it something that could be attached to the card.

2. Instead of using the Banners Framelits, I had each lady cut the v at the bottom of the banner.

3. Buttons make the card bulkier and then cost more to mail so instead of a button I punched out a tiny flower out of a piece of the designer paper. 

   When I first went to Knollwood several years ago, I had the ladies do everything .  I quickly learned that I needed to adapt what I had the ladies do to allow each person to have some success and decision in what the card would look like. 
   I love going to Knollwood and working with the Seniors.  They are so grateful, and have such a great time it can totally turn around my mood of the day.  The extra plus is, I feel like I am with my mom again.  She did love so much to be creative.


Friday, June 6, 2014

Stamping at Knollwood Retirement Village


    This is the original card I designed for my Fill Your card box class.  I realized it would be too hard for the ladies I make cards with at Knollwood.  Most of the ladies are in their 80's and have a hard time squeezing our punches.


     This is the card we made at Knollwood with some changes I made to accommodate the needs of the ladies that attend.

1. I changed the stamping to pre-punched butterflies.  The stamping would have taken too long and I would have done all the punching.

2. The background was not embossed.  With the designer paper I used the card was busy enough and did not need the texture to make it look good.

3. The saying is added on as a separate part of the card to allow for smudging, or double images.  The main card is not ruined and it still looks good.

   I prepared most of the items ahead of time and placed them all in the card envelope.  The ladies still had a chance to stamp, and could arrange the items any way they wished.  Using designer paper makes it easy to have choice in whichever design they want to use. Everyone enjoyed the cards they made and were proud of what they created.

Thursday, June 5, 2014

Brayer a Flower


     Do you ever look at your catalog as a source of inspiration?  When I was finding ideas for my May Flower class I did just that.  On page 25 of the catalog that just retired, I found this flower.  It used the brayer which for some reason I tended to avoid using.  No longer after finding out how easy it was to make this flower.

1. I punched out 6 flowers all at once using the blossom punch and crepe filter paper.  Then punched out two flowers using the now retired blossom party big shot die.  Any flower punch or die would work

2. Using a brayer, I inked up Tangerine Tango and brayed over the largest flowers one at a time until I got them the color I wanted.  Then, inked up the brayer with Daffodil Delight and repeated the brayering on the smaller flowers.

2.  The rest was easy.  I layered the flowers staggering them a little , stapled the middle, and scrunched them up around the staples. 

3. Using hot glue, I attached a florist stem on the back of the flower, and then finally added a green circle over the stem to give the back a finished look.

  If you would like to make a similar flower there is a really great video you can watch to give you some visual instructions.  Check it out here.

   I think this would be a great addition to the top of a package.  When would you use this flower/

Wednesday, June 4, 2014

Fringe Scissor Flower box


     Have you ever looked at a picture and tried duplicate it for yourself?  When I was looking at the new catalog (for maybe the 15th time) I noticed a really cute flower on the back cover.  I thought it looked easy enough to duplicate and would be a cute item for my May Flower class.  Here is what I did......

1. Cut a 1 1/2 inch piece of Daffodil Delight card stock about 5 inches long.  I made a pencil mark at the 3/4 inch mark.  This would be my cutting line with the fringe scissors.

2. Make the fringe trying very hard to stop at the penciled in line.  Once that was completed, I trimmed the paper to about 1 inch.

3. Punch and crush 5 2 3/8 inch scalloped circle punches made from Crisp Cantaloupe card stock.

4. Layer the scalloped circles using glue dots in the center.

5. Roll the fringed paper into a tight circle and attach to the center of the scalloped circles with some hot glue.

   Now, you have a cute flower that can decorate any kind of a project.  Who would you give this cute box to/

Tuesday, June 3, 2014

Everything Golden Box


     Everyone needs a great box to give the perfect gift to someone special.  This is one of the flowers we made in my May flower class.  I love all the special gold items that were used in the creation of this box.

Gold Foil paper
Watercolor Washi tape
Champagne Glimmer paper
Gold Encore ink pad
Gold sequins
Gold Vellum

   What would you place in a box like this and who would you give it to?

Monday, June 2, 2014

In color flowers


     Don't you love the look of flowers?  My recent class called Fay Flowers was so much fun.  Everyone made a vase of last years in color flowers. Well, I thought it would be fun to add some flowers for this years in colors.  You might wonder how I made the cute flowers.

1. Stamp and punch 3 flowers for each color you want in the vase. Glue them together using a glue dot or two.

2. Make some slits in the top flower so it can fold up a bit.

3. Add a button to the center.

4. Use the fringe scissors to make some filler for your vase.

5. Add a ribbon embellishment to finalize your project.

   Does this design look familiar to you?  I adapted the flowers I found in the old catalog on page 95.

Sunday, June 1, 2014

In Color Challenge card FMS #138


    What do you do when your brain does not come up with a great idea?  I go to a couple of my favorite challenge sites,  my favorite one of which is called Freshly Made Sketches.  This card meets three purposes.

1. I created it for Freshly Made Sketches challenge number 138.


2. I can use the card for my downline challenge for June.  I gave each downline member a small piece of each one of the new in colors and they were to make a card using at least a tiny bit of each in-color on the card.

3. This is another way to showcase the new in-colors for the new catalog which premiers.......Tomorrow!  Can't wait.

  So, what did I use for this card

Mossy Meadow, Tangelo Twist, Hello Honey, Lost Lagoon, Blackberry Bliss and Crumb Cake ink and card stock

Petite Petal, banner, and Bird builder punches

Banner Framelit

Starburst and Gorgeous Grunge stamp sets

Linen Thread

Candy Dots

   What card would you make using sketch #138?