Showing posts with label Paper Pumpkin. Show all posts

Friday, July 30, 2021

Put it together Friday-One Sheet Layered Pocket card


Supplies needed:
Card base of Card Stock or Designer paper 8.5 x 11
2 pieces of neutral card stock cut 3.5 x 5
Coordinating color cut 2 x 4.25
Differrent coordinating color cut 2 x 5.5
Ribbon
Saying and embellishments
Neutral card stock to use as an easel cut 11 x 3 
Score this at 4.25, 8.5, 9.5, 10.5

Watch the video below to learn how to put the card together.


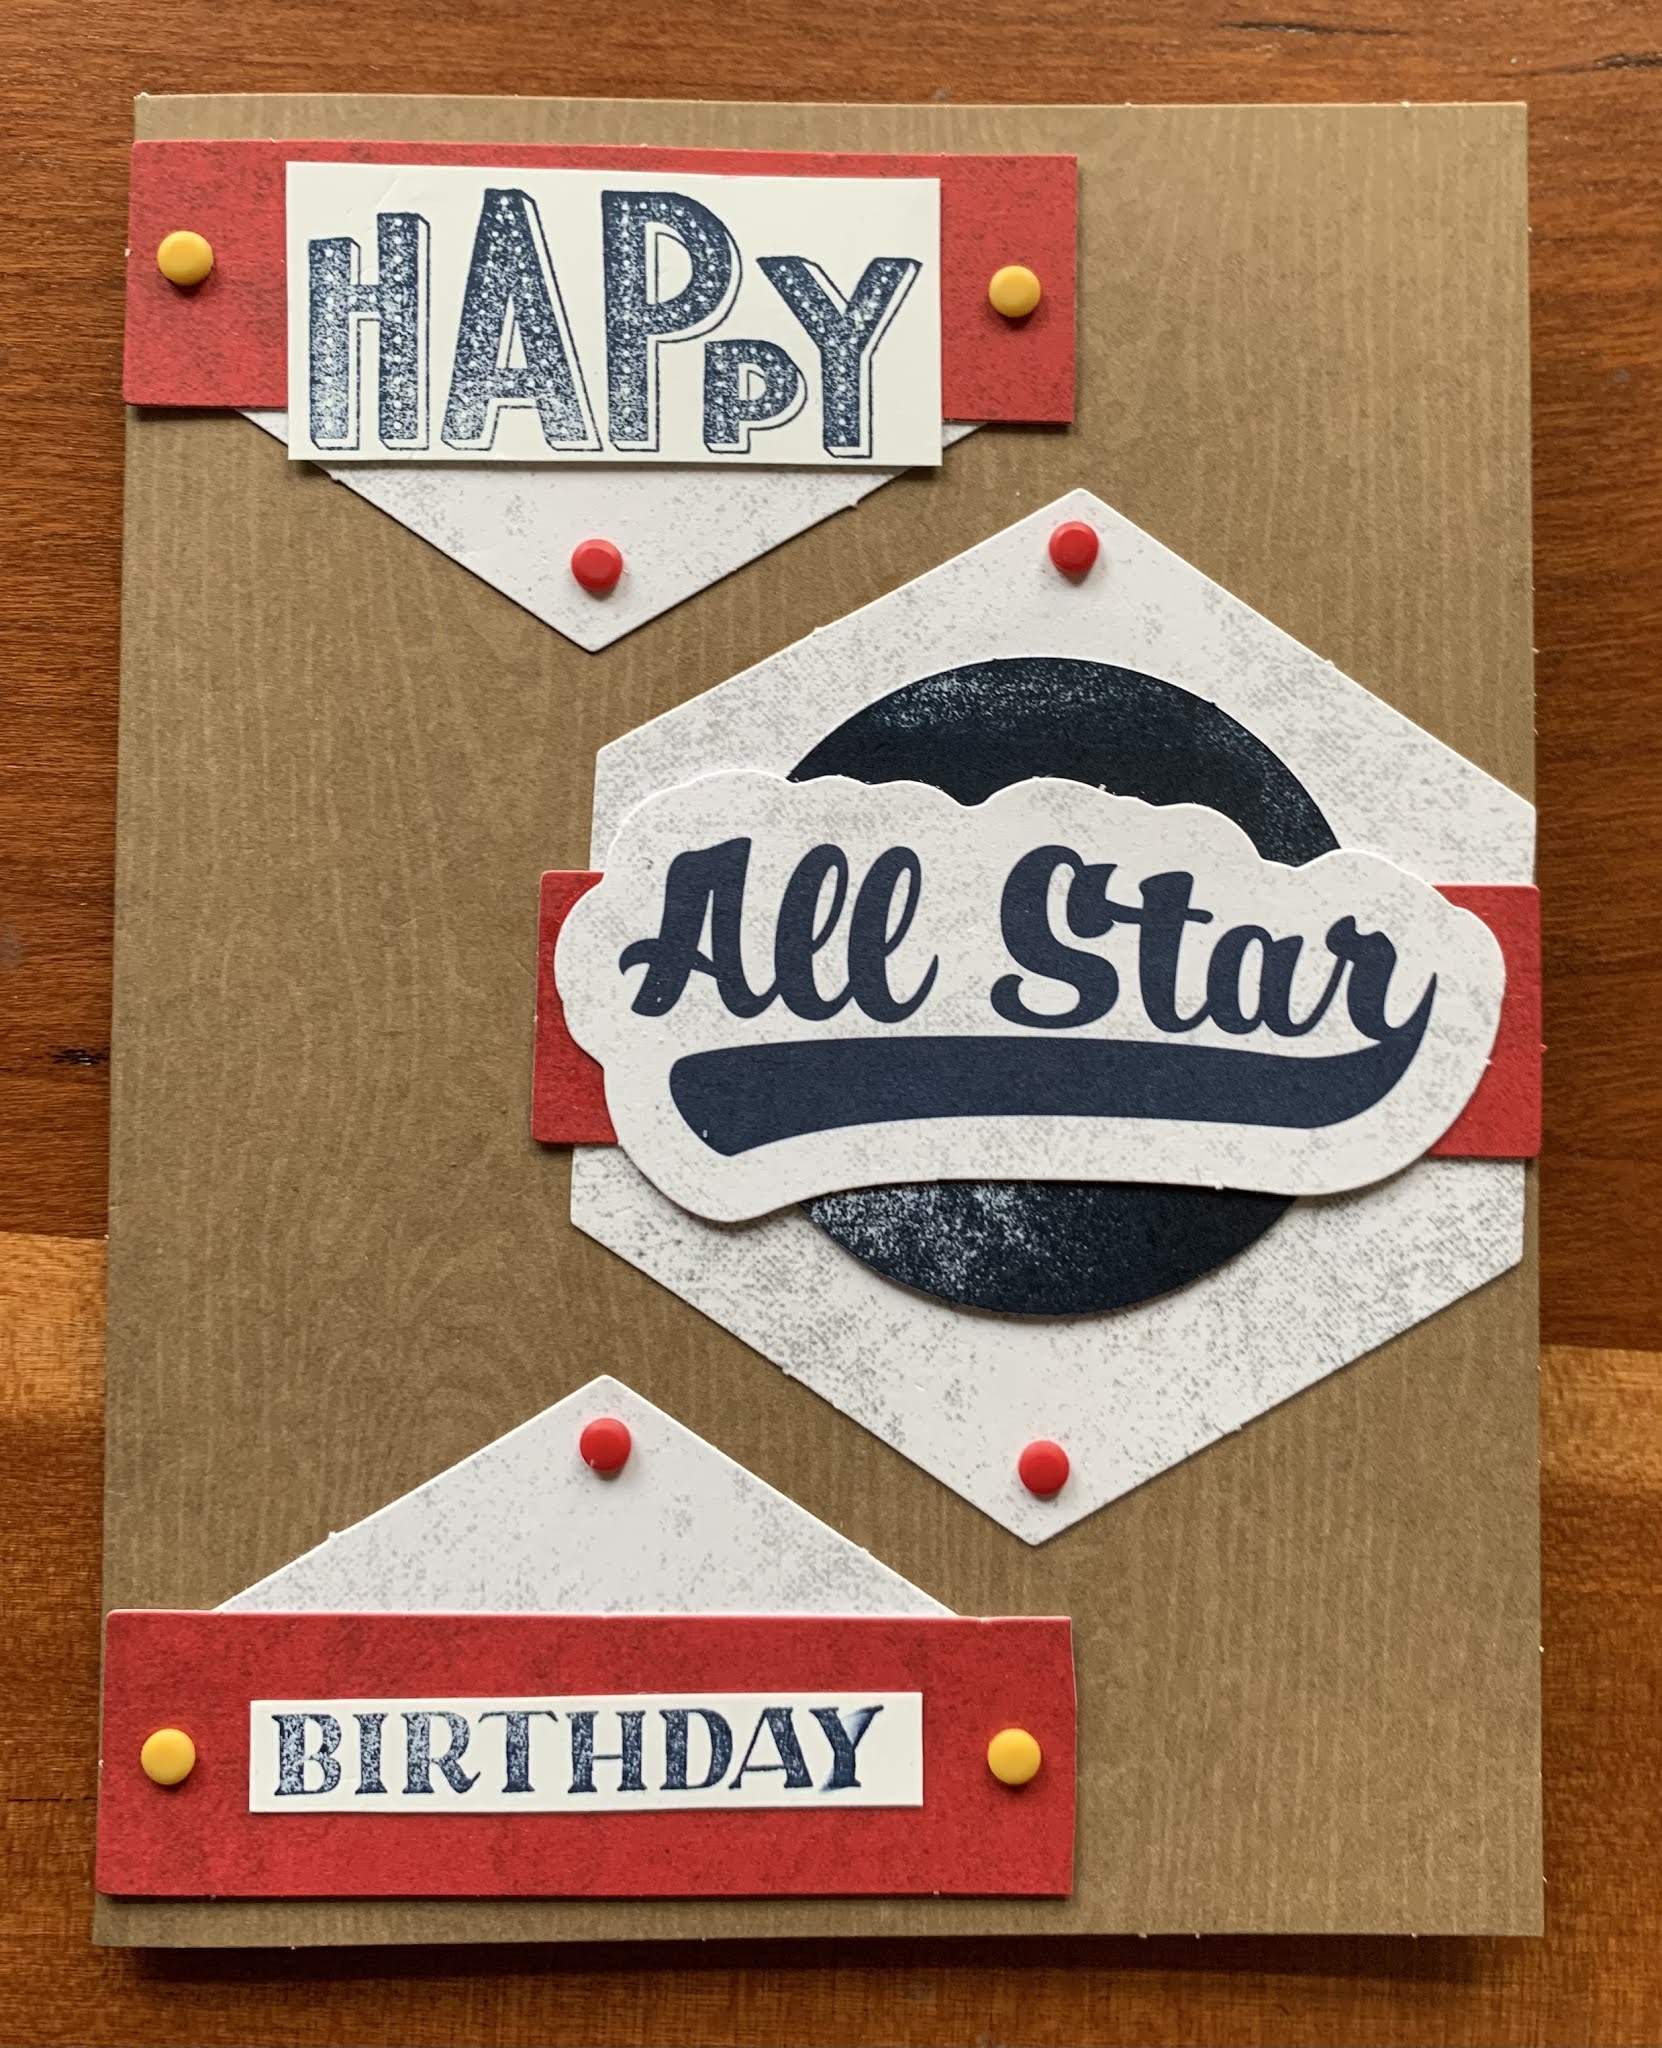
This is what the card looks like when everything is put in its place.I made this card using parts of the July paper pumpkin kit.


These are the pieces that are included on the front of the card, in the pockets. A bookmark, and tag in the front pocket .In the back pocket is an easel that you can place on a book shelf to admire.


 This is what the inside of the card looks like, with a place you can write a message.


Paper Pumpkin week has come to a close.  I had great fun making lots of cards with this cute kit.  I hope you got some ideas that you can use with your kit.  If you are not a member then sign up and use me Sue Scheets as your demonstator.

I'll have a new post on Wednesday, August 4th when I will share with you the new Suite for the month of August, the Beauty of the Earth.


Product List
Beauty Of The Earth Suite Collection (English)

[155843]
$73.50

Till then,
Happy Stamping,
Sushi

Wednesday, July 28, 2021

What is it Wednesday-Paper Pumpkin Meets Gilded Leafing

This week is Paper Pumpkin week. I love this week.  I make one card for each design and then let my imagination go wild.  


These first cards are alternates of the Adventure Begins kit.  The card on the left is made from the front of the envelope.  Yes, I like to cut apart the envelopes and this one has lots of possibilities. The card on the right uses the inside layer of the card on a standard card base.


When I was making the cards I remembered the kit from last July called Summer Nights.  What I remembered most was the lanterns and the fireflies and how cute they were. I had lots of extra supplies so I used them on these cards.


 The last few cards I am featuring use the Gilded Leafing along with The Adventure begins kit.  For the card with traailer, I outlined the trailer with Tombow glue and set it aside until the glye dried.  It will dry tacky which is what I wanted. Once it was dry and tacky I rubbed gilded leafing on the glue and the leafing stuck.  I love the results on the card on the top left.  Notice the golden fireflies on the tree.

The card on the top right used glue for the fireflies bodies and on the bottom of that smae card I placed strip of tear and tape strips.  Once I pulled the top layer off I could press the leafing onto the sticky strip and get a really great effect.

The final card was created using different sized glue dots that come in the paper pumpkin kits.  I made the dots and when they were dry staamped the image of the firefly on top.

I am not finished and may share the rest of my creations on Tuesday when I show cards I have received during the week.


Product List

What do you think?  Are you ready to try using Gilded Leafing?  Are you ready to sign up For Paper Pumpkin?  The August kit has been designed by Shelli Gardner, the creator of Stampin'Up!/

Check out this video that explains her ideas behind the kit. Click on the word video to get the link for her video.

Tomorrow, I will be stepping up cards based on the template of the week. And guess what.......I will be using the current paper pumpkin kit called The Adventure Begins.

Till then,
Happy Stamping,
Sushi


Thursday, June 3, 2021

Step it up Thursday in a patriotic way and with the Pansy Patch paper

Step it Up day is a fun day for me.  First off is the template for the week.


Next is the simple card I made using the Pansy Petal suite.


I stepped up the first card, by...,.

1. Creating a background for my designer paper strips.
2. Creating a background for my horisontal strip.
3. Popping up the Happy Birthday with dimensionals..
4. Adding a small pansy cut from the designer paper.

r
And here's how I stepped up the card once again.

1. I added an embossed layer of card stock on top of the card base.
2. I layered a second color card stock behind the designer paper strips.
3. I added an additional layer behind the horizontal strip.
4. I added a second pansy as an accent.

Which of the above 3 cards is your favorite?

Here is how I stepped up my patriotic cards.


1. I added a Paper Pumpkin Batter Up card as the base.
2. I changed the colors of the strips, one is the envelope flap from the Batter Up kit.
3. I placed the thanks on one of the vertical strips.
4. I wove the horizontal strip through the other strips and added some stars to the strip.


Finally, 
1. I cut apart the paper pumpkin card and mounted the front on some Night of Navy card stock.  
2. I also backed the 3 strips on the same card stock.
3. Lastly I added my saying to the horizontal strip.


I loved this template.


Tomorrow, I will put together the card of the week, the Opposite card.  Come watch on the Facebook Live at 10:30 or at the Zoom meeting at 6:30.

Till then,
Happy Stamping,
Sushi

Thursday, May 27, 2021

Step it up Thursday-using the Batter Up kit and Pansy Party Suite


Step it up Thursday is a lot of fun for me. Since this is paper pumpkin week the first set of cards I stepped up were using the Batter Up kit.
Since I am getting ready  for my next on line class and my new suite of the month, the second set is from the Pansy Party Suite.


Template of the week


Basic card made using parts from the Batter up kit.
 
                                               
Card has been stepped up by cutting one of the accent pieces in thirds, mounting it on card stock and staggering it a bit.
                                               

Final card uses the base accent pieces cut smaller, the baseball turned over and inked in Night of Navy.
Added a saying and some dots. I felt like the dots added a lot to this card.

                                                 
Basic card, where the pansy and leaf are  cut out from the designer paper.
                                             

I stepped up the card by adding designer paper behind each strip and stamping the pansy. Oops I forgot to add the saying.


For the final card I added an embossed background, a saying on Pale Papaya card stock and a paper pieced pansy.

Such Fun!

This ends Paper Pumpkin week and another month.  Hard to believe isn't it.
Get ready for June where I will be featuring the Pansy Party suite, the Birds and Branches oldy but goody and the June paper pumpkin kit. 


Product List
Pansy Dies
[155680]
$32.00

I am excited about tomorrow's video.  I will be putting together the card of the week.  I have fun choosing the card, making my sample to show, making another example at 10:30 on my live, and then a final sample on Zoom at 6:30.

I hope to see you then,

Till then,
Happy Stamping,
Sushi

Wednesday, April 28, 2021

What is it Wednesday-So Cool paper pumpkin kit


Have you gotten the So Cool paper pumpkin kit yet?
I like to make 1 card of each sample, and then create some of my own.


After I punched out the silver medallions, I looked at what was left over and added some cut outs from the designer paper in each window.


This is a simple card I made from the template of the week.  Thursday I will be stepping this card up a couple of times.


I stamped the saying in several of the colors that were featured in this set and then added the stickers and some twine that is included in the kit.


These two cards are made using the card of the week as my sample.  I think this will be for my grandson's 16th birthday.


Here is another frame leftover from punching out the silver rectangles.


This is the card I made from the video showing how to create this saying with my Stamparatus.


Product List

Have you tried making the cards in your kit?  Do you wish you had signed up for this kit? Click on the link a the top of the page and join this fun monthly subscription kit.

Come back tomorrow when I will step up the simple card I made on Monday.
Till then,
Happy Stamping,
Sushi

Monday, April 26, 2021

Make it Simple Monday-So Cool Paper Pumpkin


It is time for a new template and simple card.  Are you ready?

This is the template for the week.  I love the idea of the curvy line.  This will be fun.


For my simple card I made it really simple. 

1. I cut apart one of the envelopes in the paper pumpkin kit and cut a wavy line in my cut out piece. 

2. I cut one of the cards in the kit in half and used the popsicle as my shape.

3. Finally, I used one of the tags to stamp on the saying.  

4. I used a strip from the envelope for my inside and for my envelope.

Now, for the fun of figuring out how to step it up for Thursday.


These next simple cards are ones I made for the ladies that live at the assisted living in town. I was so glad when the activity director contacted me about coming back and having monthly classes once again.  I have been fully vaccinated and so have the ladies.  I still wore my mask.


Product List

Come back tomorrow to get the cutting instructions for the card of the week, I am pretty sure it is card 57.
Till then,
Happy stamping,
Sushi

Tuesday, February 23, 2021

Cut it Out Tuesday One inch strip #2 (card #49)

Are you ready for another card made with 1 inch strips.  They are so easy to make and a great way to use up your designer paper scraps.  I learned this technique from Jackie Bolhuis..

Here are this week's cutting instructions.

1. Card base 5.5 x 8.5
2. Next layer 5.25 x 4
3. One is strips of designer paper cut
2-1 by 2 inches
2-1 by 3 inches
Ribbon, a saying and some accessories


For this first card I used several items from the Bouquet of Hope paper pumpkin kit
and the Sale A Bration designer paper called Flowers and Fields.  The kit was designed to coordinate with the designer paper.  The paper is available at no cost to you  with a $50 purchase  


The Sale a Bration stamp I am featuring to day is the adorable Darling Donkey stamp set.  This is another set that is free to you for a $50 order.


Darling Donkeys Cling Stamp Set
[155264]
$0.00

Check out this video that talks about today's cutting instructions and the paper pumpkin kit.


Have fun getting your supplies ready for Friday when we will be putting this weeks card together at 10:30 on Friday.
Tomorrow I will be sharing several different ways to use a stencil. So come back and see if you will learn something new.
Till then,
Happy Stamping,
Sushi

Tuesday, March 19, 2019

Show and Tell Tuesday-Paper Pumpkin box opening

My Paper Pumpkin kit came in the mail today, so I have decided to switch my Tuesday and Thursday.  Today I will share my box opening video with you and Thursday I will show you another Stamparatus technique.

Come back tomorrow to see what's new this week.
Till then,
Happy Stamping and Happy Paper Pumpkin.

Here's the link to my Paper Pumpkin page in case you want to join.


Wednesday, March 6, 2019

What's New Wednesday-Paper Pumpkin


 Have you heard of Paper Pumpkin?  Are you a subscriber?  Do you like a great deal?  This might be the thing you are looking for.

Paper pumpkin is a kit you receive in the mail once a month.
All the supplies are included except scissors, to make at least 8 items a month.

This card was one of the kit cards from the February kit.


This was a second card from the kit.  There were enough supplies to make 9 cards, three of each design.


This was the third card.  In the kit was an ink spot, and in a 12 month period the spots will never be duplicated.  Sometimes there are even 2 spots in a kit.  Spots are a great way to ink up the items on the Stamparatus. Also included in each kit is an exclusive stamp set that is photopolymer.  Your first kit includes an acrylic block to use with your stamps.


I order 2 kits a month so I can make scrapbook layouts for my Scrapbook Your Life class.  This is the layout for this month.


A closer look at one of the accent pieces.  To order Paper Pumpkin you can click on this link, which will take you to my Paper Pumpkin page.


The special for March is 2 stamp sets.  This is the 6th year that Paper Pumpkin has been around.  You need to make your order by March 10th if you want to receive the March kit.

Contact me at sue.scheets@gmail.com with any questions and I will be happy to help.

Consider subscribing to this fun orange box to be delivered in your mailbox. 

Tomorrow I will be posting a video now that I have figured out how to get it right side up.  Yeah Me!!! Come back to check out Card samples from my Butterfly Friends meeting that featured the Stamparatus.

Till then 
Happy Stamping,
Sushi


Product List