Friday, September 5, 2014
Fix-It Friday-Christmas Change Up
Wouldn't you like to find this card in your mailbox a few weeks before Christmas? Well, the stampers that have been coming to my Christmas Through the Year classes were able to make this card in July. It was simple to make and fun to color in. One of the ladies that has been coming to my class is visually impaired and the color would have been virtually impossible for her to do. So, I thought and talked to Vicki about an alternative technique that she could use.
And this is what we came up with. We used one of the stamps from the Work of Art stamp set to create a colorful background that simulated the marker colors the other stampers used to color in the letters. Then Vicki stamped the saying on top of the background and embossed it in the same way everyone else did. The final card looked just as good as the original design. In face I like this card just as much as the first design I made. Which card do you like the best
Holiday Catalog Supplies Used
Mingle All the Way stamp set
Current Catalog Supplies used
Pistachio Pudding, Whisper White, Cherry Cobbler, card stock
Pistachio Pudding, Cherry Cobbler, Mossy Meadow, Real Red markers or
Pistachio Pudding, Cherry Cobbler ink stamped off
Brights candy dots
VersaMark ink pad
Black embossing powder
Mossy Meadow stitched satin ribbon
Thursday, September 4, 2014
3-D Thursday-Last Framed Art
Can you believe a year has almost passed since I started my Framed Art class? Wow, where did the time go? I have 2 people that are interested in making framed art pictures and will be starting up a new class in October. If you check out blog posts that are labeled Framed Art you should be able to see several of the pictures we made this year. Contact me if you are interested in joining the class.
Holiday Catalog Supplies Used
Color Me Autumn designer paper
Current Catalog Supplies Used
Old Olive, Early Espresso, Soft Suede card stock
Blackberry Bliss ink
Skinny Mini ABC's
Autumn Accents bigz die
Crushed Curry Chevron ribbon
Argyle embossing folder
Wednesday, September 3, 2014
Wednesday Wow- Ink Pad Pizazz Technique
| I used the Wetlands stamp set to make this scene. |
One of my favorite presenters at Convention was Michelle Zindorf. She showed us how she created her scenes in a simple manner using ink pads.
1. Start with a light sky color, I used Soft Sky. Placing your ink pad at about a 45 degree angle to the paper brush it across your paper. It will leave an uneven streak of color. Do this until you like the look.
2. Next take a darker color you would like in your sky. I used Marina Mist. Use the same process with this color on top of your first color.
3. Next choose 2 colors for your grassy area. Starting with the light color first and overlapping your sky area a tiny bit, color the grass. When you use the darker color start it in front of the light color to create a look of distance.
4. Using an mask, make an image with your stamp on the side of your paper. The final image will be made once you have moved the mask off the page.
| I had such fun making these scenes. This card uses the set The Open Sea and shows rolling waves at sunset. |
Tuesday, September 2, 2014
Beautiful Background for Technique Tuesday
One of my favorite things to do to help me get new ideas is look through blogs. I recently found this idea on Mary Ellen Stites blog and thought the results were stunning. I changed up the colors and introduced this to my Press Club members in August. Each month they make 2 technique cards and place a minimum order. Every 5th month they are the hostess and earn all the free products. For the next few months we are making cards that focus on background techniques. To copy this technique follow these steps.....
1. Stamp the image of your choice in Versamark on white or vanilla cards stock. I used the flower from the stamp set called Regarding Dahlias.
2. Emboss using the white embossing powder.
3. Sponge your flowers using a yellow color. I used Daffodil Delight. Then sponge the center only using a contrasting color. I used Crisp Cantaloupe.
4. Finally sponge around each flower using your favorite background color. I used Pistachio Pudding.
The background part of this card is the color that I have placed behind my embossed images. What colors would you use, or what stamp set would you stamp? I think it would be fun to try different colors of embossing powder for a totally different result.
If you would like to join our club just give me a heads up and I will give you more details.
Monday, September 1, 2014
I'm Back and I've Missed My Blog
Family seemed to fill my time this summer and I really loved seeing everyone. But I missed my blogging and am really glad to be back.
One event I love to hold every summer is my Hostess Appreciation Brunch. I invite any one who is hostess at a party the past Stampin'Up! year, any club member, and any one who had a party order. This year the number of people who attended the brunch was small, but we had a great time.
Brunch was Oven Pancake, with fresh peaches and a choice of beverages. Next was an auction of 3-D items from the past stamping year, and finally everyone made an exclusive make n take I never repeat during the year.
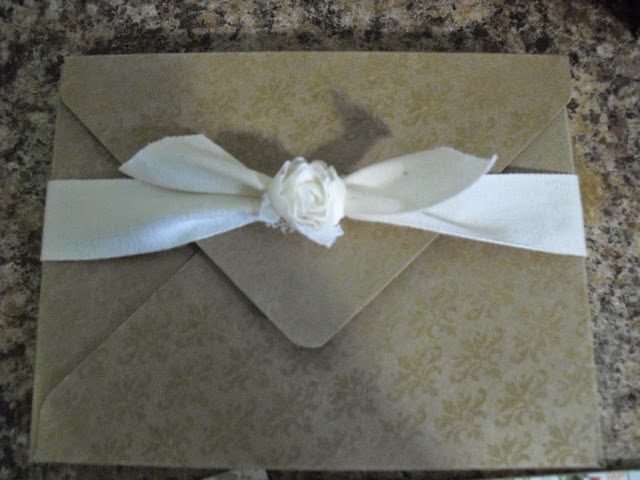
First we made an envelope box using the envelope punch board. I used some extra retired designer paper that was just perfect for the project.
Next we made some cards to go inside the envelope box using the Gold Soiree designer paper. Each person was able to personalize the cards with an initial.
We each talked about ways to make this project for friends and family and ended our day with lots of fun and inspiration.
If this sounds like something you would like to be a part of, then contact me and we will talk about setting a date for your own private party with friends.
Subscribe to:
Posts (Atom)