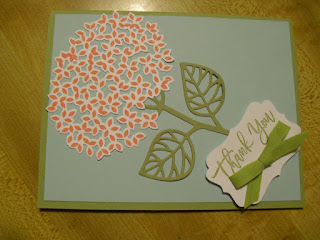
Friday, July 29, 2016

Swirly Bird- Fix it Friday

 I received this card as a swap recently and liked the simpleness of the boat on the water with a sun over head.  So how could I fix this?


    I used just the stamps for this card.  Can you see how I changed the card to make it look a little different?

1. The sun is double layered using two stamps one on top of each other.

2. The ocean is a swish inked once but stamped 3 times. This makes the ocean stand out a bit more than white on white.

3. The boat scene is the whole focus of the card instead of just a part of the card.

  Both cards look really good and have a simple look.  It is fun to see how you can change a card design using the same elements and make it look very different.

  I had a lot of fun with Swirly Bird week.  


Come back next week to discover my first impression favorite set from the new annual catalog. (Finally!)

Thursday, July 28, 2016

Swirly Bird-Template Thursday


Did  you guess Washi Tape?  Then you were correct.  Why do I love Washi Tape?

1. Easy to place on the cardstock.  I tear a piece a little larger than I need and wrap it around to the back side.

2. Easy to tear.  Not as thick as masking tape and easier to move if you get some in the wrong place.

3. Colorful and helps you make a lot of cards quickly.

This template is so easy to duplicate. 

   Washi Tape
   A Saying
   A stamp from Swirly Birds

Another card with this template....


 I could go on and on, but will stop for the night.

Come back tomorrow to see how I go from a simple card to one that is a little more difficult for Fix It Friday.

Wednesday, July 27, 2016

Swirly Bird-Wednesday Wow

   So what made this my WOW card?

1. The simple design.

2. The tiny flowers and the colors.  Sweet Sugar Plum and Flirty Flamingo.

3. The long swirl feature that makes such a simple but great looking background piece.

   You might think that would be a lot of scissor work, but the thinlits help make the cutting go faster.

Come back tomorrow to see a template using one of my favorite items that Stampin'Up! sells.  What is it you wonder?  Well, come back and see for yourself.

Tuesday, July 26, 2016

Swirly Bird-Technique Tuesday


   I love how the background in this card helps pop out the flowers.  How did I make it?

1. I cut a piece of watercolor paper to fit the card.

2. I chose 3 colors of ink pads, Emerald Envy, Rose Red and Sweet Sugar Plum.  Then I squeezed each ink pad to make a pool of ink on the lid.

3. Finally I took an aqua painter and making sure the tip was wet dipped it in the ink and spread it over the water color paper squeezing water onto the paper if I needed to lighten the color.

  Several stampers were a little nervous and really did not like the results when they first saw them, but once the put the flowers and leaves on the card they loved what they did.  And that is what Stampin'Up! is all about.... We Love what we do!

  These are the last few days in which to place a $50 order and then receive $5 credit to spend in August.  Purchase this bundle and you will be there.  And purchase this bundle from me and I will send you some free doilies.  My coupon of the month.  Just go to the shop now button at the top of this page and you will be set.

  Come back tomorrow to see the WOW card that everyone loved.

Monday, July 25, 2016

Swirly Bird-Miscellaneous Monday


  Swirly Bird has been a such great hit that Pinterest is loaded with ideas on how to use this stamp set and matching Thinlit.  I loved looking at all the great samples and had fun choosing the ones I wanted to feature.

  For Miscellaneous Monday I decided to feature the curly circle that has little leaves coming off the sides.  A perfect Thinlit for a tree top.
Can you guess what the trunk of the trees is made from?  The branch from the Tree Builder punch.  How about the hearts?  They are punched out from the Owl Builder punch.  And the saying is from the set called Endless Thanks.

  Come back tomorrow to see a wonderfully simple technique to make a stunning background.

Friday, July 22, 2016

Thoughtful Branches-Fix it Friday


 Simple is good right?  I like this card because there is not a lot too it, but it is still eye catching.  So, how could I fix it to make it a little bit more eye catching?

 You can see that I kept the same colors, Always Artichoke, Cajun Craze, and Delightful Dijon.  I also kept the Woodgrain embossing folder and the styles of the leaves.

To make it a little more eye catching, I took a piece of water color paper and made my own background paper by painting a little of each one of the colors on the paper.  Then I cut out the leaves.  I stamped the solid leaf in Delightful Dijon ink and arranged the leaves around the saying.

Which card do you like the best?  I personally like both of them.  

Here is what the Thoughtful Branches cards looked like this week.  What great fun I have had with a stamp set that will be ready for anyone to purchase in August.


Come back next week to see what I will do with the Swirly Bird stamp set and matching thinlit.  They were featured in a class I had on Monday so I wanted to share them with all of you.

Don't forget to follow me if you have been enjoying my blog, and share this blog with your friends.  Have a great weekend and try to stay cool.  Here in Illinois the temp could get to be over 100 and the heat index as high as 115.  

Thursday, July 21, 2016

Thoughtful Branches-Template Thursday

Summer with some yummy looking apples

  I saw a card on the Stampin'Up! blog page with a card similar to this.  The template is......
    The bare tree
     Some flowers or leaves
     Some grass

The creator of this card is on the Artisan team at Stampin'Up! and went on to create 4 cards similar to this one to resemble the 4 seasons.  I am all about the seasons so I put my own twist on to her cards.

  The artist cleverly cut come of the leaves off and placed them on the ground.  So now you can see some of the branch and notice the leaves that have fallen off the tree.  I colored the ground first with crumb cake to resemble the grass that dries out in the fall, with a little touch of green for the grass that still is that color.

 Next is a winter tree with no leaves and some snow on the ground and of course the Illinois State bird a cardinal.

Finally a spring tree most likely a cherry tree with its beautiful blossoms.  Are you liking this set as much as I am?  It will be available as a bundle for $52 during the month of August only.  And if you make a purchase of $50 this month you can earn a discount of $5.00 off that bundle.  Just go to the store at the top of this page and place an order.

Come back tomorrow to see the final card I will post using this set.  See how I fix up a simple card to make it stunning.

Wednesday, July 20, 2016

Thoughtful Branches-Wednesday Wow


When I saw the pine trees in Thoughtful Branches, I thought there would be a way to make a Christmas card.  I saw a card like this one on Pinterest, but added my own twist to the card.

Designer paper is This Christmas
Doily is the new doily
Merry is from the thinlits called Christmas Greetings
Birds are from this set

I think this card will be featured in one of my Christmas Around the Year classes.  

Come back tomorrow to see how to use this set to feature the 4 seasons.

Tuesday, July 19, 2016

Thoughtful Branches-Technique Tuesday


Here is another card I made using this great stamp set.  I stamped the flowers in Marina Mist on Marina Mist cardstock and cut them out with one of the Beautiful Branches thinlits.  I liked how it turned out.

BUT........


I had this piece leftover and wanted to try and find a way to use it.
So........


I stamped the flower image on a piece of white cardstock and attached it underneath the hole.  I added a little bit of night of navy ink to the flowers.  Then I stamped the leaves, and cut them out using the matching thinlit.  No waste.

Come back tomorrow to see how I made a Christmas card from another image in this stamp set.

Monday, July 18, 2016

Thoughtful Branches-Miscellaneous Monday


     A new stamp set for a short period of time!  As a demonstrator for Stampin'Up! I was able to purchase this great stamp set in July, make some samples to show customers who then can purchase the stamp set in August.  Here are some facts about this set.

There are 23 stamps in this set

There are 9 matching framelits that cut out 9 images from this set

They can be purchased as a bundle for $52

Once you purchase the bundle you qualify for a bonus of $5 to be cashed in during August.

The stamp set is versatile and has many different looks.

   For today I make a simple card that features the blossom with matching thinlit, and the leaves.  Come back tomorrow and see what I do with some leftover parts.

Friday, July 8, 2016

Scrapbook Week-Designer Paper Stacks


Do you love using the designer paper stacks in your stamping?  Here is why I enjoy using them in projects...

1. There are a large variety of papers that coordinate with each other.

2. They are 6 by 6 which makes them perfect for cards or scrapbook pages.

3. They make the project go together quickly.

I love the look of black and white and color so decided these papers that are now retired would look great with red and pink.

I added a grouping of flowers in the center of each page to provide the contrast I wanted.  I used coordinating pinks and reds.  I think I will find some black and white pictures to post on these pages. I'd back the pictures in black.

I will be away on my family reunion next week in Pigeon Forge, Tennessee.  It is my turn to plan the reunion so I will be a busy beaver while we are gone.  So, I am going to take a vacation from my blog for a week or so and enjoy visiting with the 23 members of my immediate family who will gather together.  Hope that all of you are enjoying your summer and have an opportunity to get together at some point with your family members.

Check back Monday, July 18th for my next blog.

Thursday, July 7, 2016

Scrapbook Week- Using Scraps


  I found this layout idea from something I had saved years ago.  I thought it was a great way to use up scraps.  I punched lots of 1 1/2 inch squares.  Now, that the punch is retired you could use the layered squares framelits to cut your squares. 

  I am thinking I will put some of the pictures from our family reunion on these pages.  The page on the left will be perfect for the family group picture we take each year.

  Come back tomorrow to see the final layout for the week.

Wednesday, July 6, 2016

Scrapbook Week-Summer Layout


   Is it really Wednesday?  What ever happened to Tuesday?  I was so busy yesterday getting ready for our family reunion that I totally forgot to post a scrapbook page.  

 This was the second layout the Scrapbook Your Life people made in June.  I decided it was a perfect layout for this weather we have been having.  Hot and Humid.  What to do....escape to the mountains. When i was still teaching we would load up the camper every summer for 2-3 weeks and head for the mountains to escape the hot humid weather of the Midwest.  We never camped in the same place, but saw so many wonderful sites.

Come back tomorrow to see another layout.  

Monday, July 4, 2016

Scrapbook Week- Happy 4th of July


    I decided since my favorite stamp set is not ready to use yet, that I would feature scrapbook pages this week.  My Scrapbook Your Life class met last week and this is one of the layouts we made.  I can't wait to put some pictures of the family reunion on this layout.

 I have had this Uncle Sam laying around for several years.  It was originally a refrigerator magnet and I turned it into an accent piece for the scrapbook page.

Supplies used

12 by 12 Dapper Denim

Striped piece is part of the 2016-2018 In-Color paper stack

Stars were cut out with the star framelits in various sizes, using
      Real Red
      Night of Navy
      Whisper White

Come back tomorrow to see another layout, with my pictures attached.

Friday, July 1, 2016

Serene Scenery-Fix it Friday


  This card should look familiar.  It was one of the featured cards from yesterdays template cards.  Here is how I fixed it....

1. First I added strips of the designer papers I used all week.  My husband was not impressed, but I tried to layer the papers so they looked like sky, leaves, ground and grass.  

2. Then I used the saying from the set called Me=Grateful.  I stamped it and cut it up placing each part of the saying in a different section of the card.  

3. I tied the ribbon to try and bring the parts together.  It seemed to work for my husband so I guess that was a success.


Here is an over view of Serene Scenery week.  It was fun to try and create cards that met each one of the categories for the week.  

Come back next week to see what I can do with my favorite stamp set that is due to come in the mail today.  You will have to wait till Monday to see what the set is called.