Monday, September 30, 2013
Miscellaneous Monday-August Paper Pumpkin
At first glance I thought the August Paper Pumpkin kit was kind of simple. But, then I remembered the purpose of My Paper Pumpkin. It was created for those people who love the idea of making cards on their own, but have never done it before. They don't need complicated kits, just simple good looking card kits. When I thought of it that way, then the August kit fully met the need it was created for. So, for my first card I made it exactly the way it was described in the kit.
And then I went on Pinterest.........
And then I noticed Julie Davison's blog.......
So, it just goes to show you that you can find a way to create cards in My Paper Pumpkin whatever your style. The best thing about it is that all the supplies are in the box and you can have 4 great cards in a short amount of time. No Cutting, no thinking, just plenty of creating.
What is your favorite way to use the My Paper Pumpkin kits?
Saturday, September 28, 2013
Scrappin Saturday -It's All About the Chevrons
I wanted to play around with the new Chevron punch so I can up with these two pages. Now, what on earth would you use for pictures on the pages I wondered.
 |
| I even used the Chevron embossing folder to carry out the theme. The punched out chevrons made cute accent pieces |
Friday, September 27, 2013
Fix it Friday
The card on the bottom was one of the featured cards at my Fall Fill Your cardbox class. It is cute and uses the Best of Halloween stamp set. But, Leigh Anna, who was at the class really needed a get well card so we used the pumpkin from the Best of Autumn stamp set for the following adaptation. I love how easy it is to take one card and just change up a few things for a totally new look. Which card do you like best?
Wednesday, September 25, 2013
Wednesday Wow- Envelope Liners
Just when I thought I was excited enough about making envelopes I watched Mary Fish's video on how to make an envelope liner. Now, I just don't want to stop.
For years I made my own envelopes from magazine pictures by tracing around a regular envelope that I had opened up to make a pattern. Now not only can I make these envelopes much faster, but I can also line them with coordinating paper to make a sturdier product.
What will you make your envelopes and liners from? Send me a link to your envelope. I'd love to see what you have done.
Tuesday, September 24, 2013
Template Tuesday-Judy's design
I received this swap at convention and loved the simplicity of the design and the colors. It was just the card I wanted to feature in my Fall Fill Your Cardbox class.
Judy is one of my regular stampers. She had never tried to make a card in her life and came to a party several years ago. At the party she had fun and ordered an address stamp. I had mentioned the monthly classes I hold and Judy started coming to them. She realized how much she enjoyed making her own cards and slowly has started collecting stamps, inks, and paper. Now, she has become a designer in her own right and I love to see her interpretation on things. She changed up the card I presented in card class and made it her own.
And that is what I love about stamping. Each person can look at a design and create his or her own look from the design. I like the changes that Judy made to the original card, what about you?
Monday, September 23, 2013
Miscellaneous Monday- Butterfly Bundle
 |
| Cindy Malone made this card. Love the colors and the colored button |
September 30th is the last day for the Butterfly Bundle special. Purchase the Papillion Potpourri stamp set and the Bitty Butterfly punch and receive 15% off both items. What a deal. Here are some cards I have received in swaps featuring the stamp set and the punch.
 |
| My friend Dina sent me this card for our in the mail swapping. Nice use of in-colors. Another in the mail swap, love how the butterfly is punched out of the center of the circle. |
 |
| Julie Davison's card swap, love the colors. |
Check out this offer on my website and you, too, can make cards like these.
Sunday, September 22, 2013
Simple Sunday, Cards in a Bag
Another fun project from convention. We decorated the front of one of the Tag a Bag gift bags and tied it so that the ribbon would slide right off and the contents of the bag would be revealed. Inside the bag were 5 simply decorated cards with matching envelopes. They were all created with one of the stamp sets that we received at convention. This one is called Hello, Lovely and has so many wonderful components.
Can you guess what was used as the card base? The note card and envelope set, 20 cards with matching envelopes pre-cut and ready to go. It doesn't get much easier than that.
Saturday, September 21, 2013
Scrappin Saturday- Scrapbook Your Life for August
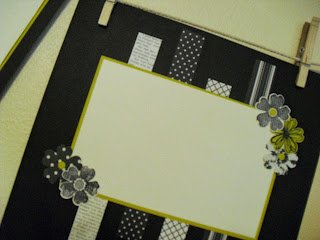
I have always thought that black and white cards, and layouts are so striking. So, this was one of the layouts that we made at my Scrapbook Your Life class this past month. I have been thinking long and hard about what kind of pictures would look good on these pages. Should it be black and white pictures of me as a baby, or prom pictures of my daughter through the years, or should I recolor a picture of Sam and I and feature that. Once you create a layout it is almost as much fun to figure out what to put on the finished product.
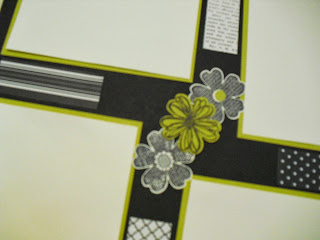 |
| Flower accent |
 |
| Second page accent
What pictures would you place on this layout?
|
Friday, September 20, 2013
Fix it Friday
When I was getting my cards ready for my Fall Fill Your Card box class I found this card that I really liked. However it featured a lot of retired card stock which I don't keep. So, I made the following switch.
Can you see the changes I made?
1. I switched the ribbon to Always Artichoke seam binding.
2. The colors that I changed are Cajun Craze, and Crushed Curry.
3. I stamped a different stamp set from the set Gently Falling on each layer so that the stampers would not have to keep cleaning off one stamp.
4. We had lots of need for the Big Shot on the other cards we were making so I left off the scalloped edge from the embossing folders called Adorning Accents.
You can see how easy it was to change up parts of the card without altering the final image. What would you change on this card/
Thursday, September 19, 2013
3-D Thursday Halloween Frame
Sometimes I need some help getting my stamping ideas flowing. I subscribed to Create with Connie and Mary and got some wonderful ideas for 3-D projects. This was one of them. The project called for an 8 by 8 frame, but none of the local stores had one that size, so I purchased this 8 1/2 by 11 frame and think it turned out just fine. It was so much fun to make I will be offering it as a class in October.
 |
| Featuring the Morning Post ABC's |
 |
| Don't you love the pumpkins in the Halloween Happiness set |
 |
| The bow adds the final touch.
|
Wednesday, September 18, 2013
Wednesday Wow-Cindy's Undefined stamp set
At the August meeting of the Super Snails, I gave everyone a piece of stamp carving material and encouraged them to carve their own stamp. Cindy has a monthly club that calls themselves the Scrap Chicks so she thought it would be fun to create a chick as her group's logo. I challenged everyone to bring back a card this month that featured their hand carved stamp. This is what Cindy showed up with. Don't you want to be a Scrap Chick.
The Undefined stamp carving kit allows everyone to be a stamp creator. I know I have just loved the chance to make stamps of my own. So, give it a try and become your own stamp creator.
Tuesday, September 17, 2013
Template Tuesday-Downline Freshly made Sketches
One of my latest Super Snails challenges was to look at this Freshly Made Sketch and make one of their own.
 |
| Cindy's card- I love that it is all blue |
 |
| Peggy's card- I love her two toned ribbon and multi-colored scalloped circle |
 |
| Dana's card-Great use of the new in-colors |
 |
| Nan's card-I love the color combo |
 |
| Nan's other card You gotta love this saying |
Monday, September 16, 2013
Miscellaneous Monday-Change a flat bag into a 3-D bag
Have you ever needed a small bag to put a small item in and not wanted to spend much money? Well, at convention we learned how to take one of the Tag a Bag gift bags and turn it into a fuller bag. Check out this video. We used the McDonald stamp set for this year called Tag It and created a cute little tag for the finished bag.
HINT: Make a rectangle of cardboard for the bottom of your bag to make it a little stiffer.
Can you see the other new items that make this a simple project to duplicate.?
Tag a Bag Accessory Kit which includes
Diagonally striped tag
Tag that is stamped on
Clothes pin
Baker's twine
Ruffle Stretch Trim
What would you place in a bag like this and who would you give it to?
Sunday, September 15, 2013
Simple Sunday Washi tape cards
I have spent the last few hours trying to figure out this lap top!!!! So, you can imagine I needed a simple project to post for today. I like to include a tiny thank you card in every order that I receive. I have lots of fun creating the designs, and they go pretty fast since the cards are 3 by 6 folded in half. This is the card I created for the next 10 customers. I thought you might enjoy my formula for making a quick thank you note card.
1. Choose one of the Washi tape grouping and place one strip of each color on your 3 by 6 card. In this first card I used the Witches Brew tape.
2. Look for a small image that complements the Washi tape. I thought the images in the Halloween Hello stamp set were so cute and the size was just right for the card.
3. Find a small saying you can add to the card. I wanted mine to all say Thank you in some way.
After I made this one, I thought I would just make a bunch using the same design and a different Washi tape collection each time.
For my next card I used Epic This and That Washi tape and the Postage collection stamps.
On to the Gingham Garden Washi tape and the A Round Array stamp set.
Next was the Season's of Style Washi tape and the That's the Ticket stamp set with matching punch. I definitely on a roll and did not want to stop so......
I chose one color of each grouping and placed them in a group using the A Fitting Occasion stamp set as my accent piece. This was so much fun. It took me about 30 minutes to make the 5 cards and 90 minutes to figure out how to get them on my blog.
What combinations can you think of to use to make a Simple card this Sunday?
Friday, September 13, 2013
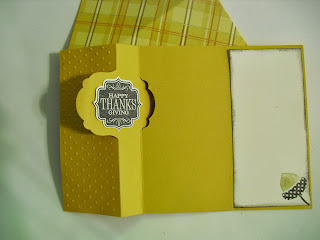
Thinlits card with an extra flap
We just formed a new club in Springfield. I was so excited when we had our first meeting last Thursday. There are 5 great ladies that are starting up the club. I knew they would love to play with some of the new products that are not in the current catalogs so I brought along the Label card Thinlit. Since fall is approaching I decided to feature the Sweater Weather designer paper. I think this card looks great, but what makes it even greater is when you open it up.....
Do you notice something different, or extra? There is an extra flap to this card that makes it easy to have space to make a special note to whomever you give the card to. I will be showing people that attend my classes this month how to add that special flap. See if you can figure out what you have to do?
We also made a matching envelope using the wonderful Envelope Punch Board.
Thursday, September 12, 2013
Christmas for Knollwood
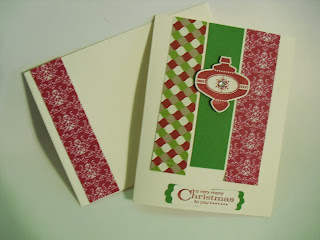
It's never too early to start on Christmas cards! Right! So, the ladies at Knollwood agree with that sentiment. Believe it or not I am still using up some retired paper from last year's Holiday catalog. I thought this card would make a great simple Christmas card with the 3 banners, and a simple ornament in the middle. I used the new Christmas Collectible stamp set with the matching Christmas ornament punch. The saying is from the More Merry Messages stamp set which has been carried over from last year. You can not find it in the catalog, but you can still order it. I think the ladies at Knollwood will like making this card don't you?
Wednesday, September 11, 2013
Fall Knollwood card
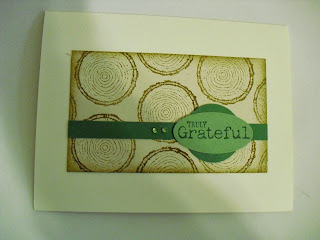
What card should I make this month for my Knollwood ladies? That is the thought that went through my head this past weekend. I looked through cards I had already made and found this one.
But when I thought about the needs of the ladies that will be making the card I vetoed it for the following reasons.
1. It would be hard for the ladies to glue down the Thankful.
2. The button would mean extra postage which they would not necessarily have or think of.
I did however like the design and the colors of the designer paper, so this is what I came up with for one of the cards we will be making this month.
Subscribe to:
Comments (Atom)


